# Welcome to Rayon's resources
All you need to know about Rayon.
You will find here our **documentation**, **product updates, community, FAQ, asset portal** (*Rayon assets*) and **tutorials**.
# Rayon documentation
Looking for some guidance? You are at the right place!
Here are the general topics of our documentation. Feel free to **look around** or **use the search bar on the top banner!**
***
### We are always available
Book a demo with our team, [right here](https://b1kzip68v9f.typeform.com/to/Hgr0eQ4k#source=docs).\
To get some support, reach out to us through our **in-app support chat**. \
More about [our support policy right here](/other-resources/others/support-policy).
# Rayon's basics
Know your way around the app in a matter of minutes!
***
### We are always available
Book a demo with our team, [right here](https://b1kzip68v9f.typeform.com/to/Hgr0eQ4k#source=docs).\
To get some support, reach out to us through our **in-app support chat**. \
More about [our support policy right here](/other-resources/others/support-policy).
# Start here!
Taking your first steps
**Welcome to Rayon!**\
Let's get started, simply **follow the steps below**...
{% stepper %}
{% step %}
#### What is Rayon?
**Rayon is the *****effortless***** CAD app for creating flawless architectural drawings.**
**From importing to drafting, styling to layout,** it's your one-stop shop for producing professional-grade document sets. Rayon is the next generation of tools for architects — online, collaborative, cross-platform, and built to feel effortless. It brings a fresher, more modern approach to CAD, the one the profession has been waiting for.
{% endstep %}
{% step %}
#### Let's watch a demo!
**A video is worth a thousand words**: here is a 20-minute demo, where we will walk you through a short presentation of our app.
{% embed url="" %}
{% endstep %}
{% step %}
#### Next step
Whenever you are done with the demo above, **head to the next step**, to create a Rayon account.\
Click on the button below.
Next step
{% endstep %}
{% endstepper %}
***
#### We are always available
Book a demo with our team, [right here](https://b1kzip68v9f.typeform.com/to/Hgr0eQ4k#source=docs).\
To get some support, reach out to us through our **in-app support chat**.\
More about our support policy right here.
# Signing up
Creating your Rayon account.
Let's start by **creating a free Rayon account**. \
It will take you less than a minute...
{% stepper %}
{% step %}
### Head to the signup page
To create a new account, Signup here
{% endstep %}
{% step %}
### Enter your information
...and click on **`Create account`.**
{% endstep %}
{% step %}
### Just a few questions...
The next few steps will be about getting to know you!
{% endstep %}
{% step %}
### Alone or in team?
You can now either continue or your own, or create a team! If you choose to start a team, you will be asked to **choose a name for your team**, and to fill in the few survey questions.
Then, **invite colleagues** to your team. Each member can be invited as:
* **Admin**: a member that will be able to **see and edit all files and settings** of your team.
* **Editor**: a member that will be able to **see and edit all files** of your team.
* **Viewer**: a member that will only be able to **see all files** of your team.
{% endstep %}
{% step %}
### Set up your preferences
You are now done with the onboarding. \
Choose **a way to navigate in Rayon**...
* Either using a **mouse** or **trackpad**
* Either using **shortcuts** or the **command line**
{% endstep %}
{% step %}
### Start the tour
That's it, **you are now in a Rayon drawing**! \
Just follow the tour to discover Rayon's interface...
{% endstep %}
{% step %}
### Go back home
Once the tour is done, **head back home**, to the project manager, where we will continue this lesson. Click on **`Back to models`** in the context menu (upper left corner).
{% endstep %}
{% step %}
### Next step
You are done! \
Head to the next step, **click below!**
Next step
{% endstep %}
{% endstepper %}
***
### We are always available
Book a demo with our team, [right here](https://b1kzip68v9f.typeform.com/to/Hgr0eQ4k#source=docs).\
To get some support, reach out to us through our **in-app support chat**. \
More about [our support policy right here](/other-resources/others/support-policy).
# Your workspaces
Organizing your models.
Once your account is created, you will reach the project manager, where files are stored. The project manager is organized into workspaces. This page will take you step-by-step through **your first steps in the project manager.**
{% stepper %}
{% step %}
### Your personal workspace
Your **`Personal`** workspace should now look like this...
A few important things...
* At the centre of the screen are **your models.**
* The bar on the left displays **all your workspaces** (repositories for your models...more on that later).
* In the top left corner is **your avatar**, where you have access to your profile and its settings.
* On the right side of the screen are the **`New`** and **`Import`** buttons, as well as some information about the **current workspace and billing**.
{% endstep %}
{% step %}
### Starting a new project
You can start a new project from your **`Personal`** workspace in 2 different ways:
* **`+ New model`** allows you to create a new drawing.
* **`Import`** allows you to import a file (JPG\PNG image, DWG, DXF & PDF).
{% endstep %}
{% step %}
### Next step
You are done! \
Head to the next step, **click below!**
Next step
{% endstep %}
{% endstepper %}
***
### We are always available
Book a demo with our team, [right here](https://b1kzip68v9f.typeform.com/to/Hgr0eQ4k#source=docs).\
To get some support, reach out to us through our **in-app support chat**. \
More about [our support policy right here](/other-resources/others/support-policy).
# Creating a new project
Let’s create a model from scratch!
This will take you step-by-step through **your first steps in the editor.**
{% stepper %}
{% step %}
### Creating a model
To start a new project, you can either:
* Create a new model from scratch
* Import a DWG/DXF, a PDF or an image ([more on this topic here](/documentation/import-export/dwg-dxf-import))
* Start from a template
For now, let's start simple, and begin by creating a new model from scratch. Click on **`+ New Model`**. This will **create a new drawing in your workspace and open it.**
{% endstep %}
{% step %}
### The model canvas
You just arrived in the model canvas! It is **a blank space where you can draw.** Let’s explore the various panels of the interface...
{% endstep %}
{% step %}
### **The left-side panels**
In the top left corner of the canvas, you will find the **main panels:**
* The main menu (to go back to your workspace, export, or import)
* The [layers](/documentation/design/layers) panel
* The [block library](/documentation/design/blocks) panel
* The [styles](/documentation/design/styles) panel
* The [pages](/documentation/layout-and-present/pages) panel
* The [tables](/documentation/layout-and-present/tables) panel
* The [properties](/documentation/layout-and-present/custom-properties) panel
* The [reference panel](/documentation/import-export/dwg-dxf-import#importing-xrefs)
* The [comments/annotations](/documentation/rayons-basics/sharing-commenting-annotating) panel
* The AI panel (coming soon)
{% endstep %}
{% step %}
### The properties panel
On the right side, you will find the properties panel; at its top, you will have access to the **model's...**
* **Sync** status & model history
* **Presentation** mode
* **Sharing** options
* Users' **avatars**
The panel, itself, is then filled by different sections...
* **`Model`** documents the properties of the model you are in,
* **`Canvas`** lists the modes and units your model uses
* Other sections will describe the properties of your current selection
In the bottom right corner, you will find...
* **The snapping option**s, that defines how your cursor should snap onto geometries when you draw.
* **The units and zoom level dropdown**, allowing you to set the model's unit and the current view zoom level
{% endstep %}
{% step %}
### The toolbar
The bottom toolbar contains all the following tools...
* **The** **`Element`** **tools** : all the basic geometries.
* **The** **`Shape`** **tools** : all constructive objects.
* **The** **`Annotation`** **tools**: text, dimensions, leaders, etc.
* **The** **`Editing`** **tools** : for editing existing geometries, as in any professional CAD software.
* **The** **`Layout`** **tools**: for creating layouts (views, pages, tables).
* **The** **`Utilities` :** for commenting/doodling or simply measuring things.
{% endstep %}
{% step %}
### Next step
You are done! \
Head to the next step, **click below!**
Next step
{% endstep %}
{% endstepper %}
### Tutorial
For more step-by-step information, watch our tutorial about how to start in a new model.
{% embed url="" %}
***
### We are always available
Book a demo with our team, [right here](https://b1kzip68v9f.typeform.com/to/Hgr0eQ4k#source=docs).\
To get some support, reach out to us through our **in-app support chat**. \
More about [our support policy right here](/other-resources/others/support-policy).
# Navigation & command access
Moving around in a model and calling commands.
Before we start drawing, **let's quickly review how to navigate and access commands in Rayon.**
{% stepper %}
{% step %}
### Navigating
Navigation in Rayon is the easiest thing. \
It can be set from the **editor context menu**, or from the **user settings**.
All you need to do is choose a **Navigation mode**, either using **`Mouse`** or **`Trackpad`**.
{% hint style="info" %}
If you are using an Apple Magic Mouse, you should enable the **`Trackpad`** mode as it will allow you to swipe to pan.
{% endhint %}
**Mouse mode**
* To **Zoom**, simply scroll.
* To **Pan**, hold your mouse wheel down and move.
**Trackpad mode**
* To **Zoom**, pinch on your trackpad
* To **Pan**, swipe with two fingers
{% endstep %}
{% step %}
### Command access
Command access can be set from the **editor context menu**, or from the **user settings**.
It can be set to either **`shortcut`** mode or **`command line`** mode. Either mode's shortcuts can [be found here.](/documentation/design/shortcuts)
**Shortcuts mode**
* Allows to trigger a command **using single or double stroke shortcut**, and no validation stroke.
* You may open the **command line** with **`CTRL + K`**
**Command line mode**
* Allows to trigger a command **using single or double stroke shortcut**, ***and*** a validation stroke (**`Space`** or **`Enter`**)
* Type anytime on your keyboard to search for a command.
{% endstep %}
{% step %}
### Next step
You are done! \
Head to the next step, **click below!**
Next step
{% endstep %}
{% endstepper %}
***
### We are always available
Book a demo with our team, [right here](https://b1kzip68v9f.typeform.com/to/Hgr0eQ4k#source=docs).\
To get some support, reach out to us through our **in-app support chat**. \
More about [our support policy right here](/other-resources/others/support-policy).
# Drawing
Now let’s draw something!
We will **keep things simple for now.**
In this quick introduction, we will show you how **the basics of how to draw in Rayon** (using walls, dimensions, openings, styles, layers, etc.)
Let's get started!
{% stepper %}
{% step %}
### Draw a room
Drawing a room is easy! Get started by...
* Drawing a room outline using the **`Wall (W)`** tool.
* Add a room surface using the **`Zone (Z)`** tool.
* Learn more about [walls and zones here](/documentation/design/elements-walls-zones-openings-etc)!
{% embed url="" %}
{% endstep %}
{% step %}
### Add openings & furnishing
Now, let's place openings and furniture in the room:
* Use the **`Opening (OP)`** tool to **place doors and windows** along the room’s walls.
* Add some furnishing to the interior by **dragging and dropping blocks** from the [block library](/documentation/design/blocks).
{% embed url="" %}
{% endstep %}
{% step %}
### Add dimensions
Finally, annotate your floor plan using the **`Dimension (DI)`** tool, as seen above.
{% embed url="" %}
{% endstep %}
{% step %}
### Change styles & layers
When you start drawing in a new model, some things are **set as active:**
* **The active style:** Styles are the way things on the canvas look: **their color, fill, font, line width, etc.** When you draw a new shape, its style will be defined by the current active style.
* **The active layer:** layer correspond to the way items are organized in a model, grouped on layers. When you draw a new shape, its layer will be defined by the current active layer.
{% embed url="" %}
{% endstep %}
{% step %}
### A few more things
A few additional settings are good to know as you get started with Rayon:
* **Units**: A model's **units** can be found both in the bottom right panel and from the **main menu button under preferences.**
* **Navigation: Zooming in and out of a model** can be done from the bottom right panel or using [a mouse or trackpad.](/documentation/rayons-basics/navigation-and-command-access)
* **Snapping**: There are a few **snapping options** in Rayon, all available in the **bottom right panel:**
* **Wireframe**: Lastly, you can use the **wireframe mode**, which will show elements drawn either **with the applied style (wireframe off**) or by their **minimal line weight representation (wireframe on)**.
{% endstep %}
{% step %}
### Next step
You are done! \
Head to the next step, **click below!**
Next step
{% endstep %}
{% endstepper %}
### Tutorial
For more step-by-step information, watch our tutorial about how to draw in Rayon:
{% embed url="" %}
***
### We are always available
Book a demo with our team, [right here](https://b1kzip68v9f.typeform.com/to/Hgr0eQ4k#source=docs).\
To get some support, reach out to us through our **in-app support chat**. \
More about [our support policy right here](/other-resources/others/support-policy).
# Sharing, commenting, annotating
Communicate & collaborate seamlessly.
In Rayon nothing is simpler than **sharing, commenting and annotating.** \
This page introduces the basics for working with your team.
{% stepper %}
{% step %}
### Let's comment & annotate
Before sharing a model, you might want to **add comments or annotations** to convey an idea or ask for feedback. The video below shows you how to:
* Sketch a simple **`Annotation (AN)`** onto your model.
* Place a **`Comment (CM)`** on the canvas.
* **Tag members of your team in a comment**, in which case they will receive an email notification.
{% embed url="" %}
{% endstep %}
{% step %}
### Sharing with a link
Let's now share your work with others. \
Click on the **`Share`** button to **generate a share link** and **`Copy`** it to your clipboard.
{% embed url="" %}
That's it! Now simply send it to a friend.\
People who receive this URL **will** be able to:
* **View** **your plan**, and zoom in and out
* Take **measurements**
* Leave **comments and annotations**
… however, they will not be able to...
* **Edit** your layout
* **Delete** your work
{% endstep %}
{% step %}
### Sharing with an email
Let's now try to invite a friend to edit your drawing with you.
{% embed url="" %}
People can be invited as **`Viewer`**, **`Editor`** or **`Admin`**. \
These roles come with certain **rights**, outlined below\...
Actions
Admin
Editor
Viewer
View
true
true
true
Measure
true
true
true
Comment
true
true
true
Annotate
true
true
true
Edit
true
true
false
Delete
true
false
false
Any notification can then be seen either in the **notification center** of the project manager, or in the editor.
{% endstep %}
{% step %}
### Next step
You are done! \
Head to the next step, **click below!**
Next step
{% endstep %}
{% endstepper %}
### Tutorial
For more step-by-step information, watch our tutorial about how to share your models in Rayon.
{% embed url="" %}
***
### We are always available
Book a demo with our team, [right here](https://b1kzip68v9f.typeform.com/to/Hgr0eQ4k#source=docs).\
To get some support, reach out to us through our **in-app support chat**. \
More about [our support policy right here](/other-resources/others/support-policy).
# Wrapping up
Closing this short intro.
You are now **done with your first steps in Rayon. Congratulations!**\
There is, however, much more to explore! We will let you **discover the rest of Rayon**, in the following simple steps.
{% stepper %}
{% step %}
### Design
In this section, you will go **much ore in depth in the feature and tools that constitute Rayon editing experience**: shapes, elements, editing tools, etc
Get started
{% endstep %}
{% step %}
### Layout
In this section, you will discover how Rayon allows you to **create professional-grade page layouts**, using canvases, views, pages, etc
Get started
{% endstep %}
{% step %}
### Import/Export
In this section, you will discover how Rayon allows you to **import and export DWG, DXF, PDFs, and images.**
Get started
{% endstep %}
{% step %}
### Publishing & sharing
In this section, you will discover how Rayon enables you to **share your work with others** using libraries, presentations, templates, etc.
Get started
{% endstep %}
{% step %}
### Team management & billing
In this section, we will walk you through the **setup of your team**, the management of your team members and billing.
Get started
{% endstep %}
{% step %}
### Some resources
Finally, here are **some additional resources** to get your started:\
**Academy** — where you find all our tutorials Open\
**Community** — where you can find help Open\
**FAQ** — where to find answers to your questions Open\
**Product updates** — where to know what's new Open
{% endstep %}
{% endstepper %}
***
### We are always available
Book a demo with our team, [right here](https://b1kzip68v9f.typeform.com/to/Hgr0eQ4k#source=docs).\
To get some support, reach out to us through our **in-app support chat**. \
More about [our support policy right here](/other-resources/others/support-policy).
# Design
Everything about designing in Rayon!
***
### We are always available
Book a demo with our team, [right here](https://b1kzip68v9f.typeform.com/to/Hgr0eQ4k#source=docs).\
To get some support, reach out to us through our **in-app support chat**. \
More about [our support policy right here](/other-resources/others/support-policy).
# Setup
Setting up your drawing experience.
In this page, we go over how to set up your model, and where each setting can be found.
### Accessing your preferences
{% hint style="info" %}
The default preferences are setup in your user preferences.\
[Learn more about user preferences](/documentation/team-management-and-billing).
{% endhint %}
You may access your model's preferences from **multiple areas in the editor.**\
From the **properties panel**...
From the **top left menu**...
From the **bottom right menu**...
### Modes & preferences
Modes and preferences offer a wide list of options to chose from. \
We list here the most important ones...
Navigation & zoom mode
Both modes allow you to choose how you prefer to move around in the model.
* The **`navigation`** mode defines whether you prefer to work with a **`Mouse`** or **`Trackpad.`**
* The **`zoom`** mode defines the direction of the scroll motion.\
[Learn more about how to pan and zoom in the editor](/documentation/rayons-basics/navigation-and-command-access).
Command mode
You can switch between **`Shortcut`** or **`Command line`** to trigger commands. **`Shortcut`** will allow you to trigger commands by simply typing a character or two, while **`Command line`** will expect you to press **`Space`** (or **`Enter`**) to validate a command.
Wireframe mode
The **wireframe** mode allows you to focus on **precision.**
* All **lines** are displayed with a **stroke** of **`1px`** and colored based on their layer.
* **Solid, texture** and **image** **fills** are **disabled.**
* **Hatch** fills are **enabled.**
Units & precision
The units and the decimal/fraction precision of lengths and areas can set at three different levels:
* In your user settings.
* In models, at the canvas-level, from right-side panel
* In annotation style.
Stroke scale
In Rayon, stroke weights are measured in **paper size** (e.g. **`0.5mm`** or**`1/64"`**), that is, the size at which the thickness of lines will be **on a printed paper**, and therefore **how they are displayed in any of your paper canvases**.
However, you may want to magnify your line weights, to make them be more visible across your work in model canvases: that's when the **`Stroke scale`** property can be useful. It allows you to tune how lines appear on your screen. This allows you to change the appearance of line thicknesses while you work on any of your model canvases.
The stroke scale can be accessed in the canvas settings (it will be tuneable in any model canvas, and fixed to 1:1 in any paper canvas)...
...and can also be found in the **`Stroke`** menu of styles.
Snapping modes
Rayon offers a **variety of snapping options**. Editing these modes can be done from the snapping menu at the bottom of the right side panel. Snapping options cover the following:
* **`Endpoint`**
* **`Midpoint`**
* **`Center`**
* **`Nearest`**
* **`Perpendicular`**
* **`Quadrant`**
* **`Intersection`**
* **`Direction`**
* **`Bounding Box`**
* **`Grid`**
* **`Snapping cursor effect`** toggles a magnetic pull effect that draws the cursor toward the nearest snapping point, making precise snapping easier. This can be enabled or disabled via **Menu > Preferences > Snapping > Snapping cursor effect**.
Language
The language of the software can be changed. We offer today both **`English`** and **`French`**. Additionally, shortcuts can be set to a given language (see shortcut section on the topic).
Shortcut set
Rayon offers different sets of shortcuts, that is, lists of shortcuts that can be applied across the software. We offer today Rayon's native set of shortcuts. Additionally, we offer AutoCAD-like shortcuts, both in their English and French translation.
### Model sync status
You don't have to worry about saving your work, as **Rayon** will automatically **save all of your individual changes** on the canvas. Make sure that you are **connected to the internet** so that your changes get synced across all of your devices. You may monitor your **syncing status** on hover in the top right of the editor.
#### Access your model history
You may access your **model history** by clicking in **`Menu > Show history`** or by clicking on the **`syncing` status indicator** in the top right of the editor. All of your **drawing sessions**, including the **current** one, are listed in the **Version history** panel.
**Clicking** on one of the **sessions** will open a new tab **displaying your model at the selected timestamp**. Clicking **`duplicate`** will give you copy of the opened snapshot.
#### Saving a model snapshot
At any point, you can save a specific version of your model.\
Either hitting **`CMD`** + **`S`** or the **`+`** button in the history panel, will open the save bar, where you will be able to name and save your snapshot.
### Tutorial
For more step-by-step information, watch our tutorial about how to set up your model in Rayon:
{% embed url="" %}
***
### We are always available
Book a demo with our team, [right here](https://b1kzip68v9f.typeform.com/to/Hgr0eQ4k#source=docs).\
To get some support, reach out to us through our **in-app support chat**. \
More about [our support policy right here](/other-resources/others/support-policy).
# Shape tools
An exhaustive list of Rayon's shape drawing tool set.
All shape drawing tools can be found in the **bottom toolbar** or triggered via [**shortcuts**](/documentation/design/shortcuts).
### The command options
Commands can be controlled through **modes**, **arguments** and **properties**.
#### Modes & arguments
The **command modes** and **arguments** are accessible at the **top** of the **active command bar**\
[complete list of commands and modes](/documentation/design/shortcuts).
#### Properties
Upon **triggering a command**, some **properties** will appear in the **right panel.** These properties correspond to the **properties of the entity being drawn.**\
You will find there properties like...
* **Active layer** is the layer on which **the geometry will be drawn**
* **Active style** is the style that is applied to **the drawn geometry (**[Learn more about styles](/documentation/design/styles))
### **The shape tools**
#### Polyline **`PL`**
**Mode** : Line/Arc **`A`**\
**Arguments** : Distance, Angle
{% embed url="" %}
#### Line **`L`**
**Mode** : Line/Arc **`A`**\
**Arguments** : Distance, Angle
{% embed url="" %}
#### Arc **`AC`**
**Arguments** : Distance, Angle, Radius
{% embed url="" %}
#### Curve **`CV`**
**Argument** : Distance
{% embed url="" %}
#### Circle **`CI`**
**Argument** : Radius
{% embed url="" %}
#### Rectangle **`RE`**
**Mode** : Axis Aligned/ Three Points **`M`**\
**Arguments** : Width, Height
{% embed url="" %}
#### Guideline **`G`**
**Mode** : Vertical/Horizontal/Free **`O`**
{% embed url="" %}
### Tutorial
For more step-by-step information, watch our tutorial about how to use drawing tools in Rayon:
{% embed url="" %}
***
### We are always available
Book a demo with our team, [right here](https://b1kzip68v9f.typeform.com/to/Hgr0eQ4k#source=docs).\
To get some support, reach out to us through our **in-app support chat**. \
More about [our support policy right here](/other-resources/others/support-policy).
# Editing tools
An exhaustive list of Rayon's editing tool set.
All editing tools can be found in the **bottom toolbar** or triggered via [**shortcuts**](/documentation/design/shortcuts).
### **Editing tools**
{% hint style="info" %}
Note that for **every editing tool**, you may either start by...
* **Selecting the element(s)** to be edited then **triggering the command.**
* **Triggering the command** first, then **selecting the element(s)** and clicking on the **`DONE`** \
(**`↵`** or **`SPACE`**) button in the command bar.
{% endhint %}
#### Copy **`CC`**
**Arguments** : Distance, Angle
* Start by **selecting** the **element** to be copied, then triggering the **`Copy`** command
* Select the **specific point** you wish to copy the element from
* Select the **insertion point** for the **copied element.**
{% embed url="" %}
#### Move **`MM`**
**Arguments** : Distance, Angle
* Start by **selecting** the **element** to be moved, then triggering the **`Move`** command
* Select the **specific point** you wish to move the element from
* Select the **insertion point** for the **moved element.**
{% embed url="" %}
#### Offset **`OO`**
**Argument** : Distance
* Start by selecting the element to be offset, then triggering the **`Offset`** command
* Select the **specific offset distance** you wish to offset the element with
{% embed url="" %}
#### Trim **`TR`**
* Start by **selecting** the **elements** that intersect, then triggering the **`Trim`** command
* Select the **paths to be deleted**
{% embed url="" %}
#### Scale **`S`**
**Mode** : Scope Selection/Model\
**Arguments** : Scale, Distance
* Start by **selecting** the **element** to be scaled, then triggering the **`Scale`** command
* Select the **first point** to scale from
* Then select a **second** point or **enter a scale ratio** in the **active command argument**
{% embed url="" %}
#### Join **`J`**
**Select** the **paths** to be joined then triggering the **`Join`** command
{% embed url="" %}
#### Rotate **`RR`**
**Argument** : Angle
* Start by **selecting** the **element** to be rotated, then triggering the **`Rotate`** command
* Select the **first point** to rotate from
* Then select an **angle** on the canvas
{% embed url="" %}
#### Mirror **`MI`**
**Mode** : Copy/Move
* Start by **selecting** the **element** to be mirrored, then triggering the **`Mirror`** command
* Select the **first point** to mirror from
* Then select a **second point** on the canvas
{% embed url="" %}
#### Fillet **`CF`**
**Mode** : Scope Single/All\
**Argument** : Radius
* Start by **selecting** the **element** to be filleted, then triggering the **`Fillet`** command
* Select the **two contiguous paths** to fillet from
* Then select the **radius** on the canvas
{% embed url="" %}
#### Chamfer **`CH`**
**Mode** : Regular/Irregular\
**Arguments** : Distance left, Distance right
* Start by **selecting** the **element** to be chamfered, then triggering the **`Chamfer`** command
* Select the **two contiguous paths** to chamfer from
* Then select the **distance** on the canvas
{% embed url="" %}
#### Explode **`X`**
**Select** the **shapes** to be exploded in **individual** **paths** then triggering the **`Explode`** command
{% embed url="" %}
#### Extend **`TX`**
* Start by **selecting** the **element(s)** to extend to.
* Then select the **paths** to be **extended.**
{% embed url="" %}
#### Align **`AL`**
**Mode** : Unscaled/Scaled
* Start by **selecting** the **element(s)** to be aligned.
* Select the element **first source point**
* Select the element **first** **destination point**
* Select the element **second source point**
* Select the element **second** **destination point**
{% embed url="" %}
#### Boolean **`B`**
**Mode** : Join/Intersect/Exclude/Subtract
* Start by **selecting** the **`Boolean`** command**.**
* Select the appropriate mode : **`Join`**, **`Intersect`**, **`Exclude`** or **`Subtract`**
* Select the element **according to the chosen mode.**
{% embed url="" %}
#### Array `AR`
* Start by **selecting** the **element(s)** to be duplicated multiple times.
* Select the duplication **start point**
* Enter a number of copies you want to make.
**Mode** : Distribute\
**Argument** : Count, Distance, Angle.
Pick a **final point** on the canvas. Rayon automatically adjusts the gap between each item so the copies completely fill the distance between the start point and the final point.
**Mode** : Increment\
**Argument** : Count, Distance, Angle
**Type a distance** to set a fixed spacing between two copies. The item count then determines the total length of the array.
Either pick a **final point**, or **type a distance** to specify the length between two copies in the array.
{% embed url="" %}
#### Polar Array `PA`
* Start by **selecting** the **entities(s)** to be duplicated multiple times.
* Select the duplication **center** **start point**
* Select the duplication **end point**
* Enter a number of copies you want to make.
**Mode** : Fill \
**Argument** : Count, Angle.
Automatically adjusts the gap between each item so the array completely fills the specified angle.
**Mode** : Angle\
**Argument :** Count, Angle.
Uses a fixed angle between items and a user-defined item count to determine the total span of the array.
**Rotate** : Rotates each item to follow the direction of the array path.\
**Don’t Rotate** : Keeps each item’s original orientation regardless of its position in the array.
{% embed url="" %}
#### Bucket `BB`
Bucket can be used in two different ways...
* Either by launching the command, and picking areas across your canvas; in that mode, all entities on the canvas will be considered as bounding entities.
* Or by selecting some bounding entities first, then launching the command; this way, the selected shapes will be the only bounding entities while the command is running.
{% embed url="" %}
#### Break `BR`
Instead of trimming and redrawing, use **`Break`** to split a line or arc at a specific point, creating two editable paths with different properties.
**Mode** : Point
* Start by **selecting** the **element(s)** to be broken.
* Place **breaking points** along the path where break is required.
**Mode** : Entities
* Start by **selecting** the **breaking entity(ies).**
* Select **path** on other **entities** to be broken.
{% embed url="" %}
#### Divide `DD`
The **Divide Command** lets you split an entity into equal segments.\
You can divide by **count** (number of parts) or by **distance** (fixed spacing).\
When dividing **closed path** with **`Distance`** mode, you'll be asked to choose a direction.
Mode : **Count**
* Start by **selecting** the **path** to be divided.
* Choose how many **segments** you want.
* Rayon places **division points equally** along the entity and splits the path accordingly.
Mode : **Distance**
* Start by **selecting** the **path** to be divided.
* Enter a fixed distance.
* Rayon places **division points at this interval** along the entity and splits the path accordingly.
{% embed url="" %}
### Tutorial
For more step-by-step information, watch our tutorial about how to use editing tools in Rayon:
{% embed url="" %}
***
### We are always available
Book a demo with our team, [right here](https://b1kzip68v9f.typeform.com/to/Hgr0eQ4k#source=docs).\
To get some support, reach out to us through our **in-app support chat**. \
More about [our support policy right here](/other-resources/others/support-policy).
# Elements: walls, zones, openings, etc
An exhaustive list of Rayon's BIM-like tool set.
**Elements** (wall, zones, etc) can be found in the **bottom toolbar** or triggered via [**shortcuts**](/documentation/design/shortcuts).
### Wall `W`
**Mode** : Alignment, Arc\
**Arguments** : Distance, Angle
* Start by inserting a **start point** for your wall.
* Then select an **end point**.
* The wall commands then offers to continue drawing other wall segments; press **`Done`** to terminate at any point.
Once drawn, a wall has a few important properties that can easily be tuned...
* **The wall `thickness`**, inside the wall style
* **The wall `alignment`**, inside the wall properties
**Walls can also be redesigned**; at any point, the user can click on the wall helper dimensions, and resize a wall length.
Finally, **walls can be reshaped,** to represent more irregular shapes. Triggering the edit mode on any wall will allow remodelling it.
### Free walls
Any existing wall can be converted into a free wall via a right-click : Convert > To Free wall. Once converted, the wall's path becomes fully editable, allowing it to represent curved or irregular shapes.
Note: converting a wall to a free wall will not transfer its style tokens. Re-apply the desired style after conversion.
### Openings `OP`
* First, **select a door or window from the "Opening" library.**
* Then, place the opening by **dragging and dropping**, like in the GIF above!
* The final step of the command will allow you to choose the opening direction.
Once drawn, an opening has a few properties that can be edited easily...
* The **`zone limit`**: it defines where the zone should stop across the opening hole; at its inner threshold, outer threshold, center, etc
* The **`offset`:** distance between door center line and wall spine the opening is hosted in.
**Openings in free walls**
Openings can now be hosted in free walls. The workflow is the same: select an opening from the library, then drag and drop it onto the free wall.
A few things to keep in mind:
* **Orientation is manual.** Unlike regular walls, free walls have no predefined spine direction. The opening's orientation is set by where and how you place it — what you see is what you get.
* **Hosted openings follow the wall.** Moving a free wall will move all its hosted openings along with it.
* **Path editing preserves hosting.** Editing the free wall's path will not unhost openings already placed in it.
### Everything about zones
Zones allow defining room surfaces in a single click; they can be created using the **`Zone`** tool, and divided using the **`Zone Divider`**. These tools are described here below.
#### Zones `Z`
* **Click inside a room enclosed by walls.** A single click will create a zone, made of a shape and a tag.
* Alternatively, **clicking outside of an enclosed room** will allow you to create a zone **based on its outline.**
Once created, a zone with a style using a texture-based or hatch-based fill, will give you access to the zone's **`Tiling`** property. **`Tilling`** enables you to set the pattern's offset and rotation.
Additionally, **a zone can be manually edited**. A double click on a zone will give you access to its edit point, like for any regular shape.
#### Zone divider `DV`
Zone divider allows you to **split the zone of room** into distinct areas.
**Mode**: Arc.
* Click, preferably on a room's wall, to place the zone divider's first point.
* Place all other points across the room, until you reach another of the room's walls.
### Tutorial
For more step-by-step information, watch our tutorial about how to use walls, zones and openings in Rayon.
{% embed url="" %}
***
### We are always available
Book a demo with our team, [right here](https://b1kzip68v9f.typeform.com/to/Hgr0eQ4k#source=docs).\
To get some support, reach out to us through our **in-app support chat**. \
More about [our support policy right here](/other-resources/others/support-policy).
# Annotations: dimensions, leaders, text
An exhaustive list of Rayon's annotation tool set.
Rayon's annotation tools can be found in the **bottom toolbar** or triggered via [**shortcuts**](/documentation/design/shortcuts).
### Dimension & Leader
#### Dimension `DI`
**Mode:** Orientation, Chained\
**Arguments** : Distance, Angle
* Start by **selecting** the **start point** of your dimension, then pick an end point.
* If in **chained mode**, repeat the above step.
{% embed url="" %}
#### **Angular dimension `AD`**
**Mode:** Arc**,** Loop\
**Arguments** : Offset
When annotating **angles**...
* Start by **setting two segments to define the angle**
* Pick a **quadrant**
* Then set an **offset** for the dimension
When annotating **arcs**...
* Start by **picking an arc**
* Then set an **offset** for the dimension
{% embed url="" %}
#### **Leader `DR`**
**Arguments** : Distance, Angle
Leader can be used either with **text** or with **blocks**. To work with a **text leader**:
* Call the **`Leader`** command, and make sure that in the annotation style, the **`Block`** property is turned off.
* Start by **selecting** the **arrow head point** of your leader, then the landing line.
* As the text box opens on command completion, enter the text that your leader should display.
{% embed url="" %}
To use a **block leader**, repeat the same steps, but toggle *on* the **Block** property of the annotation style. Let's go through each step:
* Call the **`Leader`** command.
* Toggle *on* the annotation style's **`Block`** property.
* In the modal that opens, either pick one of the three default head blocks, or browse to your preferred library. Validate to close the modal.
* Start by **selecting** the **arrow head point** of your leader, then the landing line.
{% embed url="" %}
At any point, the text inside **the leader's block head can be edited**, by simply doubling clicking on the text itself.
{% embed url="" %}
### **Annotation head options and transform**
The head of a dimension or a leader can be either a **text** or a **block**. Either way, the annotation style allows choosing the head...
* **`Gap`**: a gap surrounding the annotation text
* **`Position`**: Centered, Below, Above
* **`Rotation`**: Aligned, Horizontal, Vertical
... as a way to format the annotation.
Additionally, the **head transform** allows moving manually the head inside the annotation. Any manual edition will be saved inside the head transform property (**`Shear`**, **`Rotation`**, **`Offset`**, **`Scale`**), that can be reset at any point.
### **Dimension scale**
Note that dimensions can **be set to a specific scale**. \
This is especially useful when adding dimensions in the paper canvas. This way, if a view has a 1:20 scale, then dimensions overlaid on top of it can be tuned to match the view scale. The scale properties can be found in the dimension properties.
### **Arrow `AW`**
**Arguments** : Distance, Angle
* Start by selecting the **start point** of your arrow.
* Then pick the **arrow head point.**
{% embed url="" %}
### **Revision cloud `RC`**
**Mode** : Rectangle, Polygon
Simply draw your revision cloud and press Done/space when your shape is complete.
{% embed url="" %}
### Text & tag
#### **Text `TT`**
* Start by **selecting** the **insertion point of your text box.**
* As the text box opens on command completion, **enter the text that your text box should display.**
{% embed url="" %}
#### **Tag `TG`**
* Start by **selecting** **an entity your tag should be tied to.**
* As the text box opens on command completion, either:
* **Enter the text that your tag should display.**
* Click on the **`/`** (add variables) button in the text edition panel to **call the property of the tag parent entity**.
{% embed url="" %}
### Tutorial
For more step-by-step information, watch our tutorial about how to use annotations, text and dimensions in Rayon:
{% embed url="" %}
***
### We are always available
Book a demo with our team, [right here](https://b1kzip68v9f.typeform.com/to/Hgr0eQ4k#source=docs).\
To get some support, reach out to us through our **in-app support chat**. \
More about [our support policy right here](/other-resources/others/support-policy).
# Associative Dimensions
How to use Associative dimensions in Rayon.
### Associative dimensions
#### Core logic
Dimensions are now **Linked** to the underlying geometry. When you move or modify an entity, any dimension attached to it will automatically update to follow the change.
> Note: Dimensions created prior to this release can be made associative by manually attaching them to geometry.
#### Creating New Dimensions
{% hint style="info" %}
Since the feature release, dimensions are **associative at creation.** This behavior can be disabled via **Menu > Preferences > Snapping > Auto-link annotations.**
{% endhint %}
* **Workflow** : Ensure **Snapping is turned ON**. Snap onto a valid point (Endpoint, Midpoint, etc.) located on an entity.
* **Visual Confirmation**: A **Padlock icon** will appear next to the crosshair to confirm that the dimension's endpoint is successfully linked.
{% embed url="" %}
#### Managing Associativity
When a dimension is selected, its current status is displayed in the Right **Property Panel**. The possible states are:
* **Linked** : All dimension endpoints are attached to geometry.
* **Partially Linked** : Only some endpoints are attached to geometry.
* **Unlinked** : No endpoints are attached to geometry.
* **Mixed** : Multiple dimensions with different states are currently selected.
You can modify or remove links at any time through the interface :
* **Remove all links** : Click the **minus (-) button** in the right- hand panel under Properties > Link.
* **Add links Manually** : Edit the dimension and drag each endpoint to the target geometry until the padlock appears.
* **Unlink specific points :** While in Edit mode, select a specific endpoint and click the **minus (-) button** in the Properties Panel. This removes the link without requiring you to move the point.
{% hint style="warning" %}
A dimension with a **Linked** or **Partially Linked** status cannot be moved manually. You must unlink it first before repositioning it.
{% endhint %}
{% embed url="" %}
#### Best Practices and Limitations
* **Movement :** When moving geometry, the attached dimension follows. To ensure the dimension remains readable, you can adjust it's Alignment Properties in the Property Panel.
* **Supported Snap Points** : Currently, you can associate dimensions to : Endpoints, Midpoints, Nearest, Perpendicular and intersections between walls.
* **Supported Annotations :** Currently, Supported annotations are : Linear dimensions, Angular dimensions, Arrows.
# Measurement: distance & area
Everything about Rayon's takeoff tools.
Rayon's takeoff tools can be found in the **`Utilities`** menu of the **bottom toolbar** or triggered via [**shortcuts**](/documentation/design/shortcuts).
### **Distance `DS`**
**Mode**: Polyline
* Click to **set the measurement start point**; using the **`Polyline`** mode, you can also decide whether to measure one segment or multiple ones at once.
* As you click to set measurement points, **the total distance measured will appear in the toolbar.**
* By the end of the command, **the control points can be adjusted** to correct the measured distance.
### **Area `AA`**
* Click on the canvas to **define the outline** of measured area. The **size of the surface** will appear at the center of the outline.
* By the end of the command, **the control points of the area can be adjusted** to correct the surface outline.
***
### We are always available
Book a demo with our team, [right here](https://b1kzip68v9f.typeform.com/to/Hgr0eQ4k#source=docs).\
To get some support, reach out to us through our **in-app support chat**. \
More about [our support policy right here](/other-resources/others/support-policy).
# Shortcuts
Master Rayon's shortcuts to draw faster.
Now that we have discovered all of Rayon's commands, let's have a look at shortcuts.\
In Rayon, shortcuts come in two kind: **shortcut** mode and **command** line mode.
Additionally, for the command line mode, users can choose whether to use **Rayon's command line** **keys** or use **AutoCAD-like keys**, in any of the available languages the app supports.
Learn more about command access mode here.
***
### Drawing tools
Shortcuts in Rayon can be **swapped between sets**: a Rayon set and AutoCAD-like set are available today. Swapping can be done in your **user settings page.**
{% hint style="info" %}
* Mode toggles follow a fixed convention: **`A`** switches the command's main mode, **`B`** its second mode when it has one, and **`L`** toggles once/loop.
* `CTRL` mentioned below corresponds to `⌘ CMD` for Mac users.
{% endhint %}
{% tabs %}
{% tab title="Rayon shortcuts" %}
Shortcut
Command
Mode (toggle)
a
SPACE or ↵
Exit and validate command content
ESC
Exit and delete command content
CTRL + K
Trigger command line
W
Wall
A : line/arc S : left/center/right align L : once/loop
OP
Opening
L : once/loop
Z
Zone
L : once/loop
DV
Zone Divider
A : line/arc L : once/loop
PL
Polyline
A : line/arc L : once/loop
L
Line
L : once/loop
AC
Arc
A: radius/angle L : once/loop
CV
Curve
L : once/loop
CI
Circle
L : once/loop
RE
Rectangle
L : once/loop
PG
Polygon
A : circumscribed/inscribed L : once/loop
G
Guideline
A : horizontal/vertical/free L : once/loop
BB
Bucket
DI
Dimensions
A : single/chained O : aligned/horizontal/vertical/rotated L : once/loop
***
### We are always available
Book a demo with our team, [right here](https://b1kzip68v9f.typeform.com/to/Hgr0eQ4k#source=docs).\
To get some support, reach out to us through our **in-app support chat**.\
More about our support policy right here.
# Layers
Using layers to organize your drawings.
The **`Layer` panel** can be found in the top-left corner of the editor.
This panel hosts **canvases** (more [about canvases here](/documentation/layout-and-present/canvases)), **layers** and **pages** (more [about pages here](/documentation/layout-and-present/pages)).
### What is a layer?
Layers are an **essential tool to organize your drawings.** Layers **contain drawing elements** (geometries, blocks, text, etc) or even layers.
Layer allowing controlling a few things:
* **The visibility:** layers can be shown or hidden, which in turn will apply to all their contained elements.
* **The lock behavior**: layers can be locked so that the user cannot select the things hosted on them.
* **The rendering order: the layer list is rendered from top to bottom,** meaning that elements in layers at the top of the list will be placed on the top of your drawing, and layers at the bottom of the list will be rendered at the bottom of your drawing. This list can be reordered at any time.
* **The active layer:** once active, a layer will host all new elements you draw.
All the actions described above can be found in the **`Layer`** panel, on any given layer, or in the panel's header...
Selecting a layer will give you access to its properties, in the **`Properties`** panel.\
A few settings can be edited there...
* Layer **name:** the name the layer carries in the **`Layer`** panel.
* Layer **color**: the color that identifies the layer in the **`Layer`** panel, and the color its elements carry in wireframe mode.
* Layer **opacity**: the level of transparency of the objects on the layer.
* Layer **parent**: the layer the selected layer is on. *Root* means that the layer has no parent layer.

#### Inheritable values
Below those, the **`Inheritable values`** section carries a second set: **`Color`**, **`Opacity`**, **`Stroke weight`**, **`Dash pattern`** and **`Dash scale`**.
These are **not applied to the layer's elements on their own.** They are picked up only by elements set to inherit them, one value at a time. Change one here, and every element inheriting it updates at once.
More [about inheriting values here](/documentation/design/styles#h_layer_level_styling).
### Layers in action
Below, we will review the **different actions that layers enable you to do.**
#### Ordering
Layers allow you to determine **the order of things on your canvas.** Changing the order of layers will affect the display order of elements.
{% embed url="" %}
#### Nesting
Layers can be **nested into one another.** As any point, a layer can be dragged onto another to turn it into a child of another layer.
{% embed url="" %}
#### Reassigning
You can always **change the layer an object is assigned to.** Simply edit the **`Layer`** property in the **`Property`** panel.
{% embed url="" %}
### Layer states
A **layer state** is a saved snapshot of every layer on the canvas: which layers are shown or hidden, which are locked, and each layer's color and inheritable values. Save one for each way you look at your drawing, then switch between them in one click instead of toggling layers one by one.
Layer states live in the **`Layers`** section of the **`Layer`** panel, under the **`Canvases`** section. Open the **...** menu next to the **`Layers`** header and turn on **`Show layer state`**: a **`Layer state`** dropdown appears under the header, with a **...** menu beside it.
* **Save a state:** set your layers the way you want them, then choose **`Save as new`** in the dropdown's **...** menu. Rayon names the state and opens the name for editing: type yours and press Enter.
* **Switch:** pick a state in the dropdown. Every layer goes back to the way that state saved it; a layer created after the state was saved is left as it is.
* **Modified:** once you show, hide, lock or restyle a layer after applying a state, its name in the dropdown reads **`Modified`**. **`Save`** overwrites the state with the current layers; **`Restore`** puts the layers back the way the state saved them.
* **`Rename`** and **`Delete`** act on the state shown in the dropdown.
Layer states belong to the canvas they were saved on. When you override a view, picking a state in the dropdown applies it to that view alone.
### Tutorial
For more step-by-step information, watch our tutorial about how to use layers in Rayon.
{% embed url="" %}
***
### We are always available
Book a demo with our team, [right here](https://b1kzip68v9f.typeform.com/to/Hgr0eQ4k#source=docs).\
To get some support, reach out to us through our **in-app support chat**.\
More about [our support policy right here](/other-resources/others/support-policy).
# Styles
Controlling your drawing's aesthetics.
Rayon is also about **applying a professional rendering to your drawings** : applying colors, line weights, fonts, text sizes, using hatches and textures, etc.
**All this** can be controlled in Rayon **using** **styles**, located in the property panel.
### The basics of styles
In Rayon, **styles document the aspect of all elements** (a text box, a line, a surface, etc.).
#### Style types
Styles come in 4 different types; **shape** style, **text** style, **annotation** style and **wall** style. We detail below how each style type works...
{% tabs %}
{% tab title="Shape style" %}
**Shape styles** offer the following options:
* Fill (type, opacity, etc)
* Stroke (tickness, color, dashing, etc)
{% endtab %}
{% tab title="Text style" %}
**Text styles** offer the following options:
* Text color and size (type, opacity, etc), and text options (units, unit formatting, etc)
* Font family
* Font style (bold, italic, etc)
**Text options** allow you to further customoze your text's content, with the following options...
{% endtab %}
{% tab title="Annotation style" %}
**Annotation styles** offer the following options:
* Text color and size (type, opacity, etc), and text options (units, unit formatting, etc)
* Font family
* Font style (bold, italic, etc)
* Stroke (tickness, color, dashing, etc)
* Extension lines option (tickness, color, dashing, etc)
* Ends styling (arow head, dot, etc) and size
* Head options (block vs text)
{% endtab %}
{% tab title="Wall style" %}
**Wall styles** offer the following options:
* Wall thickness
* Fill (type, opacity, etc)
* Stroke (tickness, color, dashing, etc)
{% endtab %}
{% endtabs %}
#### Fill types
In shape and wall styles, the **fill option** can be of different kinds: **solid**, **gradient**, **texture**, **hatch**, and **image**. We detail below how each one works.
{% tabs %}
{% tab title="Solid" %}
Fills can use a **`solid`** fill.\
A solid fill is made of single color, and opacity.
{% endtab %}
{% tab title="Gradients" %}
Fills can use a **`gradient`**.\
Gradients can be **`Linear`**, **`Angular`** or **`Radial`**.
For any of those options, controls will be accessible on the canvas to define the position and extents of the gradient. **`Start`** and **`End`** value will allow you to assign a given color to each part of the gradient.
{% endtab %}
{% tab title="Texture & hatches" %}
Fills can use a **`Texture`** or a **`Hatch`**.\
Both types of fill allow **choosing a pattern**. If patterns offered in Rayon's libraries are not what you need, **uploading** a seamless texture or a PAT hatch file is also possible.
For entities carrying a fill using a **hatch** or a **texture**, **the pattern of each element can be edited independently!** To do so, head to the **`Tiling`** field, to enable the option.
{% embed url="" %}
You can then manually **use the blue dot to rotate and offset** the pattern, or **simply input precise offset/rotation values** in the tiling panel.
{% endtab %}
{% endtabs %}
### Editing, saving & sharing styles
Styles can be either **specific** to a given entity, or **shared** across elements.
Styles can be **edited**, **published**, and **shared** across your drawings.
Let's dive in!
#### Editing a style
**Styles' settings** can be found **in the property panel**, on the right.\
Styles can be edited through their **different token fields** (Fill, Stroke, etc), or **swapped**/**saved** through the options of the section header.
#### Saved styles
At any point, **the style of an element can be saved**, in order to apply it to multiple elements at once. Clicking on **`+`** allows saving styles.
{% embed url="" %}
Once saved, a style displays different options...
* Editing
* Swapping
* Detaching
... accessible on and above the style itself.
**Editing** a saved style allows changing that style across all shapes carrying it.\
That way, an entire drawing can be redesigned **by simply intervening on the few saved styles** carried by the drawing's elements.
{% embed url="" %}
**Swapping** allows replacing a saved style by another.\
That action can be triggered by using the **quad button**, or by **clicking on the style itself.**
{% embed url="" %}
**Finally, detaching** allows removing a saved style for the current selection. Elements whose style has been detached will go back to having their own specific styling.
### Layer-level styling
Beyond styles, **a layer can carry style values of its own**, that the elements sitting on it can pick up. Change a value on the layer, and **every element inheriting it updates at once.**
#### Setting values on a layer
Select a layer, and head to the **`Inheritable values`** section of the property panel.\
Five values can be set there: **`Color`**, **`Opacity`**, **`Stroke weight`**, **`Dash pattern`** and **`Dash scale`**.
{% hint style="info" %}
These are not the **`Layer color`** and **`Layer opacity`** sitting above them. Those two identify the layer in the **`Layer`** panel and drive wireframe mode. More [about layers here](/documentation/design/layers).
{% endhint %}
#### Inheriting a value
In an element's **`Fill`** or **`Stroke`** options, **hovering a value reveals a layer icon** on its right. Clicking it makes that value **come from the layer** instead of the element.

The field then shows the layer's value and can no longer be edited; **to change it, change it on the layer.** Clicking the icon again gives the element its own value back. Setting a value by hand does the same.
Values are inherited **one by one**, and only **solid color fills** can inherit. Selecting several elements at once displays a third state, when only some of them inherit.
Shapes and walls can inherit their stroke and fill values, texts their color and opacity, and annotations both.
### Style libraries & publishing
At any point, you can **find all the styles contained in your drawing** in the left-side **style panel.**
* **`In model styles`** lists all the styles you have in your model
* **`Libraries`** gives you access to extensive libraries
Styles listed under **`In model styles`** can be **curated**, using the panel's options; actions such as...
* **Creating** new styles by clicking on **`+`**
* **Editing/renaming** any given style
* **Deleting** unused styles
More importantly, this list can be **turned into a library**, by being published.
* Publishing can be found in the **`Share`** modal (upper right corner), under the **`Publish styles`** tab.
* A library can be **refreshed** at any time by hitting **`Refresh`** in the modal.
* Published libraries are accessible by users **within your organization.**
More [on libraries here](#h_aeea2b7ec7-1).
{% embed url="" %}
### **The *****active***** style**
Each time a creation command gets used, the **active style appears in the property panel**; that style will be **assigned to the things you draw** with the current command.
{% embed url="" %}
### Tutorial
For more step-by-step information, watch our tutorial about how to use styles in Rayon:
{% embed url="" %}
***
### We are always available
Book a demo with our team, [right here](https://b1kzip68v9f.typeform.com/to/Hgr0eQ4k#source=docs).\
To get some support, reach out to us through our **in-app support chat**.\
More about [our support policy right here](/other-resources/others/support-policy).
# Images
Everything about working with images in Rayon
Among many other things, **Rayon allows working with images seamlessly**. Importing, scaling, cropping, filtering and AI-enabled editing are available at your fingertips in the app.
### Import
Images in Rayon can be imported by simply drag/dropping them on your canvas, or by choosing the import option in the main menu. (Note that upon import, images above 2048x2048 px will be down scaled)
### Editing
Images can easily be edited in Rayon.
The object itself can be **resized** and **cropped** (using CMD/CTRL holding).
{% embed url="" %}
Images can also be edited. Editing can be accessed...
* From the selection bar, by clicking on **`Edit image`**
* From the image swatch of the style panel.
* By pressing **`CTRL`** + **`I`** while the image you want to edit is selected.
Alternatively, on selection of a single image, AI editing tools can be accessed, inside the **Image** section of the property panel.
In the image editing modal, images can be...
* **Filtered**
* **Upscaled**
* Their **background can be removed** (useful for furniture images for instance)
Tip — The options of the toolbar are using AI to improve your images; these tools are quite powerful, consider upgrading to Pro or Team to increase your credits.
***
### We are always available
Book a demo with our team, [right here](https://b1kzip68v9f.typeform.com/to/Hgr0eQ4k#source=docs).\
To get some support, reach out to us through our **in-app support chat**. \
More about [our support policy right here](/other-resources/others/support-policy).
# Text
Working with text in Rayon
Here is all you need to know about **using** text and working with text styling.
### Creating a text
The **`Text`** tool can be found in the toolbar annotation menu (see below). \
Once created, a text can...
* Have its style edited, in the right-side panel.
* Be edited by double-clicking on it. The text panel that appears offers a few options.
### Text styling & fonts
In the right-side panel, **the style properties of a text can be edited**. The font can be changed, as well as its styling. At the same time, the **alignment** and **baseline** properties of the text paragraph can be adjusted from the same panel.
Another way to edit a text styling is to double-click on the text box, select some text, and apply any style change **from the floating option bar**. Inside this bar, most **text styling options** can be found: italic, bold, underline. A text can also be formatted as lists using **the list option**.
### Hyperlinks
Rayon offers the option to **add hyperlinks inside models**. Once added, the user will be redirected to the underlying link on click. The option to add hyperlinks can be found inside the floating option bar.
**Tips** — A useful feature with hyperlinks is to **redirect to another position in the same model**, rather than sending to an external reference. To do so, simply place your window on the position in a model you would like the user to be redirected to, adjust the zoom level, then copy the model URL and paste it inside the URL slot. Upon clicking on the link, the user will be redirected immediately to the next position (with correct zoom level), without any window refresh being triggered.
### Using properties
Another useful feature in text boxes is the ability to display property values inline. Press the slash key (`/`) and start typing a property name to search the available options, or browse the property dropdown and select the one you want to display.
### Text overrides
Text content can be overridden per instance when working inside a block or a view. Enter override mode and select a text element to change its content for that context only, without affecting the original. This is useful for blocks that share the same geometry but need different labels, such as room names or furniture tags.
***
### We are always available
Book a demo with our team, [right here](https://b1kzip68v9f.typeform.com/to/Hgr0eQ4k#source=docs).\
To get some support, reach out to us through our **in-app support chat**. \
More about [our support policy right here](/other-resources/others/support-policy).
# Blocks
How to use block libraries in Rayon.
Here is all you need to know about **using** and **creating blocks.**
### **Creating blocks**
In Rayon, **blocks allow grouping elements** and **saving them into your block library.** \
Once saved, you can create as many instances as you would like: each instance will remain tied to its definition, such that editing any block will affect all block instances in your model.
{% embed url="" %}
To create a **new block**...
* **Select the elements** you want to save as a block.
* Click on the **`Block`** button (**`CMD`** + **`B`**) in the toolbar.
* Your **new block was added to your block library,** in the left-side panel.
* Click on the block name to **rename** it!
* **You can now drag and drop the block on your canvas** to insert as many instances as you want.
Alternatively, blocks can be created **through the import of DWG/DXF files**, as Rayon can detect AutoCAD blocks, and turn them automatically into Rayon blocks.
### Editing vs overriding blocks
Blocks can be either **edited** or **overridden**.
**Editing** a block means editing its underlying block definition.
* Any changes done in edit mode will be applied to all instances of that block in your model.
* Editing can be accessed in the edit bar, through double-click on a block instance, or through hitting **`CMD`** + **`E`**.
**Overriding** a block means tuning the aspect (styles, text, and visibility) of a single block instance.
* Any overrides applied to an instance will be carried by this instance, and only this one, while it will keep its tie to its definition.
* Overriding can be accessed in the edit bar, or through hitting **`CMD`** + **`O`**.
* At any point, all overrides on a block can be reset, by hitting **`Reset all overrides`** (in the right click), or by hitting **`CMD`** + **`OPT`** + **`O`**.
**Making unique** a block means converting into its own definition.
* In other words, at any point, a block instance can be detached from its definition, and turned into its own, unique definition.
* The **`Make unique`** option can be accessed in the right click on block, or through hitting **`CMD`** + **`U`**
### Using the block panel
The block panel works with 2 tabs:
* **`My blocks`** : this tab is where blocks stored in your current model, and that you have created are displayed
* **`Libraries`** : this tab gives you access to blocks contained in libraries you have created, or contained in Rayon libraries.
**`My blocks`** will display everything in your model. Any block stored there is called a block *definition*. It is the parent of all similar blocks (called instances) inserted on the canvas. Changing a definition (its geometry, its properties, etc) will affect all instances on the canvas. At any point, a definition can drag-dropped on the canvas to create **a block instance.**
In the **`Libraries`** tab of the Block panel, typing (almost) any item name will return blocks out of Rayon's libraries or that of your organization. Rayon has built today more than 60k blocks, for all types of programs. All of them are accessible to you.
In both tabs, you are also able to filter what appears, by using the filter feature in the panel header.
Finally, in the **`My blocks`** you will find the publication button. This button will allow you to publish your blocks so that they can be retrieve from any other model in have access to.
More about publication in our page about [libraries](/documentation/publishing-and-sharing/publishing-a-library).
### Block families
**Blocks can be grouped in Rayon, to gather blocks that belong together.** In Rayon's libraries, for instance, the different views of the same block are grouped as a family together.
In fact, **you can create your own families**. To create a block family, simply...
* Select any block definition, and in its option, click on **`Create family`**
* Now that a family is created, to add a new child to it, in the option of any other block, choose the option **`Add to family`**
* Select the family to add to
{% embed url="" %}
### Hosted blocks
**Blocks can also be hosted into walls**. \
A hosted block uses an **insertion line**, to specify how it should get inserted into a wall.
To create a hosted block...
* **Select the elements** you want to save as a block.
* Click on the **`Block`** button (**`CTRL`** + **`B`**) in the toolbar.
* **Click on the block** and then on the **`Edit`** (**`E`**) button; now, **you will notice** **a white dot** in the middle of the block (this dot is its insertion point to the model).
* **Swap the dot with a line on the top right panel**, and click on **`Done`**.
That's it! Your opening block will now **punch a hole/snap on Rayon walls.**
{% embed url="" %}
### Block's Bounding box controls
**Blocks** can have a fully functional **bounding box,** that allows for non-uniform resizing from the sides and uniform resizing from the corners. In some cases it can be useful to hide those controls, for example with parametric blocks, which have specific grips to interact with the block in the intended way only.
In the right panel, when editing a block, under "Box corners" :
* You can choose to **show** or **hide** those controls.
* **Auto** will automatically hide the controls if the block is [parametric](/documentation/design/parametric-blocks).
### Tutorial
For more step-by-step information, watch our tutorial about how to use and create blocks in Rayon:
{% embed url="" %}
***
### We are always available
Book a demo with our team, [right here](https://b1kzip68v9f.typeform.com/to/Hgr0eQ4k#source=docs).\
To get some support, reach out to us through our **in-app support chat**. \
More about [our support policy right here](/other-resources/others/support-policy).
# Parametric blocks
How to use parametric blocks in Rayon.
Here is all you need to know about **using** and **creating `parametric` blocks.**
### What is a parametric block?
**`Parametric`** blocks make blocks in Rayon adaptable.\
Instead of creating multiple versions of the same object (different lengths, sizes, or repetitions), you can define a single block that adjusts automatically by editing it manually, or by editing its parameters numerically.
{% embed url="" %}
### Interacting with a p**arametric block**
We explain in this section where to find, and how to work with parametric blocks.
#### Working with existing parametric blocks
Existing parametric blocks can be found in side Rayon's libraries. Spotting them is easy as they have a gear icon, indicating their **`parametric`** nature.
Once inserted on the canvas, you will be able to work with any parametric block by **interacting with its grips**. Let's dive in, step by step...
* Click on a **`parametric` block instance** on canvas to select it.
* The block will now display **`grips`** , which are small handles corresponding to each **`parameter`**.
* Drag a grip along the **`parameter`** axis to adjust the block’s geometry.
* As you drag, the geometry updates in real time, based on to the actions and parameters that are set up on inside the block definition. The dragging motion will be affected by other settings too: minimum and maximum of the dragging distance, incremental or continuous dragging motion, etc.
Another way to interact with a parametric block, is through **the values of its parameters**, located in the properties panel...
* Select a **`Parametric` block instance** to **input a numeric value** directly in the right panel.
* Rayon immediately updates the **`parameter`** and all linked actions.
* When an **incremental value** is defined, entering a custom value rounds automatically to the **closest valid increment**.
{% embed url="" %}
### Creating a new parametric block
Parametric can also be created; this requires a slightly more in-depth understanding of how parametric blocks work. This section will offer a deeper dive into parametric blocks.
#### Some definitions
We need to start by laying down **a useful definitions.**\
A parametric block combines five elements that work together:
* An **action** transforms geometry,
* **A parameter** drives that transformation,
* A **parameter points** mark *how* and *where* the parameter is anchored on the canvas,
* A **selection set** decides what is impacted,
* An **active area** defines *where* the transformation applies within the selection set.
| Element | What it does | Example |
| -------------------- | ------------------------------------------------------------------------------------------------------------ | --------------------------------------------------------------------------------------------------------------------------------------------------------------------------------------------------------------------------------------------- |
| **Action** | Defines *how* geometry changes when the parameter updates. |
Stretch : moves parts of geometry. Array : repeats geometry along a direction. Visibility: shows or hides a geometry based on a state.
|
| **Parameter** | Provides the numeric and directional input for the action. | A segment **`parameter`** between two points controlling distance or spacing. |
| **Parameter Points** | Define the start and end of a **`parameter`**. They anchor its axis and can be moved or snapped to geometry. | The two grips controlling a block’s **`stretch`** direction. |
| **Selection Set** | Defines which geometry is included in the transformation. | The elements that will move or repeat. |
| **Active Area** | Refines the selection set by specifying which control points or portions of geometry are affected. |
In a Stretch action, entities with control points inside the area stretch proportionally. Entities without any inside are translated entirely along the parameter axis.
|
So far Rayon supports, a handful of parameters and actions that we detail here.
| Type | Description | Used by.. |
| --------------------------- | --------------------------------------------------------------------------------------------------------------------------------------------------------------- | ---------------------------------------------- |
| **Segment `Parameter`** | Measures a distance between two points and provides both length and direction. | **`Stretch`**, **`Array`**, **`Move`** |
| **Point `Parameter`** | Marks one position with a single grip. On an instance it exposes an X and a Y value. | **`Move`** |
| **Rotation `Parameter`** | Holds an angle around a center point. Its grip turns the linked geometry. | **`Rotation`** |
| **Flip `Parameter`** | Defines a flip axis with two named states, Not Flipped and Flipped by default. Its grip switches between them. | **`Flip`** |
| **Alignment `Parameter`** | Marks an alignment point and a direction on the block. A placed instance dragged by its grip snaps to nearby geometry and turns so the direction runs along it. | no action needed |
| **States `Parameter`** | Holds a list of named states. Switching the active state determines which geometry is shown. | **`Visibility`** |
| **`Stretch` Action** | Moves geometry inside a defined selection set when the parameter value changes. | Segment **`Parameter`** |
| **`Array` Action** | Repeats selected geometry at a defined increment along the parameter axis. Two Array actions on two perpendicular Segment parameters pave a grid. | Segment **`Parameter`** |
| **`Move` Action** | Translates the selection set by the parameter's displacement. | Point **`Parameter`**, Segment **`Parameter`** |
| **`Rotation` Action** | Rotates the selection set around the parameter's center by its angle. | Rotation **`Parameter`** |
| **`Flip` Action** | Mirrors the selection set across the parameter's axis when the parameter is flipped. | Flip **`Parameter`** |
| **`Visibility`** **Action** | Shows or hides geometry based on the active state of the linked States **`Parameter`**. | States **`Parameter`** |
#### Creating your first parametric block
Let's go through a few steps to create a first block, and learn a few concepts along the way...
{% stepper %}
{% step %}
#### Enter edit in isolation mode
* Create a **`block`** definition. *More about* [*blocks*](/documentation/design/blocks)*.*
* Edit the block with **Edit in Isolation.** *(Right Click > Edit in Isolation **or** Ctrl+Alt+E).*
{% endstep %}
{% step %}
#### Choose an action
* In the block toolbar, choose an action you'd like to use.
* Pick the transformation you want: **`Stretch`**, **`Array`**, **`Move`**, **`Rotation`**, **`Flip`** or **`Visibility`**; **`Alignment`** sits in the same menu and creates a parameter that needs no action.
{% endstep %}
{% step %}
#### Create or select a parameter
After selecting an action, Rayon prompts you to choose a parameter.
* **Create `Parameter`** : pick two points to define a Linear axis.
* **Use existing `Parameter`** : reuse one defined earlier in the same block by selecting it.
Once the parameter is selected or created:
* For **`Stretch` actions**, Rayon asks which **`Parameter Point`** should be assigned to the action — the **start** or the **end** point.\
This determines which side of the parameter acts as the *fixed point* and which side drives the transformation.
* For **Array actions**, this step is skipped: the action uses the entire parameter direction and doesn’t depend on a specific point. For a grid, add a second **`Array`** action on a new Segment **`Parameter`** perpendicular to the first.
* For **`Visibility` actions**, this step is skipped. The States **`Parameter`** is created automatically when the action is added. There is no parameter to pick or place.
The parameter appears as a purple guideline with draggable grips.
{% embed url="" %}
{% endstep %}
{% step %}
#### Define the selection set & active area
**For `Stretch` actions**
Stretch action uses two definitions:
* **Selection Set** — which entities are eligible to move;
* **Active Area** — where deformation is detected.\
• If selected entities have control points inside the Active Area, only those points move (deformation).\
• If selected entities have **no** control points inside the Active Area, the **entire entity translates** by the stretch delta.\
• Entities not in the selection set do not move.
{% embed url="" %}
**For `Array` actions**
* Select the geometry to repeat.
* Define the spacing or increment distance (e.g., 600 mm).
{% embed url="" %}
**For `Visibility` actions**
**`Visibility`** has no selection set or active area. You build each state by switching it active and drawing geometry inside the block while in **`edit in isolation`**. Geometry that should appear in several states must be duplicated into each one.
{% endstep %}
{% step %}
#### Save the definition
Exit **`edit in isolation`** to save the block definition.\
All instances of this block now include interactive grips that control the parameter.
{% endstep %}
{% endstepper %}
#### Example scenarios
As it turns out, parameters and actions can de combined in many different ways to create various types of parametric blocks; we provide you here with a few examples...
| Use Case | Setup | Result |
| ---------------------------- | ------------------------------------------------ | --------------------------------------------------------------- |
| **Adjustable bench** | Segment **`Parameter`** + **`Stretch`** Action | Drag to make the bench longer. |
| **Row of chairs** | Segment **`Parameter`** + **`Array`** Action | Drag to add or remove chairs at fixed spacing. |
| **Modular shelf** | Segment **`Parameter`** + **`Array`** Action | Extend to automatically add shelf units. |
| **Door with swing variants** | States **`Parameter`** + **`Visibility`** Action | Switch between left, right, and double swing on the same block. |
### **Going deeper: parameters & actions**
Let's complete our understanding of parametric blocks by getting more familiar with parameters and actions.
#### **Segment `Parameter`**
The **segment `parameter`** defines a linear distance and direction that actions can use to transform geometry. It’s the core driver behind **`Stretch`** or **`Array`** actions — providing both the *value* (length) and *axis* (orientation).
Each Segment Parameter has two **`Parameter Points`** : a **start** and an **end**.\
They appear directly on the canvas and can be moved, snapped, or edited numerically in the right panel.\
When the distance between these two points changes, every linked action updates automatically.
Parameter Entity Panel
| Field | Description |
| --------------------- | ------------------------------------------------------------------------------------------------------------------------------------------------------------------------------------------------------------------------------------------------------------------ |
| **Name** | The name of the parameter (e.g., *Length*, *Spacing*, *Distance*). This helps identify it when linking actions. |
| **Length** | Displays the current measured distance between the two parameter points. You can also type a specific value to set it precisely. |
| **Type** | Defines how the parameter behaves. You can select between **None/Incremental/List.** |
| **Minimum / Maximum** | Optional constraints for the parameter value. Use these to prevent the user from stretching or arraying beyond desired limits. |
| **Chain actions** |
Determines whether linked actions are triggered continuously when the parameter changes: • On : actions run in series (chained or cumulative). • Off : actions run in parallel (non-destructive).
|
Parameter Behaviour
* The **Segment `Parameter`** establishes a **direction** (from its start to end point) and a **length**.
* When its value changes (by dragging the grip or editing numerically), all linked actions recalculate their transformation.
* You can reuse the same parameter across multiple actions to synchronize behaviour (e.g., stretching and arraying in the same direction).
* Constraints (minimum / maximum) are enforced visually in the canvas : the **`parameter`** grip stops at the limit.
* When a **list of incremental values** is defined for the **`parameter`**, any value entered **outside edit mode** is automatically adjusted to the **closest valid increment** based on that list, ensuring consistent, precise behaviour across all instances.
Parameter Example
Imagine a **shelf module** with a Stretch and an Array action:
1. You create one **`strech`** action with a **segment `Parameter`** called *ModuleLength*.
2. You create another and **`Array`** action linked to that same parameter.
3. Dragging one grip increases the shelf’s total length : stretching the side panels and adding extra shelves in between automatically.
This allows complex adaptive behaviours to remain easy to control with a single distance handle.
#### Actions
Rayon supports **stretch**, **array**, **move**, **rotation**, **flip** and **visibility** actions, plus an **alignment** parameter that needs no action; let's go through each of them.
**`Stretch` action**
When you select a **`Stretch` Action** in the right panel, you can configure how the action behaves.\
This panel defines *what will move* and *how it will move* when the linked parameter changes.
Stretch action panel
| Field | Description |
| ------------------ | --------------------------------------------------------------------------------------------------------------------------------------------------------------------------------------------------------------------------------------------------------------------------------------------------------- |
| **Name** | The name of the action, automatically set to “Stretch”. You can rename it if you have multiple actions in the same block. |
| **Area** | Opens the editor to define the **Active Area** : the crossing zone that determines which parts of the geometry will deform when the **`parameter`** changes. Geometry with control points inside this area will stretch; geometry without any inside will move as a whole along the **`parameter`** axis. |
| **Selection Set** | Opens the editor to define the **Selection Set** : the geometry affected by this action. Only selected entities react to the stretch (either by deforming or moving). You can add geometry by clicking on it, or remove part of the geometry with **Alt/Option.** |
| **Angular offset** | Rotates the stretch direction relative to the **`parameter`** axis, allowing for angled transformations. For most cases, this stays at **0°**. |
| **Dist. mult.** | Defines a **distance multiplier** for the stretch effect. For example, `×1` applies the **`parameter`** value as-is; higher values amplify the displacement. |
| **Insertion** |
Controls whether the block’s insertion point is affected by the stretch: • Include : insertion point moves with the stretch. • Exclude : insertion point remains fixed in place.
|
Stretch action behaviour
* The **`Stretch` Action** is linked to a **`Parameter`**.
* The parameter’s **distance and direction** drive how far and in which direction the geometry moves, this can include regular geometry **and other `parameters`**, allowing multiple **`parameters`** to move together.
* The **Selection Set** defines which objects respond to the stretch.
* The **Active Area** defines which parts of those objects are deformed versus translated.
Stretch action example
If you create a Stretch action on a table block:
1. The **Selection Set** includes the table top and one leg.
2. The **Active Area** crosses the right side of the table.
3. When you drag the parameter grip, the right leg and that part of the top move, while the rest of the table stays fixed.
If the table had an object (like a decorative line) fully outside the Active Area but inside the Selection Set, it would translate as a whole rather than deform.
**`Array` action**
The **`Array` Action** creates repeated copies of selected geometry along a parameter’s direction.\
It’s used to distribute identical elements (like chairs, panels, or shelves) evenly along a distance that can be adjusted on the canvas.
The number of copies depends on the parameter’s total length and the **column offset** value.\
As you drag the parameter grip, Rayon automatically recalculates how many instances fit along the axis and updates the geometry in real time.
**Arrays in two directions.** Two **`Array`** actions on two perpendicular Segment **`Parameters`**, aimed at the same geometry, pave a grid: the second array repeats every copy of the first. Each parameter drives its own count, so a 3 x 3 grid becomes 5 x 3 when you stretch the first parameter to five times the column offset, and 5 x 2 when you shorten the second.
Array action panel
| Field | Description |
| ----------------- | -------------------------------------------------------------------------------------------------------------------------------------------------------------------------------------------------------------------------------------- |
| **Name** | The name of the action, automatically set to “Array.” You can rename it to distinguish multiple array actions in the same block. |
| **Selection Set** | Opens the editor to define the **Selection Set** : the geometry that will be repeated along the parameter’s axis. Only the selected entities will be duplicated. |
| **Column offset** | The **column offset** defines the distance between each copy. It can be expressed in any supported unit (e.g., `0.6 m`). The total number of copies is calculated automatically based on this offset and the current parameter length. |
Array action behaviour
* The **`Array` Action** is linked to a **`Parameter`**, which defines both the *axis* and the *total distance* available for repetition.
* As the parameter length increases, Rayon fills the space with copies spaced by the **column offset**.
* The first copy is always placed at the parameter’s start point; subsequent copies extend along the axis until the parameter’s end point.
* The array updates dynamically as you drag grips on the canvas or modify the parameter value in the inspector.
* The array never overlaps or extrapolates past the parameter’s total distance : when the space becomes too small to fit another copy, Rayon automatically removes the extra instance.
Array action example
Imagine a **row of chairs** block:
* You define an **`Array` Action** associated to a **Segment `Parameter`** along the row direction.
* You select one chair as the geometry to repeat.
* You set the **Column offset** to `0.6 m`.
* As you drag the parameter grip, Rayon automatically adds or removes chairs so they fill the distance evenly at 0.6 m intervals.
Array action Tips
* Use logical increments for the **column offset** (e.g., module widths, seat spacing, tile size).
* You can combine an **`Array`** and a **`Stretch`** on the same parameter, for example, stretch the base plane and array the elements on top of it.
**`Visibility`** action
The **`Visibility` Action** lets a block hold several visual states, where each state shows a different version of the block. State-based visibility of geometries.
Unlike **`Stretch`** and **`Array`**, the **`Visibility`** action and its **States `Parameter`** share a single right-panel surface and are created together. You build each state by drawing geometry inside the block in **`edit in isolation`**.
A 'eye' icon appears on the canvas when the action is created. The icon has no geometric relationship to the block, so you can place it anywhere. Clicking the icon allows for easy switching between states.
Visibility action panel
| Field | Description |
| ------------- | ----------------------------------------------------------------------------------------------------------------------------------------------------------------------------------------- |
| **Name** | The name of the parameter, automatically set to "Visibility". Rename it directly in the field if you have multiple Visibility actions in the same block. |
| **State** | The list of states the block can switch between. Click **+** to add a new state (empty by default, or copied from the active state). Click a state's name to rename it. |
| **State row** | Each row shows the state name, an **ellipsis menu**, and a drag handle. The ellipsis menu offers **Set active** (switch to this state) and **Remove**. The drag handle reorders the list. |
Visibility action behaviour
* Each state holds its own geometry. Switching the active state changes which geometry renders.
* Geometry common to several states (e.g., a door frame across swing variants) must be duplicated into each state.
* The state at the **top of the list** is the one shown when a fresh instance is placed on canvas. Drag a state to the top to change the on-insert default.
* On a placed instance you can switch states in three ways:
* clicking the canvas icon,
* using the dropdown that opens above the bottom toolbar,
* or using **Set active** in the ellipsis menu of the right panel.
* **`Visibility`** combines freely with **`Stretch`** and **`Array`** on the same block.
Visibility action example
Imagine a **door** block with multiple swing variants:
1. Add a **`Visibility`** action in **`edit in isolation`**. A "Default" state appears.
2. Rename "Default" to "Left swing" and draw the frame plus the left-swing arc inside it.
3. Click **+** to add a second state, name it "Right swing", and draw the frame plus the right-swing arc inside it.
4. Click **+** again, name the third state "Double swing", and draw the frame plus both arcs inside it.
5. Save the block by exiting **`edit in isolation`**. Every instance can now switch between the three swings.
Visibility action Tips
* **Duplicate shared geometry across states.** If a frame appears in every state, it has to be drawn or pasted into each one.
* **Reorder to set the default.** The top state in the list is the one that shows on a fresh instance.
**`Move` action**
The **`Move` Action** translates the geometry in its selection set when the linked parameter moves. It is driven by a **Point `Parameter`**, one grip that drags freely and exposes an X and a Y value on the instance, or by a **Segment `Parameter`**, a drag along the segment's axis. When you add the action, the command bar asks where to place the parameter and offers **Point** or **Segment** while you place it, then asks which geometry moves. (On a block that already has a compatible parameter it first offers to reuse one.)
Move action panel
| Field | Description |
| ------------------ | ------------------------------------------------------------------------------------------------------------------------------------------ |
| **Name** | The name of the action, automatically set to “Move”. Rename it to tell several actions apart. |
| **Selection** | Opens the editor to define the **Selection Set**: the geometry that moves. Click entities to add them, hold **Alt/Option** to remove them. |
| **Angular offset** | Turns the move direction relative to the parameter's own direction. At **0°** the geometry moves exactly as the grip moves. |
| **Dist. mult.** | A **distance multiplier**: `×1` moves the geometry as far as the parameter, `×2` twice as far. |
| **Insertion** | Whether the block's insertion point moves with the action: **Include** or **Exclude**. |
Move action behaviour
* With a **Point `Parameter`**, the grip can be dragged anywhere; the selection set follows by the same displacement, turned by the angular offset and scaled by the distance multiplier.
* With a **Segment `Parameter`**, the displacement runs along the segment's axis: a **`Stretch`** whose whole selection set translates.
* Geometry outside the selection set does not move. Other parameters can be part of the selection set, so their grips move along.
Move action example
Imagine a **desk with a lamp** block: a Point `Parameter` on the lamp and a `Move` action whose selection set is the lamp. Drag the grip and the lamp slides across the desk; the desk stays.
**`Rotation` action**
The **`Rotation` Action** turns the geometry in its selection set around a center. It is driven by a **Rotation `Parameter`**: a center point and an angle, with a grip that turns around the center. When you add the action, the command bar asks where the center sits, what the initial angle is, then which geometry rotates.
Rotation action panel
| Field | Description |
| ------------- | ----------------------------------------------------------------------------------------------- |
| **Name** | The name of the action, automatically set to “Rotate”. Rename it to tell several actions apart. |
| **Selection** | Opens the editor to define the **Selection Set**: the geometry that rotates. |
Rotation action behaviour
* Drag the grip on an instance to turn the selection set around the center; type a value in the instance's **Angle** property for an exact angle (the definition's Angle field sets the starting angle).
* Geometry outside the selection set stays where it is.
Rotation action example
Imagine a **swivel chair** block: the center at the base, the seat as the selection set. Drag the grip to turn the seat; the base stays.
**`Flip` action**
The **`Flip` Action** mirrors the geometry in its selection set across an axis. It is driven by a **Flip `Parameter`**: a point and an orientation that define the flip axis, and two named states, the **Base state** (“Not Flipped”) and the **Flipped state** (“Flipped”). When you add the action, the command bar asks where the axis sits, its orientation, then which geometry flips.
Flip action panel
| Field | Description |
| ------------- | -------------------------------------------------------------------------- |
| **Name** | The name of the action, automatically set to “Flip”. |
| **Selection** | Opens the editor to define the **Selection Set**: the geometry that flips. |
Flip action behaviour
* Click the grip on an instance to switch between the two states; the selection set mirrors across the axis, the rest stays.
* The state names are what the instance shows for this parameter; rename them in the parameter's **Base state** and **Flipped state** fields.
Flip action example
Imagine a **door** block: the leaf and the swing arc as the selection set, the axis along the wall line. Flip the swing to the other side without a second block.
**`Alignment` parameter**
The **Alignment `Parameter`** needs no action: it makes the whole block instance align to other geometry. In the block, run the **Alignment** command (PI), click where the alignment point sits, then click to set its direction: point it **along the edge** that should sit on the geometry. On a placed instance, drag the alignment grip onto a line or a wall: the block snaps to it and turns so that direction runs along the geometry.
Alignment parameter panel
| Field | Description |
| --------------- | -------------------------------------------------------------------------------------------------------------------------------------------------------------------------------------------------------------- |
| **Orientation** | How the alignment grip is drawn on the instance: **Perpendicular** (the default) draws it square to the alignment direction, **Tangent** draws it along the direction. It does not change how the block turns. |
Alignment parameter example
Imagine a **sink** block with its alignment point on the middle of its back edge and the direction along that edge: drop it onto a wall and the back edge sits on the wall, the sink facing the room.
### Tutorial
For more step-by-step information, watch our tutorial about how to use and create blocks in Rayon:
{% embed url="" %}
***
### We are always available
Book a demo with our team, [right here](https://b1kzip68v9f.typeform.com/to/Hgr0eQ4k#source=docs).\
To get some support, reach out to us through our **in-app support chat**.\
More about [our support policy right here](/other-resources/others/support-policy).
# Layout & present
Everything about designing in Rayon!
***
### We are always available
Book a demo with our team, [right here](https://b1kzip68v9f.typeform.com/to/Hgr0eQ4k#source=docs).\
To get some support, reach out to us through our **in-app support chat**. \
More about [our support policy right here](/other-resources/others/support-policy).
# Canvases
Creating dedicated spaces in your model.
In Rayon, a canvas is **a 2D space to draw on**. The menu to manage canvases can be found in the **`Canvas`** section of the **`Layer`** panel.
### **What is a canvas?**
A canvas is a space in a model where things can be drawn. A model can contain multiple canvases. A canvas carries its own settings (its units, its own active layer, its stroke scale and display settings) and its own entities (in the layer panel).
Canvases come in two different types: **`model`** canvases, and **`paper`** canvases.
* A **`model`** canvas is usually where you will draw your projects (buildings, floor plans, sections, etc). In a model canvas, the **`units`** are in *meters* or in *feet*, the **`Stroke scale`** is usually set at 1/40, and background is white.
* A **`paper`** canvas is usually where you will create your sheet layout. In a paper canvas, the **`units`** are in *centimeters* or in *inches*, while the **`Stroke scale`** is usually set at 1/1, so that the thickness of the things you see is the one you get when exporting your document set. In a paper canvas, the background is usually gray, while pages have a visible, white background.
{% embed url="" %}
### Creating canvases
Both **`model`** and **`paper`** canvases can be created from the **`+`** of the layer panel. \
A canvas can be made active by simply clicking on it in the layer panel.
Once in a canvas, the **canvas' settings** can be accessed from the right side of the screen.
### Using canvases with views
Canvases become especially useful when **used with views**; a drawing, made in a model canvas, can be turned into a professional-grade layout by creating a few views of it on a paper canvas.
More on this topic [in our view documentation.](/documentation/layout-and-present/views)
Paper space, with model view
Model space
### Tutorial
For more step-by-step information, watch our tutorial about how to use canvases and views in Rayon.
{% embed url="" %}
***
### We are always available
Book a demo with our team, [right here](https://b1kzip68v9f.typeform.com/to/Hgr0eQ4k#source=docs).\
To get some support, reach out to us through our **in-app support chat**. \
More about [our support policy right here](/other-resources/others/support-policy).
# Views
Creating windows to reference your drawings.
Here is all you need to know about **creating** and **using views.**
### **What is a view?**
A view is **a window onto a canvas of a model.** In other words, using views helps create a duplicate representation of your work. Views are the best way to create as many references to an existing drawing as you would like, to then be used for instance in page layouts or as a drawing underlay.
Notably, views display 3 main characteristics:
* Views are **updated**: any changes to the drawing the view represents will be immediately visible from the view itself.
* Views can be **edited**: the **size**, **crop**, **scale** of a view can be changed.
* Views can be **overridden**: the **style, text,** and **visibility** of things displayed in a view can be changed to diverge from its initial aspect.
### **Creating a view**
To create a view, head to the toolbar, in the layout section, where you will find the **`View`** tool.
With this tool, a view can be created either within a canvas referencing itself, or onto a canvas referencing another canvas. In the video below, we demonstrate both possibilities.
Note that the **`Canvas`** property allows choosing the canvas that the view is referencing.
{% embed url="" %}
Alternatively, views can be created from the **`Layer`** panel, behind the **`+`** of the **`Layer`** section. \
The **`View`** option will allow you to choose a source canvas for your new view. Once clicked, a view will be created on the canvas currently displayed, and referencing the canvas chosen in the dropdown.
### Editing a view
To edit a view, select it and click **`Edit`** in the selection bar (or **`CMD`** + **`E`**).
There, **4 main aspects** of a view can be tuned:
* The view **`crop window`** can be resized, by editing the view clipping path in the view edit mode. Alternatively, and to go faster, a view can be cropped by resizing it while holding **`CMD`** (**`CTRL`** on PC).
* The view **`origin`** can be modified, by either panning in the view, or editing the **`Origin X,Y`** values in the view properties.
* The view **`scale`** can be tuned, by either zooming in the view, or editing the **`Scale`** value in the view properties.
* The view **`canvas`**, that is, the canvas the current view points to, can be swapped.
The **`origin`** and **`scale`** can be locked using the lock icons in the properties panel, preventing accidental changes.
{% embed url="" %}
### Overriding a view
To override a view, select it and click **`Override`** in the selection bar (or **`CMD`** + **`O`**).
#### **Visibility overrides**
The content of views can be hidden/shown, by interacting with the layers/entities visibility settings, once in view **`Override`** mode.
{% embed url="" %}
At any point, the visibility overrides you have created can be reset, either for the entire view or for a single entity/layer.
#### **Style overrides**
The content of views can be restyled, by interacting with the entities’ styles in the style panels, once in view **`Override`** mode.
{% embed url="" %}
At any point, the style overrides you have created can be reset, either for the entire style, all styles at once, or for a single parameter of a style.
### Tutorial
For more step-by-step information, watch our tutorial about how to use canvases and views in Rayon:
{% embed url="" %}
***
### We are always available
Book a demo with our team, [right here](https://b1kzip68v9f.typeform.com/to/Hgr0eQ4k#source=docs).\
To get some support, reach out to us through our **in-app support chat**. \
More about [our support policy right here](/other-resources/others/support-policy).
# Pages
Exporting your work as PDF or images.
Pages can be found both in the **`Page` panel** or at the top of the **`Layer`** panel.
Page panel
Layer panel
### What is a page?
A page is how you **export what is on your canvas** as a PDF or images.\
Thanks to pages, you can turn drawings into proper document sets.
Pages behave like layers; as with layers:
* Pages can get **`Locked/Unlocked`**.
* Pages can be **`Shown/Hidden`**.
* Pages can be **set as active**
* Pages can **host elements**; if it is the case, the hosted elements will move as the page gets moved.\
Note that **hosted** **elements** will only be exported to the page they are hosted on.
Additionally, pages have specific properties:
* They have an **orientation**
* They have a **format**
* They have a **paper size**
* They have a **scale**
* Pages have a **background** color, when working in a **paper canvas**.
### Creating a page
**You can create a new page** by choosing the **`Page`** command (PP) in the Layout menu of the toolbar.\
The page can either be used in...
* **`Insertion`** mode: the page is set to a given format and scale and can be inserted as is on the canvas.
* **`Drawing`** mode: the page can be freely drawn on the canvas.
In the video below, we demonstrate both modes....
{% embed url="" %}
Alternatively, pages can be created by clicking on the **`+`** button either in the **`Page`** or **`Layer`** panel; this will make a page appear on your canvas.
{% embed url="" %}
Once created, a page can be edited further by...
* **Changing its size** by choosing a page **scale** in the property panel.
* **Changing its** **format** by choosing a page **format** in the property panel.
* **Changing its orientation** by choosing a page **orientation** in the property panel.
**Tip**** —** Pages created in Model canvas or a paper canvas will be slightly different:
* **In a model canvas**, a page will be a simple frame, fitted to the size of your screen. This allows for quick PDF exports.
* **In a paper canvas**, a page will always have the size of a real sheet of paper (A4, A3, Letter, etc) and will have a background color. This allows you to build more realistic page layouts.
### Page order and numbering
Pages are ordered automatically by their position on the canvas. By default Rayon reads them left to right, then top to bottom, and you can change the reading direction. The page number and the export sequence are computed from this order and update live as you move pages, so your multi-page PDF always exports in the order your pages are arranged.
The page number appears on each page's boundary.
Automatic ordering is a per-canvas setting: on by default for paper canvases, off for model canvases. When it is off, pages keep their manual order.
The number on a page's boundary marks its place in the reading order. To put a page number on the page itself, choose the **`Page number`** command (PN) in the **`Annotations`** menu of the toolbar, then click the page to number. Rayon places a text with the page's number at the page's bottom-right corner, in the active text style and on the active layer. The text stays live: reorder the pages and the number follows. With several pages selected, the command numbers them all at once.
### Exporting a page
To create a **PDF export**...
* Click on the **`Export`** button in the **`Page`** panel.
* Once clicked, the export modal will open.
* There, a few settings can be used, to export your page set: the document name, the format of the export (PDF/PNG), the range of pages to export, and the file size.
* You can click on **`Export`** whenever you are ready to collect your document set; alternatively, click **`Print`** to send the document to your printer.
**Tip**** —** a magnifier also allows inspecting the exported pages before completing the export.
{% embed url="" %}
### Stroke weights and printing
Stroke weights are defined by the **`stroke`** value in styles. They usually appear in the export as they appear on-screen. However, when exporting a PDF, a few other factors, come into play, that are important to have in mind:
* The **page** **scale :** the stroke scale can have an effect on how stroke weights appear on the final, exported PDFs.
* The **stroke scale :** the stroke scale can impact how line appear on-screen, but do not affect the export.
To make things simple, by default, **Rayon model will print things as they appear on-screen**, and disregard any scale, might it be page or stroke. However, do note that, at any point, the user can choose to toggle on the application of the page scale to the stroke weights.
Additionally, it is worth noting also that **stroke weights will always appear as they will be printed in paper canvases.** There, all scales are set to 1:1 (page scales, stroke scale, etc.). On model canvases, however, any can be set on pages, while the stroke scale can be used to magnify stroke weights. This is why printing from the model canvas requires a bit more set up and care.
More on this topic in[ our page about canvases.](/documentation/layout-and-present/canvases)
### Tutorial
For more step-by-step information, watch our tutorial about how to use pages in Rayon:
{% embed url="" %}
***
### We are always available
Book a demo with our team, [right here](https://b1kzip68v9f.typeform.com/to/Hgr0eQ4k#source=docs).\
To get some support, reach out to us through our **in-app support chat**.\
More about [our support policy right here](/other-resources/others/support-policy).
# Tables
Assign and list properties of your items.
**Tables let you list, filter, and organize the properties of entities in your model.** Use schedule templates to create a room schedule, furniture list, or door schedule in one click. Tables are managed in the **`Tables` panel** on the left side of the editor and can be inserted on the canvas, where they stay linked to their source data.
### **Creating a table**
To create a new table, click the **`+`** button. Once created, **a table can be displayed in full screen mode**, to allow for a smoother browsing experience. Note that the **table source dropdown**, in the table panel header, will define which canvas the table should consider listing.
**Schedule templates**
Templates create a ready-to-use table in one click. The template selects the right entity type, adds relevant columns, creates any missing properties on your model, and configures the summary row.
Three templates are available:
* **Room Schedule** lists all zones with their name, area, and columns for room number, floor finish, wall finish, and notes.
* **FF\&E Schedule** lists all block types with a preview, count, unit price, and a computed total cost column.
* **Doors & Windows** lists opening blocks with their name, dimensions, and count.
Properties created by templates (like Unit Price or Total Cost) are shared across all models. If you use the same template in a different model, the properties will match, avoiding duplicates when models are merged. Computed properties like Total Cost calculate automatically based on other columns.
Select **Custom** to create a blank table. Choose a single entity type to get started, then add columns and filters as needed.
### Curating a table
Inside the table panel, a table can be curated to display specific **entity types**, **properties**, and to organize data using **grouping, sorting, and filtering**.
**Entity types & table source**
Each table shows **one entity type**. The entity type filter at the top of the table lets you switch between:
* **Block Definition** for furniture and equipment lists (one row per block type, with count)
* **Zone** for room schedules (one row per zone, with calculated area)
* **Wall** for wall specifications (one row per wall segment)
* **Block Instance** for per-instance listings (one row per placed block)
Additional entity types (Page, Layer, Style, Shape) are available under the advanced toggle in the three-dot menu.
The **table source dropdown** in the panel header defines which canvas the table pulls data from. You can select all canvases, the active one, or a specific canvas.
To narrow down further, you can draw a **region filter** directly on the canvas. This limits the table to only the entities within that area, useful when working with large drawings where you only need to list items in a specific zone.
**Adding properties**
Click on the **`+`** button at the top-right of your table to add new properties as columns. You can drag and drop column headers to reorder them, and remove any column you no longer need.
Some properties are **computed** and calculate their value automatically based on other columns. For example, the Total Cost property in an FF\&E schedule multiplies Count by Unit Price. Computed values update as the underlying data changes.
**Sorting & filtering**
You can **sort** the table based on any column by clicking the column header menu.
To **filter** the table, use the filter bar below the entity type chips. Click **`Add filter`** to create a filter clause. Each clause specifies a property, an operator, and a value. You can add multiple filter clauses to narrow down your data further.
You can also add a filter directly from the **column header menu**, which will create a filter scoped to that column.
#### Grouping
You can also **arrange tables by group.** Groups can be based upon any given property.
#### Inserting a table on the canvas
Once created inside the table panel, **a table can be inserted on the canvas** by clicking **`Insert`**. The canvas table is **linked** to its source in the panel. Any changes you make in the panel (adding columns, removing rows, updating filters) can be synced to the canvas table.
A linked canvas table displays all data from the panel, including the **summary row** at the bottom. The table content is managed from the panel and cannot be edited directly on the canvas. You can still **resize, format, and restyle** the canvas table freely. Your styling is preserved when you sync.
Inside the table command, **a table can either be created as `none`, or using an existing table as `source`.** To that effect, the **`source`** property can be found in the active properties of the table command. Note that if a table is empty, its row/column count can be edited. This option is, however, not available if a source table is set.
Alternatively, a table containing empty cells that can be edited manually, can be created directly on the canvas by using the Table **`TA`** tool.
#### Keeping tables in sync
When you make changes to a table in the panel, linked canvas tables can be updated to reflect those changes.
{% embed url="" %}
**Syncing**
A **sync button** appears in the table panel header. When a linked canvas table is out of date, the button is highlighted. Click it to update all canvas tables linked to that source at once. You can also sync a single canvas table from the **properties panel** when it is selected.
**Navigating to the source table**
When you select a linked canvas table, the **properties panel** shows a button to open the corresponding source table in the panel. This makes it easy to find and edit the data behind any canvas table.
**Detaching from source**
If you want to edit a canvas table freely, you can detach it from its source. In the **properties panel**, open the source dropdown and select **`None`**. The table becomes a standalone canvas table with fully editable content, no longer linked to the panel.
### Exporting a table
You may also export your tables at any time in **.csv** or **.xlsx** formats using the **Export option** of the table context menu.
### Tutorial
For more step-by-step information, watch our tutorial about how to use tables and metadata in Rayon.
{% embed url="" %}
***
### We are always available
Book a demo with our team, [right here](https://b1kzip68v9f.typeform.com/to/Hgr0eQ4k#source=docs).\
To get some support, reach out to us through our **in-app support chat**. \
More about [our support policy right here](/other-resources/others/support-policy).
# Custom properties
Assign and list properties of your items.
We cover in this page **how to use, create and manage custom properties in Rayon.**
### What is a custom property?
Offering **custom properties** is Rayon's way of **allowing users to add data to their drawing**. This information can be added onto **`models`**, **`zones`**, **`walls`**, **`blocks`** (instances and definitions), **`shapes`**, **`layers`**, **`styles`**, and **`pages`**, and later be **retrieved, listed, and formatted in tables.**
In Rayon's editor, **custom properties can be found in the `custom properties` section**, whenever some entities are selected.
### Creating a custom property
Let's start by c**reating a new custom property.** \
With an entity selected, click on the **`Add property`** button. Then, click on the **`+`** button, in the header of the panel. This will allow you to **create a new property** that will be applied to the current selection.
You will now have to specify the **`name`**, **`format`**, **`type`** and **`value`** of the new property you are about to create. The property **`format`** expresses the kind of thing the property documents (a price, a name, a length, etc). In Rayon, available formats are:
* Text
* Length (in model units)
* Area (in model units)
* Volume (in model units)
* Number
* Price (in model units)
* URL
* Boolean
* Image
The **`type`**, then, allows you to choose whether the property should be a...
* Single value
* List of values (category single or multi)
* Formula (a value computed dynamically, based on other properties)
Clicking on **`Save`** will confirm the creation of the property and apply it to the current selected entity(ies).
### Applying custom properties
Any existing custom property, present in the panel, can be **applied to the selection** by simply ticking its checkbox.
### Managing custom properties
At any point, custom properties present in a model can be managed from the left side of the screen. The **`Custom properties`** panel stores all existing properties added by you or other users at any point. From there, custom properties can be...
* Searched
* Created (from the **`New property`** drop down)
* Edited (name and default value(s))
### Inheritance
Another useful feature of custom properties is **inheritance**. In other words, the custom properties carried at one level can be transmitted to a lower level. For instance:
* **`Definition`** → **`Instance`** : A property carried by a block definition will also be carried by its instances.
* **`Style`** → **`Entity`** : A property carried by a style will also be carried by entities carrying that style.
At any point, an inherited property can be overridden; for instance, the value of a property inherited by an instance from its definition can be changed to a different, specific value. The value can then we set back to its initial value, by clicking on the reset icon present on the property value field.
### Tutorial
For more step-by-step information, watch our tutorial about how to use tables and metadata in Rayon.
{% embed url="" %}
***
### We are always available
Book a demo with our team, [right here](https://b1kzip68v9f.typeform.com/to/Hgr0eQ4k#source=docs).\
To get some support, reach out to us through our **in-app support chat**. \
More about [our support policy right here](/other-resources/others/support-policy).
# Presenting your project
How to create a presentation for your project and share it
**We cover in this page how to create a presentation** of your pages that you can share externally to clients or others. The core principle of this feature is that you can create a presentation (think slides for your pages) that will show *all* the pages you have defined inside your project.
### Previewing your presentation
Before publishing your presentation, you may want to check how it will appear for the people you share it with. From inside your project, click the **`Preview`** button at the left of the **`Share`** button.
In the preview screen, your **pages** are displayed on the left side, in the same order as in your **`Pages`** panel. At the bottom of the screen, you find the **navigation** and **publication** options. You can also use the following keyboard shortcuts to get around:
* **`P`** to toggle the page's view
* **`F`** to toggle the full-screen view
* :arrow\_backward: and :arrow\_forward: to navigate between slides
* **`Esc`** to leave the Preview
### Publishing your presentation
Once you are happy with your presentation, you can publish it to make it available externally through a public link. There are two paths to publish a presentation:
* From the **`Publish`** button in the preview screen.
* Through the **`Share`** modal.
From the **preview** **screen**:
* In the bottom toolbar, you will find the **`publish`** button
* Once clicked, your presentation will have a dedicated public URL that can be sent to anyone.
The chevron menu will allow to either **`refresh`** your presentation if it has changed, or **`unpublish`** your work. Once unpublished, your work will not be available to the people who received your link.
Alternatively, the presentation can be published from the **`Share`** modal:
* From the editor, click the **`Share`** button in the top right corner
* In the **`Presentation`** tab, switch the toggle *on* in order to publish your presentation
* The modal will offer you a few options to copy the presentation link, to update the URL, to open the presentation, to unpublish the presentation.
### Viewing the presentation
Once the presentation has been published, you can display it in a new tab from three places:
* **`Present`** button in the editor screen
* **`Present`** button in the preview screen
* **`Open`** button in the **`Share`** menu
This will display the presentation in a new tab exactly as your clients will see it. Note that this presentation environment can be accessed from any type of device (computer, tablet, smartphone).
### Tutorial
For more step-by-step information, watch our tutorial about how to use presentations in Rayon.
{% embed url="" %}
***
### We are always available
Book a demo with our team, [right here](https://b1kzip68v9f.typeform.com/to/Hgr0eQ4k#source=docs).\
To get some support, reach out to us through our **in-app support chat**. \
More about [our support policy right here](/other-resources/others/support-policy).
# Work with AI
Discover Rayon AI in a few simple workflows.
We explain here how **Rayon’s AI feature set** can be used, to what end, and showcase a few well-known workflows.
{% hint style="info" %}
Bear in mind that we are in **`Beta`** phase, meaning that this feature set is still being refined.
{% endhint %}
### Where to find AI in Rayon?
First and foremost, AI can be found in **our toolbar, in the AI tools section.**
Additionally, an AI chat can be located **in the AI panel.** Talk to it to learn how Rayon works. You can also ask specific questions about your model.
### What to do with Rayon AI?
#### Get help/Find content
Get tips and best practices as to how Rayon’s can be used. The panel will offer you some detailed advice, visuals, tutorials, etc to help you get around the software.
**Get help** — The AI panel is the go-to place to find useful advice about Rayon, its feature set and be redirected to useful resources (tutorials, doc, etc)
{% embed url="" %}
**Find content** — Alternatively, let the AI panel help you find blocks, styles, and templates from Rayon’s repositories, and get quick access to all of our resources.
{% embed url="" %}
#### Generate/edit images
All tools can **also be found and used inside our AI panel**. \
We detail here each workflow, performed inside the AI panel.
**Edit images** — This command will allow you to edit an image with a prompt, or target a specific area of that image to edit. Alternatively, this command will enable you to create a new image from scratch.
{% embed url="" %}
**Remove background** — The **`Remove background`** command will subtract any background scene from an image, and replace it with a transparent fill.
{% embed url="" %}
**Generate axonometry** — Submitting screenshot of a floor plan to the **`Generate axonometry`** command will create a 3D axonometric view of that scene.
{% embed url="" %}
**Expand image** — Rayon allows you to expand an existing image. Either without or with a guiding prompt, the **`Expand`** command will recreate an image in continuity with the image you will submit.
{% embed url="" %}
#### **Generate CAD drawings and blocks**
Rayon can also generate geometry, either by tracing an existing image, or by generating CAD blocks, from a text or an image of a product.
**AI tracing** — Rayon allows you to generate the CAD tracing of an existing image. Rayon will simplify the scene/drawing, and apply a wireframe style to it, and generate the 2D tracing of that image.
{% embed url="" %}
**AI product generation** — Rayon allows you to generate the 3 views of a CAD block, starting from a text prompt or the image of product.
{% embed url="" %}
#### **Generate floor plan** (available on `pro` and `team` plan only)
Rayon can also generate vector-based floorplan, using walls, openings and zones, starting form a simple image of a floor plan or even a drawing of one.
{% embed url="" %}
### How do AI credit work?
Rayon gives you access to AI tools, based on a credit system. The amount of credits your have will depend on your plan. Credits come in 2 kinds:
* **`Message credits`**: allow you to chat with the AI panel, either to get some advises/help inside the panel, or simply as you chat with the software to generate assets within the same panel. Message credits allowance are based on your plan.
* **`Generation credits`**: allow you to generate images, blocks, edit image, or else. Generation credits allowance are based on your plan, and reset every week.
Both credit statuses can be found in our **credit menu**, accessible from within the AI panel.
Here is a breakdown of **credits allowances**, based on the user's plan.
| Plan | Message credits (AI panel) | Generation credits (AI toolbar) |
| ------------------------- | -------------------------- | ------------------------------- |
| **`Free`**, **`Student`** | 5 credits | 2 credits per week |
| **`Pro`** | Unlimited credits | 100 credits per week |
| **`Team`** | Unlimited credits | 200 credits per week |
### Jobs
At any point, AI jobs can be found in the **`Jobs`** tab of the AI panel. A Job can be deleted or rerunned from there.
### Feedbacks
Rayon AI is today in `Beta` phase, meaning that, as any new feature set, it still being refined. Any feedback/issues you encounter is more than welcome.
Give your feedback
***
### We are always available
Book a demo with our team, [right here](https://b1kzip68v9f.typeform.com/to/Hgr0eQ4k#source=docs).\
To get some support, reach out to us through our **in-app support chat**. \
More about [our support policy right here](/other-resources/others/support-policy).
# Import/export
Everything about importing/exporting in/from Rayon!
***
### We are always available
Book a demo with our team, [right here](https://b1kzip68v9f.typeform.com/to/Hgr0eQ4k#source=docs).\
To get some support, reach out to us through our **in-app support chat**. \
More about [our support policy right here](/other-resources/others/support-policy).
# DWG/DXF import
All about importing AutoCAD files into Rayon.
Rayon supports almost **all concepts native to the DWG or DXF formats, offering a loss-less import experience**.
### DWG import compatibility
Rayon supports most of AutoCAD's concepts. It is important to understand how each one gets mapped in Rayon. We outline here what each concept translates to in our software...
Geometries
**AutoCAD geometries are today converted into Rayon shapes.** Very little changes happen here. As of now, Rayon supports AutoCAD main geometrical concepts: line, polyline, circle, rectangle, etc.
[More on shapes here.](/documentation/design/shape-tools)
Layers
**Layers are today converted into Rayon layers**. Rayon layers achieve the same function as AutoCAD layers: they store entities. However, 2 things are important to consider:
* **Occlusion** — In Rayon, layer ordering define the scene ordering. IN other words, the order of layers defines which entity comes above which other. In this way, layers control occlusion in Rayon, which is something that is not similar to AutoCAD
* **Styling** — In Rayon, the style of things (shapes, blocks, etc) is not controlled at the layer-level, but at the style-level. Styles in Rayon are distinct from layers, and offer more customization options. When importing in Rayon, our software will...\
(1) translate the layer colour into the colour entities take in wireframe mode, based on their layer.\
(2) translate the viewport colour into a Rayon style.
Annotations
**AutoCAD annotations are today converted into Rayon annotations.** Very little changes happen here. As of now, Rayon supports AutoCAD main annotation concepts: dimensions, leaders, angular dimensions, texts, etc.\
[More on annotations here.](/documentation/design/annotations-dimensions-leaders-text)
Blocks
**AutoCAD blocks are converted into Rayon blocks.** Regular blocks import directly. Dynamic blocks also import: supported parameters and actions are converted, and anything Rayon cannot yet read falls back to a standard block that keeps its original name. Full native dynamic-block support is coming later this year.\
[More on blocks here.](/documentation/design/blocks)
Viewports
**AutoCAD viewports are today converted into Rayon views.** \
[More on views here.](https://docs.rayon.design/documentation/layout-and-present/views)
Layoutspace
**AutoCAD layout spaces are turned into Paper canvases.** \
[More on canvases here.](https://docs.rayon.design/documentation/layout-and-present/canvases)
Xrefs
**AutoCAD Xrefs are today converted into Rayon references.** However, for the time being, Rayon does not support advanced Xrefs features (*etransmit* packages for instance).\
[More on Xref import here.](#importing-xrefs)
Others
There are still a few concepts that Rayon **does not support natively.**
* Advanced Xref features (etransmit)
* *AutoCAD architecture* add-on feature (walls, schedules, etc)
* CTBs
* 3D files
* A few drawing concepts like XCLIP and Ray lines.
### Importing options
{% hint style="info" %}
Please note that DWG/DXF, PDF and image import is capped at 25mo, and that popup blockers need to be disabled for the import to work properly.
{% endhint %}
Import can happen either **from the** **project manager** or **from the editor**.
**From the project manager**, click on **`Import`** in the top right of the screen and **choose a file.**
**From the editor**, you will find the import option in the **`Menu`** in the top left corner of the screen. The following steps to import will then be **similar.**
You will then be offered to toggle **a few import options** (model name, whether to keep empty layers, blocks, etc). Clicking on **`Import`** with take you to the import window.
In the import window, you will be invited to **specify the scale of your drawing**. This will happen in 2 steps...
* First, **draw a line of a known distance.**
* Then, pick the **unit you deem most representative** of the distance you drew. Not that as this step, Rayon will ***only*** ask you for unit, and will not allow you to change the distance specified.
* Press **`Continue`** to complete your import.
The editor will then open. To complete your import, click on the canvas to **`Pick an insertion point`**. **That's it!** Your file is imported In **a new Model.** Please note that if the scale of the resulting import doesn’t look right, you can scale your model after import.
### Importing Xrefs
In Rayon, **Xref files are imported as references**. During the import flow, if your DWG contains some Xref, **an option to import missing Xrefs will appear** in the import bar.
When clicking on **`Open Xref`**, a panel will open, prompting you to **upload missing DWG files**.
For each new DWG you upload, a blue tick will appear to confirm the upload. Once all **Xrefs** have been loaded, you can click on **`continue`** to now scale your model and **`Import`** it to your workspace.
In your model, the **Xrefs** panel will allow you to upload missing references, as well as update them.
### Tutorial
For more step-by-step information, watch our tutorial about how to import in Rayon:
{% embed url="" %}
***
### We are always available
Book a demo with our team, [right here](https://b1kzip68v9f.typeform.com/to/Hgr0eQ4k#source=docs).\
To get some support, reach out to us through our **in-app support chat**. \
More about [our support policy right here](/other-resources/others/support-policy).
# PDF & image import
All about importing files into Rayon.
Rayon supports **high-fidelity import of PDFs and images**, with a scaling step, or without for quick import. We detail here how each import flow works.
### PDF importing options
To **import** **a PDF** file in **Rayon**, start by clicking on **`Import`** in the top right of the project manager and **choose a file**.
Alternatively, you can **`Import`** from the menu within a model.
**In the step that follows, select the pages** you would like to import, and define the formatting for import...\
\
**1.** **Name for model :** Define the name of your model if importing from the project Manager\
**2.** **Toggle `Selection` / `All` pages :** Select specific pages or all of them. \
**3.** **Toggle `Public` / `Private` :** whether your model should be accessible only to you, or to the wider Rayon community. More information on public models [here](/other-resources/others/private-and-public-model-settings-beta).\
**4.** **Toggle `Vector` / `Images` :** When vector is chosen, Rayon will import any editable geometry. If image is chosen, your file will be converted to an image, and you won't be able to edit its geometry. \
**5. Toggle `Single` / `Multiple` :** Single mode will place all selected page on one canvas, at the same scale. Multiple mode will create a new canvas for each selected page, with individual scale.\
**6. Toggle `New` / `Legacy` :** New mode will end up in a much quicker import but will import text as curves.
Once settings are chosen, click **`Import`** to move on to the scaling step.
**At this point, a few options are available to you to set the scale** of your imported drawing, by either choosing **`distance` mode** or **`scale` mode**.
In **`distance` mode,** start by drawing a line between two **known points.** You can move around the model to find and use a familiar element (ex: an existing dimension present on your PDF, or use a common entity, ex: width of a door.)
**At this point,** enter the distance of the **blue line that you drew in the previous step,** and then change the unit to the correct one. Once have chosen both the unit and the value, click on **`continue`**. This will close the current tab and open the PDF in your model.
In **`scale` mode,** you'll be asked to define the scale of your drawing. If you know it, look for it on your PDF. \
In doubt, use the **`distance`** mode.
### Image importing options
Importing images works like PDF importing, without the page selection step. In essence, to import an image in Rayon, you can...
* Click on **`Import`** in the top right of the project manager and **choose a file**. Note that for images, Rayon supports only \*.jpg, \*.png, \*.webp, \*.heic, \*.bmp, \*.gif formats.
* **Set the scale** of your imported drawing, by either choosing **distance mode** or **scale mode**. Then click on **`Continue`**.
**That's it!** Your file is imported In **a new Model.**
**Note that another, simpler way to import images without the scaling step is** to drag and drop multiple images directly from your file explorer to your Rayon model. Also, as for DWGs, images can be imported from within an existing model, by going to the main menu > Import.
Note that Rayon supports importing of images up to 10Mb, and that images larger than 2048x2048 Pixels will be compressed.
### Importing a RY file
To **import** **a RY** in **Rayon**,
* Click on **`Import`** in the top right of the project manager and **choose a file**.
* **That's it!** Your file is imported In **a new Model.**
### Copying from one model to another
To copy entities from one **rayon** model to another,
* Select the entities you wish to copy
* Right click and **`Copy`** or **`Ctrl` + `C`**
* Paste the content in the other Rayon model.
### Tutorial
For more step-by-step information, watch our tutorial about how to use layers in Rayon.
{% embed url="" %}
***
### We are always available
Book a demo with our team, [right here](https://b1kzip68v9f.typeform.com/to/Hgr0eQ4k#source=docs).\
To get some support, reach out to us through our **in-app support chat**. \
More about [our support policy right here](/other-resources/others/support-policy).
# Exporting & printing
As DWG, DXF, PDF, or images
You may **export your model** as **PNG, PDF, DWG, DXF** or **simply send it to your printer.**
### Exporting an image
To **export** your **model** as an **image,**
* Open the **`Pages`** panel.
* Then, click the **`+`** button to **create a new Page.**
* **Select the page frame** on the canvas and resize it to fit your drawing.
* Select **`... > Export > PNG`** in the **Page panel**
* That's it! Your file will is saved in your **Downloads folder.**
{% embed url="" %}
Alternatively, you can export the whole screen as an image through **`Menu > Export > Image`**
To get more **tips** about **pages**, go to the [Pages Documentation](broken://pages/GqwiFLOXYGLYF6DU9Lhb).
### Exporting a PDF file
To **export** your **model** as a **PDF file,**
* Open the **`Pages`** panel.
* Then, click the **`+`** button to **create a new Page.**
* **Select the Page frame** on the canvas and resize it to fit your drawing.
* (Optional) set your **Page** **scale** in the right panel
* Select **`... > Export > PDF`** in the **Page panel**
* That's it! Your file will is saved in your **Downloads folder.**
To get more **tips** about **pages**, go to the [Pages Documentation](broken://pages/GqwiFLOXYGLYF6DU9Lhb).
{% embed url="" %}
### **Exporting a DWG or DXF**
To **export** your **model** as a **DWG** or **DXF file,**
* Click on the **`Menu`** button.
* Hover on **`Export`** and choose select **`DWG`** or **`DXF`**.
* Click on the **`Download`** button that appears on top of the editor**.**
* That's it! Your file will is saved in your **Downloads folder.**
*Note : When exporting to DWG, the colours of the entities will be based on the colour of the layer they are placed on. More about our* [*layers*](/documentation/design/layers)*.*
{% embed url="" %}
{% hint style="info" %}
**Exported file looks empty?** Your model might contain stray elements far from the main drawing. Delete them before exporting. More in our FAQ.
{% endhint %}
## **Printing**
To **print** your **pages** and send them to your printer...
* Open the **`Pages`** panel.
* Then, click the **`export`** button button
* In the export modal that opens, select the **`print`** option
* The browser print interface will show up.
* Choose your paper format and printer and press **`print`**.
{% embed url="" %}
For more step-by-step information, watch our tutorial about how to import & export in Rayon:
{% embed url="" %}
***
### We are always available
Book a demo with our team, [right here](https://b1kzip68v9f.typeform.com/to/Hgr0eQ4k#source=docs).\
To get some support, reach out to us through our **in-app support chat**. \
More about [our support policy right here](/other-resources/others/support-policy).
# Publishing & sharing
Everything about libraries and templates in Rayon.
***
### We are always available
Book a demo with our team, [right here](https://b1kzip68v9f.typeform.com/to/Hgr0eQ4k#source=docs).\
To get some support, reach out to us through our **in-app support chat**. \
More about [our support policy right here](/other-resources/others/support-policy).
# Sharing a model or a workspace
How to share your work with colleagues, clients, etc.
We covered how to **export your work** as **.pdf, .dwg/.dwx** and **.png** in [Exporting models](/documentation/import-export/exporting-and-printing).
Here, we describe how to **share** your models **in Rayon**, so that your coworkers can access them right in their browser.
### Sharing a workspace
By default, new **workspaces** created in a **team** are accessible to **every member of the team**. All the **models** inside these **workspaces** are then accessible as well.
You may want to share a workspace with an external person. To do so, access your **workspace settings**, then enter the email address of the person you would like to share your model with.
People can be invited as **Viewer, Editor** or **Admin**.\
These roles come with certain **rights**, outlined below :
Action
Admin
Editor
Viewer
View
true
true
true
Measure
true
true
true
Comment
true
true
true
Annotate
true
true
true
Edit
true
true
false
Delete
true
false
false
### Sharing a model to a specific person
Click on the **Share** button in the top-right of the editor, then enter the email address of the person you would like to share your model with.
### Sharing a model via a public link
Click on the **Share** button in the top-right of the editor then enter the email address of the person you would like to share your model with.
People will only have access as **Viewer**.
### Tutorial
For more step-by-step information, watch our tutorial about how to work as an organization in Rayon.
{% embed url="" %}
***
### We are always available
Book a demo with our team, [right here](https://b1kzip68v9f.typeform.com/to/Hgr0eQ4k#source=docs).\
To get some support, reach out to us through our **in-app support chat**. \
More about [our support policy right here](/other-resources/others/support-policy).
# Publishing a library
Create your own libraries to share blocks and styles with your teammates!
In Rayon, **both blocks and styles can be curated and published**, to help you maintain consistent standards across drawings. In this page, we go over the steps needed to create libraries.
### Publishing a block library
A block library is **a model containing a collection of blocks** that you can **curate and share with other users**. Let's dive in and see how to create such a library!
* Start from a model where you have **blocks you want to share.**
* In the **`Block`** panel, click on the **`Publish`** button in the panel's header.
Once clicked, the **publication modal** should appear. There, you can choose the blocks you want to share, before hitting the **`Publish`** button, in the footer of the modal. Once published, your blocks become available to you and other users from any model in your current team.
### Publishing a style library
Similarly, a style library is **a model containing a collection of styles** that you can **curate and share with other users**. Let's dive in and see how to create such a library!
* Start from a model where you have **styles you want to share.**
* In the **`Style`** panel, click on the **`Publish`** button in the panel's header.
Once clicked, the **publication modal** should appear. There, you can choose the styles you want to share, before hitting the **`Publish`** button, in the footer of the modal. Once published, your styles become available to you and other users from any model in your current team.
### Tutorial
For more step-by-step information, watch our tutorial about how to create style and block libraries in Rayon.
{% embed url="" %}
***
### We are always available
Book a demo with our team, [right here](https://b1kzip68v9f.typeform.com/to/Hgr0eQ4k#source=docs).\
To get some support, reach out to us through our **in-app support chat**. \
More about [our support policy right here](/other-resources/others/support-policy).
# Publishing a template
How to create and use templates
### What is a template?
A template is a model that will help you kickstart new projects faster. Templates are **available to everyone in your team** and allow you to all work in a standardized way by pre-defining:
* [**Styles**](/documentation/design/styles) (line widths, fonts, hatches, colors, etc.)
* [**Blocks**](/documentation/design/blocks) (furniture and other components typically used across your projects)
* And more!
### How to create a template?
* Start from a **model** that you want to create a **template** from**.**
* Inside that mode, click on the **`Share`** button, in the top-right corner.
* Select the **`Template`** tab and **toggle on`Publish as template`**.
### How to use a template?
To access your published templates, you may browse the list of templates in the **`Templates` section**, in the **project manager**. **Team's** and **personal** templates will be listed there.
Clicking on a template will create a new model of that template.
Another way to quickly access your template, is to head to the template dropdown, next to **`New model`**.
### Tutorial
For more step-by-step information, watch our tutorial about how to create templates in Rayon.
{% embed url="" %}
***
### We are always available
Book a demo with our team, [right here](https://b1kzip68v9f.typeform.com/to/Hgr0eQ4k#source=docs).\
To get some support, reach out to us through our **in-app support chat**. \
More about [our support policy right here](/other-resources/others/support-policy).
# Sharing & notifications
Communicate & collaborate seamlessly.
In Rayon nothing is simpler than **sharing models with your team, and staying up to date with ongoings.** This page introduces the basics for working with your team.
## Comments & annotations
Before sharing a model, you might want to **add comments or annotations** to convey an idea or ask for feedback. The video below shows you how to:
* Sketch a simple **`Annotation (AN)`** onto your model.
* Place a **`Comment (CM)`** on the canvas.
* **Tag members of your team in a comment**, in which case they will receive an email notification.
{% embed url="" %}
### Sharing with a link
Let's now share your work with others. \
Click on the **`Share`** button to **generate a share link** and **`Copy`** it to your clipboard.
{% embed url="" %}
That's it! Now simply send it to a friend.\
People who receive this URL **will** be able to:
* **View** **your plan**, and zoom in and out
* Take **measurements**
* Leave **comments and annotations**
… however, they will not be able to...
* **Edit** your layout
* **Delete** your work
### Sharing with an email
Let's now try to invite a friend to edit your drawing with you.
{% embed url="" %}
People can be invited as **`Viewer`**, **`Editor`** or **`Admin`**. \
These roles come with certain **rights**, outlined below\...
Actions
Admin
Editor
Viewer
View
true
true
true
Measure
true
true
true
Comment
true
true
true
Annotate
true
true
true
Edit
true
true
false
Delete
true
false
false
## Notifications
At any time, you can stay up to date with project activity through the **Notification Center**, available both in the Project Manager and in the Editor.
There, you’ll find user mentions, library updates, model invitations, and other important notifications.
In the Project Manager, the Notification Center is located in the left-hand sidebar.
In the editor, the **notification center can be located inside the left-side bar**, at the bottom
***
### We are always available
Book a demo with our team, [right here](https://b1kzip68v9f.typeform.com/to/Hgr0eQ4k#source=docs).\
To get some support, reach out to us through our **in-app support chat**. \
More about [our support policy right here](/other-resources/others/support-policy).
# Team management & billing
Everything about managing your team, workspaces and billing.
***
### We are always available
Book a demo with our team, [right here](https://b1kzip68v9f.typeform.com/to/Hgr0eQ4k#source=docs).\
To get some support, reach out to us through our **in-app support chat**. \
More about [our support policy right here](/other-resources/others/support-policy).
# Workspaces
Arrange your models into workspaces
A **workspace** is a repository to **store models**, and to be **shared with other users.**\
Workspace can be created in the context of your team. Workspace are of two kinds...
* **Public workspaces:** every member of **the team** will have access to their content.
* **Private workspaces**: only invited members will have access to their content.
To create either type of workspace, head to your team tab, on the left side of the project manager, where you will find your existing team workspaces. \
\
By clicking on the **`+`** icon, **you will be able to create a new workspace.**
A modal will open, allowing you to define the settings of your new workspace. Note that if your workspace is set to **public**, **all members of the team will be able to access its content**. If set to **private**, **only people you invite will.**
At any point, **the settings of a workspace can be accessed from the right side panel.** There, users having access to the workspace can be seen and curated, while general settings (privacy, name, etc) can be changed.
***
### We are always available
Book a demo with our team, [right here](https://b1kzip68v9f.typeform.com/to/Hgr0eQ4k#source=docs).\
To get some support, reach out to us through our **in-app support chat**. \
More about [our support policy right here](/other-resources/others/support-policy).
# Teams
All about working as an team in Rayon
Rayon is great for **designers** that love to **collaborate**.
To that end, **Rayon** offers **teams**: a simple way to share [**workspaces**](/documentation/team-management-and-billing/workspaces), **models**, **templates** and **libraries** while making sure everyone has appropriate access.
### Team setup and access
Setting up a team can be done **at signup**, or later on, **in the project manager context menu**. In either case, Rayon will ask you to set a name for your team and to invite other users.
In project manager
The **curation of users** having access to the team , as well as their **role**, and the **billing** attached to your team can be managed from the team's settings page.
### User roles
When inviting users to an team, it is important to understand their role. \
Members can have **4 types of roles** in an team...
Role
View models
Edit models
Set team settings
Curate team users
Owner
true
true
true
true
Admin
true
true
true
false
Editor
true
true
false
false
Viewer
true
false
false
false
### Billing
Billing in Rayon always happens at the organization level. \
At any time, the team's **owner** may...
* Update their **team's plan (**[Learn more about Rayon's pricing](https://www.rayon.design/pricing))
* Update the **billing address**
* Download **invoices**
***
### We are always available
Book a demo with our team, [right here](https://b1kzip68v9f.typeform.com/to/Hgr0eQ4k#source=docs).\
To get some support, reach out to us through our **in-app support chat**. \
More about [our support policy right here](/other-resources/others/support-policy).
# Pricing & billing
Everything about our paid plans.
Welcome to **Rayon’s pricing guide.** This page explains the different plans, what’s included at each tier, how billing works, and answers common questions.
### Pricing overview
Rayon offers a **free plan** and **two paid plans** (Pro and Team). \
You can choose to pay **monthly** or **yearly** (with a 20% discount for yearly billing).\
You can also pay in **monthly installments** or as a **yearly lump sum** (with 20% discount).
{% tabs %}
{% tab title="In Euro (€)" %}
| Plan | Price (per editor) | Key Features |
| -------- | ------------------------------------------------------------------------------------------------------------ | ------------------------------------------------------------------------------------------------------------------------------------------------------------------------------------------------------------------------------------------------------------------- |
| **Free** | €0 / $0 |
• Unlimited models • Async support • Limited PDF/PNG export • Limited access to Rayon libraries • Limited model history
Everything in Free, plus: • Full PDF & PNG export • Full access to Rayon libraries • Unlimited model history • Personal templates & libraries • Ability to share models
• Async support (same day support) • 100 AI credits per week
Everything in Pro, plus: • Team templates & libraries • Team workspaces • Team-level billing • Live support (under 30 min.) • 200 AI credits per week
|
\*Note: Prices are per editor/account. “Editor” refers to a user who can edit or collaborate on models within your team.
{% endtab %}
{% tab title="In Dollar ($)" %}
| Plan | Price (per editor) | Key Features |
| -------- | ------------------------------------------------------------------------------------------------------------ | ------------------------------------------------------------------------------------------------------------------------------------------------------------------------------------------------------------------------------------------------------------------- |
| **Free** | €0 / $0 |
• Unlimited models • Async support • Limited PDF/PNG export • Limited access to Rayon libraries • Limited model history
Everything in Free, plus: • Full PDF & PNG export • Full access to Rayon libraries • Unlimited model history • Personal templates & libraries • Ability to share models
• Async support (same day support) • 100 AI credits per week
Everything in Pro, plus: • Team templates & libraries • Team workspaces • Team-level billing • Live support (under 30 min.) • 200 AI credits per week
|
\*Note: Prices are per editor/account. “Editor” refers to a user who can edit or collaborate on models within your team.
{% endtab %}
{% endtabs %}
### Billing & payment
* **Monthly vs Yearly**\
You may choose to pay monthly or annually. The yearly option gives a discount compared to paying month to month.
* **Per-editor billing**\
Each paid plan’s cost is tied to the number of editors (users with editing rights). If you add or remove editors, your billing adjusts accordingly.
* **Team billing**\
On the Team plan, billing is centralized—typically handled by a designated account owner or administrator in your team.
* **Upgrading / Downgrading**\
You can upgrade your plan (e.g. from Free → Pro, or Pro → Team) at any time.\
If you downgrade, features from the higher plan may be disabled or limited after your current billing cycle ends.
* **Cancellation**\
You can cancel your paid plan at any time. After cancellation, your account will revert to the Free plan at the end of your billing period (or immediately, depending on your policy). Please note that deleting your Rayon account does not automatically cancel your subscription. You will need to cancel your subscription prior to deleting your account with us.
* **Invoices & Receipts**\
Paid subscribers can get invoices or receipts via the billing dashboard in Stripe. (You may want to specify how and where in your app users access invoices.)
***
### We are always available
Book a demo with our team, [right here](https://b1kzip68v9f.typeform.com/to/Hgr0eQ4k#source=docs).\
To get some support, reach out to us through our **in-app support chat**. \
More about [our support policy right here](/other-resources/others/support-policy).
# Features series
The fundamental to get started with Rayon
{% stepper %}
{% step %}
### Lesson 1
Lorem ipsum dolor sit amet, consectetur adipiscing elit, sed do eiusmod tempor incididunt ut labore et dolore magna aliqua. Ut enim ad minim veniam, quis nostrud exercitation ullamco laboris nisi ut aliquip ex ea commodo consequat.
{% embed url="" %}
{% endstep %}
{% step %}
### Lesson 2
Lorem ipsum dolor sit amet, consectetur adipiscing elit, sed do eiusmod tempor incididunt ut labore et dolore magna aliqua. Ut enim ad minim veniam, quis nostrud exercitation ullamco laboris nisi ut aliquip ex ea commodo consequat.
{% embed url="" %}
{% endstep %}
{% step %}
### Lesson 3
Lorem ipsum dolor sit amet, consectetur adipiscing elit, sed do eiusmod tempor incididunt ut labore et dolore magna aliqua. Ut enim ad minim veniam, quis nostrud exercitation ullamco laboris nisi ut aliquip ex ea commodo consequat.
{% embed url="" %}
{% endstep %}
{% step %}
### Lesson 4
Lorem ipsum dolor sit amet, consectetur adipiscing elit, sed do eiusmod tempor incididunt ut labore et dolore magna aliqua. Ut enim ad minim veniam, quis nostrud exercitation ullamco laboris nisi ut aliquip ex ea commodo consequat.
{% embed url="" %}
{% endstep %}
{% step %}
### Lesson 5
Lorem ipsum dolor sit amet, consectetur adipiscing elit, sed do eiusmod tempor incididunt ut labore et dolore magna aliqua. Ut enim ad minim veniam, quis nostrud exercitation ullamco laboris nisi ut aliquip ex ea commodo consequat.
{% embed url="" %}
{% endstep %}
{% endstepper %}
# Switch
Everything about switching from AutoCAD to Rayon
# Why switch to Rayon?
The essentials for transitioning from your legacy software to Rayon.
{% hint style="info" %}
You’ve just discovered Rayon and are wondering why you should switch from your current software. \
**This page is for you.**
{% endhint %}
### What is Rayon?
**Rayon is the fastest CAD app for designing spaces**, working solo or as a team.
Rayon helps today thousands of companies in **150+ countries**, from the early phase of the design process, all the way to the construction and procurement phases, and beyond.
Rayon is the app for both the **experts** of the built world (architects, interior designers, urbanist, engineer, etc.) and **for all others** (brokers, real estate agents, construction managers, etc.).
{% embed url="" %}
***
### How does Rayon work?
**Let's start by a 20 minute demo**, showing you the essentials of Rayon; feel free to follow along, by creating [a free Rayon account right here.](https://www.rayon.design/app/auth/signup)
{% embed url="" %}
***
### Why do teams switch to Rayon?
Because Rayon brings you **the fastest, most effortless design experience possible.**
{% columns %}
{% column %}
**All-in-one tool**\
From drafting to layout, styling, schedules, collaboration, and sharing, Rayon brings the full workflow into one product so teams do not have to constantly jump between disconnected tools.
{% endcolumn %}
{% column %}
**Content-rich CAD**\
Rayon goes beyond lines and geometry by making it easy to work with visual references, materials, annotations, products, ready-made block and style libraries and project information directly inside the design workflow.
{% endcolumn %}
{% endcolumns %}
{% columns %}
{% column %}
**Multiplayer**\
Rayon is collaborative by default, letting multiple people work on the same project, review changes, and stay aligned in real time without the friction of traditional file-based CAD.
{% endcolumn %}
{% column %}
**AI-inside**\
AI is built directly into Rayon to help users move faster, explore more options, and unlock a more creative, modern way of designing.
{% endcolumn %}
{% endcolumns %}
***
### Who else is switching today?
Rayon is the new way of designing buildings, **chosen by 1000+ organizations across 120 countries.**
Small studios, large real estate groups, construction companies, consultants of the built world: **Rayon’s adopters span across the *****entire***** industry.**
It’s never too early or too late to make the switch. Rayon works today as well in new agencies, kickstarting their practice (Identité, Adrien Dupuy, etc), all the way to established businesses looking to level up their existing workflows (Wojo, Halkin, the Engine, etc).
* **Morning** has **moved their interior design team to Rayon.**
* **Wojo** has **trained their entire sales force on Rayon.**
* **CityHub** saves **€10k/month** by using Rayon for feasibility studies.
Among many others, here are a few of the other companies that recently made the switch...
How Live Light is boosting sales & streamlining shipping with Rayon
***
### **Ready switch?**
Then let's show you how to switch, [click here](/other-resources/switch/how-to-switch-to-rayon).
***
### We are always available
Book a demo with our team, [right here](https://b1kzip68v9f.typeform.com/to/Hgr0eQ4k#source=docs).\
To get some support, reach out to us through our **in-app support chat**. \
More about [our support policy right here](/other-resources/others/support-policy).
# How to switch to Rayon?
The essentials for transitioning from AutoCAD software to Rayon.
{% hint style="info" %}
You just discovered Rayon, and you wonder **how to switch** from your previous software (AutoCAD, VectorWorks, Rhinoceros, etc) to us? \
Then **this page is for you!**
{% endhint %}
### Is switching from AutoCAD to Rayon easy?
**Yes —** Rayon offers full compatibility with the DWG formats and concepts, such that switching to Rayon is **a seamless and lossless process.** Concepts of layers, blocks, styles, XREF, commands, shortcuts etc all translate in Rayon, making the switching cost from AutoCAD painless.
### How does it work?
Here is **a guide to moving your DWGs from AutoCAD to Rayon**, how each concept will translate, and some best practices to follow. In 8 simple steps, you will be able to transfer all your work from one software to the next.
{% stepper %}
{% step %}
### The Basics — Import and setup
In this first step, we are walking you through the steps of importing your DWG file, showing you concept translate from AutoCAD to Rayon.
Concepts like layers, blocks, commands, shortcuts are covered in detail.
{% embed url="" %}
{% endstep %}
{% step %}
### The editing experience
In this tutorial, we dive into the editing experience. We explain how user accustomed familiar with the AutoCAD editing experience will feel at home in Rayon, and how every important concept (commands, shortcuts, blocks, styling, etc) are expressed in our app.
{% embed url="" %}
{% endstep %}
{% step %}
### Exporting, setting up templates, preparing standards
In this last step, we look at exporting, and how Rayon can be used to set up your company standards. By the end of you will be able to export high-fildelity DWG files, PDF prints, create your company templates, share curated libraries of blocks and styles with your colleagues, etc.
{% embed url="" %}
{% endstep %}
{% endstepper %}
### **Ready switch?**
**Ready switch?** Then simply signup today, book a demo with our team, or check our training portal!
***
### We are always available
Book a demo with our team, [right here](https://b1kzip68v9f.typeform.com/to/Hgr0eQ4k#source=docs).\
To get some support, reach out to us through our **in-app support chat**. \
More about [our support policy right here](/other-resources/others/support-policy).
# Product updates
Discover Rayon's new & improved features.
***
### We are always available
Book a demo with our team, [right here](https://b1kzip68v9f.typeform.com/to/Hgr0eQ4k#source=docs).\
To get some support, reach out to us through our **in-app support chat**. \
More about [our support policy right here](/other-resources/others/support-policy).
# August '26 Product Updates
Discover August's new & improved features.
{% hint style="info" %}
August focused on making libraries easier to use, adding videos, improving import and export, and adding more precise drawing and layout controls.
{% endhint %}
**List of August's features...**
* Better library publication
* Video generation and import
* Layer-level styling
* Smaller things
For a more in-depth look at Rayon's features → check our [documentation](https://docs.rayon.design/documentation/rayon-documentation).
***
### Better library publication
Publishing, editing, and accessing libraries across teams have been improved. Access now exists from the left side panels, and offers partial publication.\
More about libraries [in our documentation.](/documentation/publishing-and-sharing/publishing-a-library)
### Video generation & import on canvas
Videos can now be generated or imported directly onto the canvas and played in place. This makes it possible to create richer, more dynamic and engaging presentations.
### Layer-level styling
From now on, style values can be set at the layer-level, to then be inherited within the style of entities. Among other things, this allows a more seamless import experience of DWG files.\
More about import [in our documentation.](/documentation/import-export)
### Smaller things
* PDF proportions and distorted images have been improved, together with CAD xref scaling and context-menu selection.
* Nested text overrides, text editing, and layer renaming have received several fixes.
* Workspace invitations, multi-currency upgrades, personal-space plans, and search and filtering access have also been improved.
***
### We are always available
Book a demo with our team, [right here](https://b1kzip68v9f.typeform.com/to/Hgr0eQ4k#source=docs).\
To get some support, reach out to us through our **in-app support chat**. \
More about [our support policy right here](/other-resources/others/support-policy).
# July '26 Product Updates
Discover July's new & improved features.
{% hint style="info" %}
July focused on improving presentation sharing, simplifying navigation and page organization, and expanding editing capabilities with layer opacity and new controls for parametric blocks.
{% endhint %}
**List of July's features...**
* Opacity support on layers
* New minimap navigation
* New page number command
* Flip, move and rotate for parametric blocks
* Better presentation sharing
For a more in-depth look at Rayon's features → check our [documentation](https://docs.rayon.design/documentation/rayon-documentation).
***
### Layer opacity
Layers now support opacity controls, allowing you to fine-tune the visibility of their content.\
Learn more about [layers](/documentation/design/layers) in our documentation.
### New minimap navigation
A new minimap makes it easier to navigate large models by displaying a simplified overview of the content on your canvas.\
Learn more about [canvases](/documentation/layout-and-present/canvases) in our documentation.
### New page number command
Rayon now includes a page number command, allowing you to add clean, consistent numbering to the bottom-right corner of any page.\
Learn more about [commands](/documentation/rayons-basics/navigation-and-command-access#h_a43d0d86b4) in our documentation.
### Flip, move, and rotate parameters for parametric blocks
Parametric blocks now support three additional parameters: **flip**, **move**, and **rotate**. This improves compatibility with AutoCAD blocks that use these parameters and makes it possible to create more flexible, fully parametric blocks in Rayon.\
Learn more about [blocks](/documentation/design/blocks) in our documentation.
### Better presentation sharing
Presentations are now easier to share with clients and collaborators. Shared links now generate richer preview cards and can open directly on a specific presentation page.\
Learn more about [presentations](/documentation/layout-and-present/presenting-your-project) in our documentation.
### Smaller things
* Fillet, Chamfer, Trim, Extend now support direct segment selection. No need to pre-select entities before launching the command
* Extend command now works correctly. The cursor position determines which side extends, and active selections limit the geometry used
* Chamfer now accepts 0 as a value, producing a clean right angle
* The bounding box no longer shows during a command's selection step
* The cursor now reflects whether you're adding or removing from the selection
* Path edit mode no longer exits unexpectedly after moving control points
* DWG import/export improved for clipped blocks, associative dimensions, leader arrow types and patterns, dimension orientation, layout scale, zone hatches, and textures.
***
### We are always available
Book a demo with our team, [right here](https://b1kzip68v9f.typeform.com/to/Hgr0eQ4k#source=docs).\
To get some support, reach out to us through our **in-app support chat**. \
More about [our support policy right here](/other-resources/others/support-policy).
# June '26 Product Updates
Discover June's new & improved features.
{% hint style="info" %}
We took some time in June's to add some much needed quality-of-life features: 3-point rectangle, openings in free walls, measure in view, etc.
{% endhint %}
**List of June's features...**
* Rectangle command 3-point mode
* Openings in free walls
* Measure in view
* Other improvements
For a more in-depth look at Rayon's features → check our [documentation](https://docs.rayon.design/documentation/rayon-documentation).
***
### Rectangle command 3-point mode
Rectangles can now be drawn using three points: two points define the width and orientation, while a third defines the height. More about shapes in our [documentation](/documentation/design/shape-tools).
### Openings in free walls
Openings can now be inserted into free walls. Once placed, they can be rotated freely to match the wall’s orientation. More about the walls in our [documentation](/documentation/design/elements-walls-zones-openings-etc).
### Measure in views
You can now measure the actual dimensions of the space represented within a view.\
More about views in our [documentation](/documentation/layout-and-present/views).
### Other features
**Inscribed and circumscribed polygons**\
The Polygon tool now includes options for creating inscribed or circumscribed polygons.
**Import DWG in place**\
DWG files can now be imported while preserving their original coordinates.
**Filter tables by layer**\
Layers can now be displayed as a field in tables and used as a filtering criterion.
**Explode views**\
Views can now be exploded, giving you direct access to the entities they contain.
***
### We are always available
Book a demo with our team, [right here](https://b1kzip68v9f.typeform.com/to/Hgr0eQ4k#source=docs).\
To get some support, reach out to us through our **in-app support chat**. \
More about [our support policy right here](/other-resources/others/support-policy).
# May '26 Product Updates
Discover May's new & improved features.
{% hint style="info" %}
We took some time in May's to add some much needed quality-of-life features: new project manager logic, copy/paste from spreasheets, page auto-ordering, etc.
{% endhint %}
**List of May's features...**
* New project manager
* Copy & paste to and from spreadsheets
* Page auto-ordering
* DWG layouts import/export
For a more in-depth look at Rayon's features → check our [documentation](https://docs.rayon.design/documentation/rayon-documentation).
***
### New project manager
Our project manager has been reworked this month, to introduce a clearer notion of Team, while we sunset the concept of organization. Moving forward, team and personal settings can be found in the context menu of the project manager. \
More about teams in our [documentation](/documentation/team-management-and-billing/teams).
### Copy & paste to and from spreadsheets
A nice new addition of this month is the ability to copy and paste to and from a streadsheet, into Rayon. A couple of cells pasted from Excel will be translated as a ready-made table, on canvas.\
More about the tables bar in our [documentation](/documentation/layout-and-present/tables).
### Page auto-ordering
Moving forward, pages will be ordered based on their on-canvas position. This option will allow you to have a more transparent ordering of pages, while being able to opt-out of this option if need be.\
More about pages in our [documentation](/documentation/layout-and-present/pages).
### DWG layouts import/export
DWG has been improved a lot this month. From now on, DWG layout spaces can be imported in Rayon, and paper canvases can be exported as DWG layouts.
More about import/export in our [documentation](/documentation/import-export/dwg-dxf-import).
***
### We are always available
Book a demo with our team, [right here](https://b1kzip68v9f.typeform.com/to/Hgr0eQ4k#source=docs).\
To get some support, reach out to us through our **in-app support chat**. \
More about [our support policy right here](/other-resources/others/support-policy).
# April '26 Product Updates
Discover April's new & improved features.
{% hint style="info" %}
We took some time in April's to add some much needed quality-of-life features: table sync, more options in command bar, avatars, etc.
{% endhint %}
**List of April's features...**
* New table sync and filters
* In-app avatars
* More options in command bar
* New visibility parameter in parametric blocks
For a more in-depth look at Rayon's features → check our [documentation](https://docs.rayon.design/documentation/rayon-documentation).
***
### New table sync and filters
From now on, tables can be synced with source, present in the table panel. This way, you can choose to update your table on canvas with the latest information displayed in the table panel. Additionally, table filters are now accessible directly in the table header.\
More about tables in our [documentation](/documentation/layout-and-present/tables).
### Avatars
Both users and organization can have a dedicated avart in-app. Both can set from the settings page of the project manager.
### More options in command bar
We have widened the scope of the toolbar, to surface much more options. Actions like aligning, copying etc, can be found through the command bar, for a quicker access.
More about the command bar in our [documentation](/documentation/rayons-basics/navigation-and-command-access).
### New visibility parameter
We shipped this month the visibility parameter, allowing you to toggle things on and off within a parametric block. More on parametric block in our [documentation](/documentation/design/parametric-blocks).
***
### We are always available
Book a demo with our team, [right here](https://b1kzip68v9f.typeform.com/to/Hgr0eQ4k#source=docs).\
To get some support, reach out to us through our **in-app support chat**. \
More about [our support policy right here](/other-resources/others/support-policy).
# March '26 Product Updates
Discover March's new & improved features.
{% hint style="info" %}
We took some time in March's to add some much needed quality-of-life features: new AI toolbar, associative dimensions, region filters, and more!
{% endhint %}
**List of March's features...**
* New AI toolbar
* Associative dimensions
* New **`Edit`** mode on views
* Region filtering in tables
For a more in-depth look at Rayon's features → check our [documentation](https://docs.rayon.design/documentation/rayon-documentation).
***
### New AI toolbar
From now on, the AI tools can be found in the toolbar, to be used directly on the canvas. \
More about Rayon AI tools in our [documentation](/documentation/rayons-basics/navigation-and-command-access).
### Associative dimensions
Dimensions can now be sticky, and follow objects they snap to. \
More about our associative dimensions line in our [documentation](/documentation/rayons-basics/navigation-and-command-access).
### New edit mode on views
Adjusting scale and pan inside views can be done from now on from within the **`Edit`** mode of views. More on views in our [documentation](/documentation/design/editing-tools).
### Region filtering
Tables can now be filtered based on a drawn region, that can be defined by the user direclty on the canvas. More on tables in our [documentation](/documentation/design/editing-tools).
***
### We are always available
Book a demo with our team, [right here](https://b1kzip68v9f.typeform.com/to/Hgr0eQ4k#source=docs).\
To get some support, reach out to us through our **in-app support chat**. \
More about [our support policy right here](/other-resources/others/support-policy).
# February '26 Product Updates
Discover February's new & improved features.
{% hint style="info" %}
We took some time in February to add some much needed quality-of-life features: polar array, text overrides, and more.
{% endhint %}
**List of February's features...**
* New command argument input logic
* New polar array command
* New text override option
* Smaller things
* New templates
For a more in-depth look at Rayon's features → check our [documentation](https://docs.rayon.design/documentation/rayon-documentation).
***
### New command argument input logic
We reworked the command argument UX, to clarify its behavior. From now on:
* **`Enter`** to validate
* **`Tab`** to validate and cycle through argument values
* **`Arrow up`** to recall previous values
More about our command line in our [documentation](/documentation/rayons-basics/navigation-and-command-access).
### Polar array
We shipped a new polar array command, that comes with 2 modes, **`Fill`** and **`Angle`** and rotation option.
More on commands in our [documentation](/documentation/design/editing-tools).
{% embed url="" %}
### Text overrides
From now on, texts contained in views and blocks can be overridden, the same way styles, and visibility can. This will allow you to easily change texts without having to detach a block, or change the text at the view source.
More about blocks and views in our [documentation](/documentation/layout-and-present/tables).
### Smaller things
Every month, the team ships many tiny additions and fixes. We are introducing a new section to our product update, that will list from now on all these tiny improvements.
* Property panel speed improvement when large number of entities selected
* Added support for group clipping paths
* Views clipping path visibility added on canvas (with a toggle to turn on/off)
* Allowing column reordering in tables
* Name column can be removed in Tables (no longer needed as first column
* DWG import improvements (optimized styles, support for DWT)
* DWG export wall fix
### February's templates
Everything we shipped this month, and available today in the app...
* [Ranch House Drawing Set Template](https://www.rayon.design/app/model/46b6845e-fc50-4ac6-bd5b-124c7dfa74b3?canvas=Sz43beqKXu1\&scale=0.31\&x=318998\&y=-151411\&token=rayon-template)
* [FF\&E Specification Template](https://www.rayon.design/app/model/929fe531-11cd-4d39-87ce-92ef2a13e27a?canvas=SGoud21HoK4\&scale=0.89\&x=1550\&y=-52684\&token=rayon-template)
* [Construction Detail Template](https://www.rayon.design/app/model/da140bf8-6da4-4cb4-9388-e7ed7751fe33?canvas=QuGcA0HV2V1\&scale=3.75\&x=28761\&y=-115031\&token=rayon-template)
* [Handrail Design Details Template](https://www.rayon.design/app/model/3bcf42a9-4121-472e-81eb-ea951fa64670?canvas=84floVBGXK1\&scale=0.82\&x=30294\&y=-117524\&token=rayon-template)
* [Skirting Design Details Template](https://www.rayon.design/app/model/9dbe580a-5c68-4008-9c5f-834789f1aa21?canvas=84floVBGXK1\&scale=0.72\&x=30452\&y=-116046\&token=rayon-template)
* [Lighting Details Template](https://www.rayon.design/app/model/570d1d48-3d1c-4859-bf2d-f54549eedfbb?canvas=QpwHD1yAfm1\&scale=0.27\&x=29093\&y=-117889\&token=rayon-template)
* [Millwork Handle Pull Details Template](https://www.rayon.design/app/model/b6d34508-9b0e-4c2c-8882-24935cb245c6?canvas=QuGJ4zoc2p1\&scale=0.27\&x=29126\&y=-118660\&token=rayon-template)
* [Washing Machine Plumbing Details](https://www.rayon.design/app/model/87d760bf-e309-4a35-9a5c-ae16704b090d?canvas=R1kFyGRS031\&scale=0.36\&x=2112\&y=-9957\&token=rayon-template)
* [Wall-Mounted Toilet Plumbing Details](https://www.rayon.design/app/model/c9397a42-cd7a-4da1-ad07-0525d6fc7605?canvas=RFRbRMdsh11\&scale=0.16\&x=1979\&y=-9876\&token=rayon-template)
* [Countertop Sink Plumbing Details](https://www.rayon.design/app/model/6e326b7a-c667-4e9c-adc1-2f77766c846c?canvas=9PS9bGoSvM11\&scale=0.38\&x=2756\&y=-9932\&token=rayon-template)
* [Standing Sink Plumbing Details](https://www.rayon.design/app/model/fe3975f5-4c10-4d3f-95e6-7ff2741f7272?canvas=RZdcjFt73G1\&scale=0.27\&x=2205\&y=-9863\&token=rayon-template)
***
### We are always available
Book a demo with our team, [right here](https://b1kzip68v9f.typeform.com/to/Hgr0eQ4k#source=docs).\
To get some support, reach out to us through our **in-app support chat**. \
More about [our support policy right here](/other-resources/others/support-policy).
# January '26 Product Updates
Discover January's new & improved features.
{% hint style="info" %}
We took some time in January to add some much needed quality-of-life features: reset overrides option, merge cells in tables, etc.
{% endhint %}
**List of January's features...**
* New **`reset override`** option
* New **`Merge cell`** option
* New AI credits logic
* New templates
For a more in-depth look at Rayon's features → check our [documentation](https://docs.rayon.design/documentation/rayon-documentation).
***
### Reset override option
It is now much simpler to remove overrides applied to views and blocks; simply head to the right click options, and **`reset override`** in a single click.
More about overrides in our [documentation](/documentation/layout-and-present/views).
### Merge cell
Tables now allow to merge cells together. You can select a 2 cells, and choose **`Merge cells`** in the right click options.
More on tables in our [documentation](/documentation/work-with-ai).
### AI credits logic
We added **credits to our AI panel** this month, in a effort to clarify our pricing strategy. Free and student plans will have some credits to try out our AI features, while Pro plan and Team will have a large allowance, to be able to work extensively with this feature set.
More about AI in our [documentation](/documentation/layout-and-present/tables).
### January's templates
Everything we shipped this month, and available today in the app...
* [Cafe Drawing Set Template](https://www.rayon.design/app/model/4156dc57-fcca-4bf2-b6dd-c0fe06b5c957?canvas=SSrMFkkCld5025\&scale=0.86\&x=-447\&y=-30\&token=rayon-template)
* [Wall-mounted shower plumbing details](https://www.rayon.design/app/model/d2ebe065-4b6d-483f-b2be-50fe804f72bf?canvas=9PS9bGoSvM11\&scale=0.38\&x=2316\&y=-10272\&token=rayon-template)
* [Bathtub plumbing details](https://www.rayon.design/app/model/ff8e1d0a-2fcc-4b1f-82a8-319e24bcb4d6?canvas=9PS9bGoSvM11\&scale=0.38\&x=2165\&y=-10188\&token=rayon-template)
* [Ceiling rain shower plumbing details](https://www.rayon.design/app/model/69fe4a1a-229f-45f1-b25d-1eaf1c38deea?canvas=9PS9bGoSvM11\&scale=0.38\&x=2316\&y=-10593\&token=rayon-template)
* [Standing toilet plumbing details](https://www.rayon.design/app/model/9227f6a2-b8e5-44ae-8cc3-0740d1df7151?canvas=9E0kQAtl7E3\&scale=0.27\&x=2136\&y=-1213\&token=rayon-template)
* [Dishwasher plumbing details](https://www.rayon.design/app/model/a9452b69-9d86-4fd9-abb0-b7d926b2aeea?canvas=9PS9bGoSvM11\&scale=0.27\&x=2790\&y=-10341\&token=rayon-template)
* [Washing machine plumbing details](https://www.rayon.design/app/model/87d760bf-e309-4a35-9a5c-ae16704b090d?canvas=9PS9bGoSvM11\&scale=0.27\&x=2967\&y=-9957\&token=rayon-template)
***
### We are always available
Book a demo with our team, [right here](https://b1kzip68v9f.typeform.com/to/Hgr0eQ4k#source=docs).\
To get some support, reach out to us through our **in-app support chat**. \
More about [our support policy right here](/other-resources/others/support-policy).
# November '25 Product Updates
Discover November's new & improved features.
{% hint style="info" %}
We took some time in November to add some key new features: the addition of parametric blocks, our new AI panel, the improvement of tables, etc.
{% endhint %}
**List of November's features...**
* Parametric blocks
* AI panel
* Updates to tables
* New templates
For a more in-depth look at Rayon's features → check our [documentation](https://docs.rayon.design/documentation/rayon-documentation).
***
### Parametric blocks
A long-awaited feature set has finally shipped: parametric blocks. These allow supporting ACAD dynamic blocks at import, and more generally allow you to create blocks that can be modified through custom grips and handles.
More about parametric blocks in our [documentation](/documentation/design/parametric-blocks).
{% embed url="" %}
### AI panel
Rayon finally offers a panel to work with state-of-the-art AI models, and generate images, blocks, or simply get some help using our software.
More on Rayon AI in our [documentation](/documentation/work-with-ai).
### Updates to tables
Tables now support computed properties (also called **`formulas`**), images, blocks previews, etc. A table can also from now on be traced while using an existing **table as a source**.
More about tables in our [documentation](/documentation/layout-and-present/tables).
### Table & properties improvements
Tables and custom properties have been significantly improved this month too.
Among many things, we added:
* Support for image properties
* Support for block previews in inserted tables
* New multi-category property
More about tables and properties in our [documentation](/documentation/layout-and-present/tables).
### November templates
Everything we shipped this month, and available today in the app...
* [Neighborhood park landscape template](https://www.rayon.design/app/model/e8e932ae-2a40-4306-8727-0264f2b7ea42?canvas=FlrPNxgwav37\&scale=1.81\&x=249597\&y=-231792\&token=rayon-template)
* [Warehouse Construction Site](https://www.rayon.design/app/model/34e40974-b2ae-403d-aee3-cefb8776de45?canvas=KZnq9S1l2x1\&scale=0.53\&x=85401\&y=-263066\&token=rayon-template)
* [Villa Construction Site](https://www.rayon.design/app/model/133c3bf9-523b-45b1-ac4e-ac7e44de6b26?canvas=KZhemFDS19205\&scale=0.53\&x=-115615\&y=-175487\&token=rayon-template)
* [Gym & Fitness Center](https://www.rayon.design/app/model/c14761f7-506d-4287-95f5-9ff2a95b2a73?canvas=KaMXtNmwKS1\&scale=1.44\&x=-41052\&y=-24589\&token=rayon-template)
* [Sport Center](https://www.rayon.design/app/model/d83a6940-f223-4e2b-aec9-732c1a6c1333?canvas=KaMXtNmwKS1\&scale=1.41\&x=-41053\&y=-24601\&token=rayon-template)
* [Office lighting plan](https://www.rayon.design/app/model/af4212b1-0688-4175-93cc-27126a8a94d7?canvas=JrggZCRjbH3\&scale=2.1\&x=-421\&y=3533\&token=rayon-template)
* [1-2 People Restaurant Seating Template](https://www.rayon.design/app/model/e7f582f5-939b-4278-9c87-1618a84c7666?canvas=JZ2nncwou63\&scale=0.78\&x=-41971\&y=31601\&token=rayon-template)
* [2-4 People Restaurant Booth Template](https://www.rayon.design/app/model/91eec2cb-e791-4d7d-8b91-12c828672a6d?canvas=JZ2nncwou63\&scale=0.81\&x=-3046\&y=595\&token=rayon-template)
* [6-8 People Restaurant Booth Template](https://www.rayon.design/app/model/617ca0b5-d75d-477d-b07a-40604210e9aa?canvas=JZ2nncwou63\&scale=1.08\&x=6773\&y=2661\&token=rayon-template)
* [Round Restaurant Booth Seating Template](https://www.rayon.design/app/model/8b9f387a-1247-4ab5-b79a-770fd7b3883c?canvas=JZ2nncwou63\&scale=0.79\&x=45851\&y=-1433\&token=rayon-template)
***
### We are always available
Book a demo with our team, [right here](https://b1kzip68v9f.typeform.com/to/Hgr0eQ4k#source=docs).\
To get some support, reach out to us through our **in-app support chat**. \
More about [our support policy right here](/other-resources/others/support-policy).
# October '25 Product Updates
Discover October's new & improved features.
{% hint style="info" %}
We took some time in October to add some key new features: divide command, angular dimensions, improved table faetures, etc.
{% endhint %}
**List of October's features...**
* Angular dimensions
* Reference panel
* Divide command
* List in texts
* Table & properties improvements
* New blocks & templates
For a more in-depth look at Rayon's features → check our [documentation](https://docs.rayon.design/documentation/rayon-documentation).
***
### Angular dimensions
A long-awaited command has been the angular dimension. We shipped this month a first version of this command, that allows dimensioning freestanding arcs.
More about angular dimensions in our [documentation](/documentation/design/annotations-dimensions-leaders-text).
{% embed url="" %}
### Reference panel
A new major addition is the support of AutoCAD XREF in Rayon. From now on, XREFs will be loaded at import, and will be accessible in the editor from the reference panel.
More on references and XREFs in our [documentation](https://docs.rayon.design/documentation/import-export/dwg-dxf-import#importing-xrefs).
### Divide command
One major addition to the set of editing commands is the new divide command we added in October. Shapes and walls can now be divided easily with this new tool.
More about commands in our [documentation](/documentation/design/editing-tools).
{% embed url="" %}
### List in texts
From now on, lists can be added into text inputs, as **`number`** or **`bullet`** lists.
More about texts in our [documentation](/documentation/design/text).
### Table & properties improvements
Tables and custom properties have been significantly improved this month too.
Among many things, we added:
* Support for image properties
* Support for block previews in inserted tables
* New multi-category property
More about tables and properties in our [documentation](/documentation/layout-and-present/tables).
### October libraries & templates
Everything we shipped this month, and available today in the app...
**Blocks**
* Hospitality accessories (63 blocks)
**Templates**
* [Architectural Proposal & Portfolio](https://www.rayon.design/app/model/fb9e4f62-a162-4488-8f98-4c93b5020334?canvas=EwDduy7mmh3\&scale=1.21\&x=2393\&y=-387\&token=rayon-template)
* [Kitchen Design Proposal | Horizontal](https://www.rayon.design/app/model/a79ae7f3-7036-45ef-b84f-70c5ab9b4598?token=rayon-template\&utm_source=assets-templates\&utm_medium=content\&utm_content=a79ae7f3-7036-45ef-b84f-70c5ab9b4598)
* [Kitchen Design Proposal | Vertical](https://www.rayon.design/app/model/a47bc619-bd7f-4d72-9b95-d62b137af4c3?token=rayon-template\&utm_source=assets-templates\&utm_medium=content\&utm_content=a47bc619-bd7f-4d72-9b95-d62b137af4c3)
* [Apartment Design Presentation | Horizontal](https://www.rayon.design/app/model/c61ac4d7-de6b-4e5d-8223-36d2a9b8a762?token=rayon-template\&utm_source=assets-templates\&utm_medium=content\&utm_content=c61ac4d7-de6b-4e5d-8223-36d2a9b8a762)
* [Apartment Design Presentation | Vertical](https://www.rayon.design/app/model/84fdecff-6aba-4025-86a1-7a97823971ad?token=rayon-template\&utm_source=assets-templates\&utm_medium=content\&utm_content=84fdecff-6aba-4025-86a1-7a97823971ad)
* [Private Home Landscape Template](https://www.rayon.design/app/model/163f5ff5-072e-4d37-8832-bbfd9b98ffc3?token=rayon-template\&utm_source=assets-templates\&utm_medium=content\&utm_content=163f5ff5-072e-4d37-8832-bbfd9b98ffc3)
* [Shopping Centre Landscape Template](https://www.rayon.design/app/model/c1e6753a-d7d5-46e2-bae9-85a3e4130fbd?token=rayon-template\&utm_source=assets-templates\&utm_medium=content\&utm_content=c1e6753a-d7d5-46e2-bae9-85a3e4130fbd)
* [Standing toilet plumbing details](https://www.rayon.design/app/model/5570c21a-9679-4100-800a-c2faa561acdf?token=rayon-template\&utm_source=assets-templates\&utm_medium=content\&utm_content=5570c21a-9679-4100-800a-c2faa561acdf)
* [Wall-mounted toilet plumbing details](https://www.rayon.design/app/model/03aeec95-118f-499c-8831-7b8b6c98fb2c?token=rayon-template\&utm_source=assets-templates\&utm_medium=content\&utm_content=03aeec95-118f-499c-8831-7b8b6c98fb2c)
* [Washing machine plumbing details](https://www.rayon.design/app/model/08e7850a-a812-479b-ad6b-9ade51f45b84?token=rayon-template\&utm_source=assets-templates\&utm_medium=content\&utm_content=08e7850a-a812-479b-ad6b-9ade51f45b84)
* [Dishwasher plumbing details](https://www.rayon.design/app/model/5541f764-02d6-4818-ac2b-d666f1e902ff?token=rayon-template\&utm_source=assets-templates\&utm_medium=content\&utm_content=5541f764-02d6-4818-ac2b-d666f1e902ff)
* [Standing sink plumbing details](https://www.rayon.design/app/model/4bd6c7c1-96fd-4060-aad9-36317ba6399f?token=rayon-template\&utm_source=assets-templates\&utm_medium=content\&utm_content=4bd6c7c1-96fd-4060-aad9-36317ba6399f)
* [Countertop sink plumbing details](https://www.rayon.design/app/model/d15b7041-70ee-4899-90ae-a159b407560f?token=rayon-template\&utm_source=assets-templates\&utm_medium=content\&utm_content=d15b7041-70ee-4899-90ae-a159b407560f)
***
### We are always available
Book a demo with our team, [right here](https://b1kzip68v9f.typeform.com/to/Hgr0eQ4k#source=docs).\
To get some support, reach out to us through our **in-app support chat**. \
More about [our support policy right here](/other-resources/others/support-policy).
# September '25 Product Updates
Discover September's new & improved features.
{% hint style="info" %}
We took some time in September to add some key new features: filtering options, revision cloud tool, inserted tables, and much ore!
{% endhint %}
**List of September's features...**
* Filtering options for libraries
* Revision cloud tool
* Inserted tables
* Academia plan for students
* New templates, new libraries
For a more in-depth look at Rayon's features → check our [documentation](https://docs.rayon.design/documentation/rayon-documentation).
***
## Filtering options for libraries
One key addition of this month is the **ability for users to filter the content of block libraries**. A new filter option allows using blocks properties to display assets based on their size, name, price, standard, etc. At the same, a block/library toggle was introduced, to offer a simpler way to decide whether to search blocks or libraries.
More about filtering in our [documentation](https://docs.rayon.design/documentation/design/blocks#using-the-block-panel).
## Revision cloud tool
Rayon is now offering the **ability for texts to be styled** using italic, bold, and underline. At the same time, we introduced this month the **ability of adding hyperlinks on texts**, to facilitate external redirections.
## Inserted tables
A major addition of this month is the **ability for users to insert tables on the canvas directly**. This new table object can be resized, formatted and manually edited to represent any data. We also added the option to expand tables into full-screen mode, for a smoother browsing experience.
More on tables in our [documentation](broken://pages/aaX3paETQpqlJ2wDz4RU).
## Academia plan for students
We rolled out this the option for universities to gather their students in shared organizations. Our team is opening new school organizations every day. Feel free to reach out to us if you think your university/school could also benefit from a similar set-up.
More on tables in our [documentation](/other-resources/rayon-for-studying).
## September libraries & templates
Everything we shipped this month, and available today in the app...
**Blocks**
* Hospitality blocks (303)
**Templates**
* [Vertical FF\&E Schedule & Project Specification Template](https://www.rayon.design/assets/templates/vertical-ffande-schedule-and-project-specification-template--60b50c59-393a-4968-859d-6a20c9c8507d)
* [Residential construction plan](https://www.rayon.design/assets/templates/residential-construction-plan--95f656ad-af4b-4033-83b7-8f4d2ae937ed)
* [Shopping center construction plan](https://www.rayon.design/assets/templates/shopping-center-construction-plan--3812836d-0313-46ee-b1ba-5a3fff20c8b2)
* [Skirting details template](https://www.rayon.design/assets/templates/skirting-details-template--58f4e51e-90a1-43fe-b154-86de698e25f7)
* [Handrail details template](https://www.rayon.design/assets/templates/handrail-details-template--7fca3de3-f728-48af-9cdf-8b1a1827b491)
* [Lighting details template](https://www.rayon.design/assets/templates/lighting-details-template--570d1d48-3d1c-4859-bf2d-f54549eedfbb)
* [Millwork handle pull details template](https://www.rayon.design/assets/templates/millwork-handle-pull-details-template--034e4240-3d28-46b5-9fc4-971ddef8b3b2)
* [Bathtub plumbing details](https://www.rayon.design/assets/templates/bathtub-plumbing-details--a4770dd2-3b99-4e27-88f3-614924fad60b)
* [Wall-mounted shower plumbing details](https://www.rayon.design/assets/templates/wall-mounted-shower-plumbing-details--56e4715f-c367-418e-958b-2cad2214861b)
* [Ceiling rain shower plumbing details](https://www.rayon.design/assets/templates/ceiling-rain-shower-plumbing-details--af3b8c72-5dbf-4270-9460-146039cb4472)
* [Kitchen design presentation template | Vertical](https://www.rayon.design/assets/templates/kitchen-design-presentation-template-or-vertical--caf70fec-2d1f-4573-aad0-c7f2a49d8320)
* [Kitchen design presentation template | Horizontal](https://www.rayon.design/assets/templates/kitchen-design-presentation-template-or-horizontal--d4228516-6e05-4131-91e3-d8af03b0d5e4)
***
### We are always available
Book a demo with our team, [right here](https://b1kzip68v9f.typeform.com/to/Hgr0eQ4k#source=docs).\
To get some support, reach out to us through our **in-app support chat**. \
More about [our support policy right here](/other-resources/others/support-policy).
# August '25 Product Updates
Discover August's new & improved features.
{% hint style="info" %}
We took some time in August to add some key new features: new command line search for blocks, hyperlinks, XREF import, and more!
{% endhint %}
**List of August's features...**
* New command line search for blocks
* Hyperlinks, Bold and Italic
* Block definition in tables
* Import compatibility for XREF and layout space
* New templates, new libraries
For a more in-depth look at Rayon's features → check our [documentation](https://docs.rayon.design/documentation/rayon-documentation).
***
## New command line search for blocks
One key addition of this month is the ability of browsing blocks through the command line. By switching to the new Block tab in the bar, blocks contained across external libraries can be browsed and imported inside models.
More on the command line in our [documentation](broken://pages/W2B3FjgsM6E2SSQBMv5m).
## Hyperlinks, Bold and Italic
Rayon is now offering the **ability for texts to be styled** using italic, bold, and underline. At the same time, we introduced this month the **ability of adding hyperlinks on texts**, to facilitate external redirections.
## Block definition in tables
From now on, block definitions can be added to tables. This way, users can easily list unique blocks contained in their models, their properties, as well as their count.
More on tables in our [documentation](broken://pages/aaX3paETQpqlJ2wDz4RU).
## Import compatibility for XREF and layout space
We added the **ability for XREF to be imported**, allowing to open external references contained in imported DWGs. At the same time, we added the **ability for layout spaces of DWG files to be imported** in Rayon. These features are today in their initial stage, and further improvements will be added soon to broaden their scope.
More on import in our [documentation](/documentation/import-export/dwg-dxf-import).
## August libraries & templates
Everything we shipped this month, and available today in the app...
**Blocks**
* Hobby blocks & accessories: (135)
* Public restroom accessories: (84)
* Bathroom shower mixers and faucets: (183)
* Kitchen accessories towel holders: (51)
**Templates**
* [FF\&E specification template | Horizontal](https://www.rayon.design/app/model/929fe531-11cd-4d39-87ce-92ef2a13e27a?canvas=S8AVRFCTtK2\&scale=50.46122365769864\&x=-2769.026193715739\&y=-36492.17123677273\&token=rayon-template)
* [Tower construction site plan](https://www.rayon.design/app/model/40bf75fd-2ea2-4c3e-ba80-7284cf9196b1?canvas=CjlBQ7tv0f2\&scale=197.5488092647376\&x=509517.82959401276\&y=-30262012.033610635\&token=rayon-template)
* [Door and window specs](https://www.rayon.design/app/model/d06eb4c0-1d87-4f0e-85a0-ef1d9d47c650?canvas=1WKHdSVKXk3\&scale=0.9563322622555626\&x=468.9959062014493\&y=-972.8862304687502\&token=rayon-template)
* [Sliding door closet](https://www.rayon.design/app/model/e0e4bcea-6a6f-4102-9bb7-934cdc2e328c?canvas=6fhBjYWKzc20288\&scale=0.57192680950375\&x=8916.440105060155\&y=-2166.0141601562495\&token=rayon-template)
* [Walk-in sliding door closet](https://www.rayon.design/app/model/cffbf01b-f42a-438e-89e4-36dc9f83b4e7?canvas=6fhBjYWKzc20288\&scale=0.8112811654108065\&x=53137.85337744169\&y=-21376.008822086063\&token=rayon-template)
* [Hinged door closet](https://www.rayon.design/app/model/c8200d41-1cc2-44b2-b8d7-869a17b61b18?canvas=6fhBjYWKzc20288\&scale=0.5679135967476889\&x=85104.79677869081\&y=-19276.005522955507\&token=rayon-template)
* [Walk-in hinged door closet](https://www.rayon.design/app/model/e044c4ba-5270-41ee-b0cd-a2553113262d?canvas=6fhBjYWKzc20288\&scale=0.620429199145418\&x=72888.1921394177\&y=-11840.260698648184\&token=rayon-template)
* [Bi-fold door closet](https://www.rayon.design/app/model/1804ea57-9ab2-4241-bde1-951fe94c4cb7?canvas=6fhBjYWKzc20288\&scale=0.5932391083805677\&x=58648.36635406362\&y=-21438.454825402066\&token=rayon-template)
* [Walk-in bi-fold door closet](https://www.rayon.design/app/model/3d22574a-7a27-4d06-b5c8-0c037f63742f?canvas=03pCHdJz6F3\&scale=0.5535699431770957\&x=20374801.0346596\&y=-7127835.4402389545\&token=rayon-template)
* [Pocket door closet](https://www.rayon.design/app/model/e84744bb-d7ae-4dd8-8c29-2ff957cd2aba?canvas=6fhBjYWKzc20288\&scale=0.5461871945625041\&x=88671.76165813938\&y=-9823.580403181033\&token=rayon-template)
* [Walk-in pocket door closet](https://www.rayon.design/app/model/e35b7e19-1a6c-40af-b27e-1a7e5206faa9?canvas=03pCHdJz6F3\&scale=0.7412835886181501\&x=50544.29962916888\&y=28097.183958595037\&token=rayon-template)
* [Built-in shoe closet](https://www.rayon.design/app/model/06251746-9549-409f-a8b6-cd60b32a2fe3?canvas=03pCHdJz6F3\&scale=0.4174604736046761\&x=50322.88742018491\&y=28097.183958595037\&token=rayon-template)
* [Built-in shoe closet](https://www.rayon.design/app/model/06251746-9549-409f-a8b6-cd60b32a2fe3?canvas=03pCHdJz6F3\&scale=0.4174604736046761\&x=50322.88742018491\&y=28097.183958595037\&token=rayon-template)
***
### We are always available
Book a demo with our team, [right here](https://b1kzip68v9f.typeform.com/to/Hgr0eQ4k#source=docs).\
To get some support, reach out to us through our **in-app support chat**. \
More about [our support policy right here](/other-resources/others/support-policy).
# July '25 Product Updates
Discover July's new & improved features.
{% hint style="info" %}
We took some time in July to add some key new features: a new custom property panel, gradients in styles, a french translation of Rayon, a brand new tiling mode, and more!
{% endhint %}
**List of July's features...**
* New custom properties panel & category property
* Gradients
* French version
* Page as lists
* New tiling mode
* New templates, new libraries
For a more in-depth look at Rayon's features → check our [documentation](https://docs.rayon.design/documentation/rayon-documentation).
***
## New custom properties panel & category property
We introduced this month a **new custom properties panel**, on the let side. Custom properties can from now on me managed from this new menu. At the same, we introduced a new type of property, called **`Category (single)`**, allowing you to build custom properties using saved values.
More on the custom properties in our [documentation](broken://pages/3Ij99NTdrie54tiHW8n6).
## Gradients
We added the **possibility to add gradients** (linear, radial and angular); gradients can from now on be applied inside shape and wall styles.
## French version
Rayon will be **offering translated version of the app** moving forward. We started this effort by releasing the French version this month, and will continue by releasing other languages later this year.
To switch the app to French, you can head to the user settings panel, and click on the **`Language`** field.
## Page as lists
To be able to better visualise a presentation, and to offer a more efficient way to reorder pages, the **`Pages`** panel now **allows displaying pages as a list.**
More on pages in our [documentation](broken://pages/GqwiFLOXYGLYF6DU9Lhb).
## New tiling mode
The tiling option has be reworked this month. It now offers the possibility to edit the tiling position using a square helper, and allows you to resize the tiling size based on the width and height of the pattern.
More on tiling in our [documentation](/documentation/design/styles).
## July libraries
Everything we shipped this month, and available today in the app...
**Blocks**
* Credenzas (72)
* Fire pits (43)
* Stand desks (20)
* Gym pilates (12)
* Kitchen faucets + Shower heads (110)
* Garden & farm accessories (111)
**Templates**
* [Residential building permit template | 3-story home](https://www.rayon.design/app/model/bf58bbcf-aa10-4ece-874a-87d7c5bbf9af?token=rayon-template\&utm_source=assets-templates\&utm_medium=content\&utm_content=bf58bbcf-aa10-4ece-874a-87d7c5bbf9af)
* [Residential Building permit template | 2-story home](https://www.rayon.design/app/model/5c2609ff-4d9b-4853-a457-a7111faf2dce?token=rayon-template\&utm_source=assets-templates\&utm_medium=content\&utm_content=5c2609ff-4d9b-4853-a457-a7111faf2dce)
* [Ranch house drawing set template](https://www.rayon.design/app/model/016d8637-7112-47bc-bf23-61f398c54d17?token=rayon-template\&utm_source=assets-templates\&utm_medium=content\&utm_content=016d8637-7112-47bc-bf23-61f398c54d17\&canvas=QcWlKhuX5V1\&scale=241.1336143500296\&x=323963.8976695072\&y=-115616.21040985598)
* [Kitchen millwork drawing set template](https://www.rayon.design/app/model/fd62793b-bf98-463f-804a-956a285167af?token=rayon-template\&utm_source=assets-templates\&utm_medium=content\&utm_content=fd62793b-bf98-463f-804a-956a285167af\&canvas=93v5Mo5GgP2\&scale=26.08180456677182\&x=-10454.489430367543\&y=-1762.890306621227)
* [Construction details template](https://www.rayon.design/app/model/07e71cdc-029c-4cc5-93fb-f6945a089b6e?token=rayon-template\&utm_source=assets-templates\&utm_medium=content\&utm_content=07e71cdc-029c-4cc5-93fb-f6945a089b6e)
* [Title block template pack](https://www.rayon.design/app/model/46e7be27-8764-4cc8-9d90-d3f04a852940?token=rayon-template\&utm_source=assets-templates\&utm_medium=content\&utm_content=46e7be27-8764-4cc8-9d90-d3f04a852940)
* [Gallery wall layout template | L/M/S](https://www.rayon.design/app/model/b49a7ab5-ecdc-4903-9966-4dd4c0fd9afe?token=rayon-template\&utm_source=assets-templates\&utm_medium=content\&utm_content=b49a7ab5-ecdc-4903-9966-4dd4c0fd9afe)
* [12 People elevator drawings template](https://www.rayon.design/app/model/fcfc72b0-7521-48ca-9f17-131c2b1a6e9d?token=rayon-template\&utm_source=assets-templates\&utm_medium=content\&utm_content=fcfc72b0-7521-48ca-9f17-131c2b1a6e9d)
* [8 People elevator drawings template](https://www.rayon.design/app/model/2bc27876-e74e-40f4-9261-46fcaff8fb8c?token=rayon-template\&utm_source=assets-templates\&utm_medium=content\&utm_content=2bc27876-e74e-40f4-9261-46fcaff8fb8c)
* [6 People elevator drawings template](https://www.rayon.design/app/model/45edea9d-f805-49d2-aa27-e5fda7f0a365?token=rayon-template\&utm_source=assets-templates\&utm_medium=content\&utm_content=45edea9d-f805-49d2-aa27-e5fda7f0a365)
* [4 People elevator drawings template](https://www.rayon.design/app/model/02fefa3c-e997-416b-b64c-b6eb7873f579?token=rayon-template\&utm_source=assets-templates\&utm_medium=content\&utm_content=02fefa3c-e997-416b-b64c-b6eb7873f579)
* [Gate & Fence template | Large](https://www.rayon.design/app/model/1cd604a3-a4a6-489f-9a13-38b487a3dfee?token=rayon-template\&utm_source=assets-templates\&utm_medium=content\&utm_content=1cd604a3-a4a6-489f-9a13-38b487a3dfee)
* [Gate & Fence template | Medium](https://www.rayon.design/app/model/a096fd2d-c1a6-4421-a1dd-a00b895fe6a5?token=rayon-template\&utm_source=assets-templates\&utm_medium=content\&utm_content=a096fd2d-c1a6-4421-a1dd-a00b895fe6a5)
* [Gate & Fence template | Small](https://www.rayon.design/app/model/c3b002fb-b983-41ed-8a44-99926230abd0?token=rayon-template\&utm_source=assets-templates\&utm_medium=content\&utm_content=c3b002fb-b983-41ed-8a44-99926230abd0)
***
### We are always available
Book a demo with our team, [right here](https://b1kzip68v9f.typeform.com/to/Hgr0eQ4k#source=docs).\
To get some support, reach out to us through our **in-app support chat**. \
More about [our support policy right here](/other-resources/others/support-policy).
# June '25 Product Updates
Discover June's new & improved features.
{% hint style="info" %}
We took some time in June to add some much-awaited quality of life features: recent search menu, loop mode, AutoCAD-like shortcuts, and more!
{% endhint %}
**List of June's features...**
* Recent search
* Loop mode
* New import modal
* AutoCAD-like shortcuts
* New templates, new libraries
For a more in-depth look at Rayon's features → check our [documentation](https://docs.rayon.design/documentation/rayon-documentation).
***
## Recent search
**Searches done in the block or style panels are from now on retrievable** when entering the search bar of either panels.
## Loop mode
**All creation and editing commands offer from now on a loop mode**, allowing users to execute commands multiple times in a row, without existing the command. This new mode can be found in the mode of all commands carrying the option.
More on the loop mode in our [documentation](https://docs.rayon.design/documentation/design/setup#loop-mode).
## AutoCAD-like shortcuts
Rayon offers the opportunity to use new shortcuts, close to that of AutoCAD, so as to help users switch over to Rayon. These can be activated from the user settings menu, by toggling to the **`Keymap`** property.
## June libraries
Everything we shipped this month, and available today in the app...
**Blocks**
* Sleeper sofa (42)
* Room dividers (84)
* Home workstation (6)
* Garden/House/outdoor plants and accessories (244)
**Templates**
* [Bathroom Wall-Mounted Floating Vanity](https://www.rayon.design/app/model/d77ff76f-2991-4c20-9035-71899ea44e48?token=rayon-template\&utm_source=assets-templates\&utm_medium=content\&utm_content=d77ff76f-2991-4c20-9035-71899ea44e48)
* [Bathroom Corner Vanity](https://www.rayon.design/app/model/4dab68e0-bb91-466e-a330-2fd99d267b41?token=rayon-template\&utm_source=assets-templates\&utm_medium=content\&utm_content=4dab68e0-bb91-466e-a330-2fd99d267b41)
* [Bathroom Vessel Sink Vanity](https://www.rayon.design/app/model/05888de9-ef77-4b39-8997-b163990a54eb?token=rayon-template\&utm_source=assets-templates\&utm_medium=content\&utm_content=05888de9-ef77-4b39-8997-b163990a54eb)
* [Bathroom Console Vanity](https://www.rayon.design/app/model/86d96420-8c1e-4aa1-b3da-ea2bfc94cfaf?token=rayon-template\&utm_source=assets-templates\&utm_medium=content\&utm_content=86d96420-8c1e-4aa1-b3da-ea2bfc94cfaf)
* [Bathroom Freestanding Vanity](https://www.rayon.design/app/model/e3c44d4f-feae-47f2-91d9-b31e5d185e76?token=rayon-template\&utm_source=assets-templates\&utm_medium=content\&utm_content=e3c44d4f-feae-47f2-91d9-b31e5d185e76)
* [Wall-Mounted TV Unit](https://www.rayon.design/app/model/172ffe2f-3efe-4345-a416-3a7413ee8f86?token=rayon-template\&utm_source=assets-templates\&utm_medium=content\&utm_content=172ffe2f-3efe-4345-a416-3a7413ee8f86)
* [Freestanding TV Unit](https://www.rayon.design/app/model/47963a6b-e7aa-4a1f-8ae1-f92e8290db36?token=rayon-template\&utm_source=assets-templates\&utm_medium=content\&utm_content=47963a6b-e7aa-4a1f-8ae1-f92e8290db36)
* [Pole TV Stand](https://www.rayon.design/app/model/f35aebe5-839b-4a38-b7f4-7725bdb70b9f?token=rayon-template\&utm_source=assets-templates\&utm_medium=content\&utm_content=f35aebe5-839b-4a38-b7f4-7725bdb70b9f)
* [Corner TV Millwork Stand](https://www.rayon.design/app/model/68c9db27-880d-4fea-831a-3c1d679ae666?token=rayon-template\&utm_source=assets-templates\&utm_medium=content\&utm_content=68c9db27-880d-4fea-831a-3c1d679ae666)
* [TV Metalwork Unit](https://www.rayon.design/app/model/892187e0-f49a-4bbd-a659-168ef5c672f9?token=rayon-template\&utm_source=assets-templates\&utm_medium=content\&utm_content=892187e0-f49a-4bbd-a659-168ef5c672f9)[4-Seat office pack](https://www.rayon.design/app/model/9be8e50b-46c5-4aef-9b0e-f703e694d3be?token=rayon-template\&utm_source=assets-templates\&utm_medium=content\&utm_content=9be8e50b-46c5-4aef-9b0e-f703e694d3be\&canvas=ym4dGnBet51\&scale=0.5521855744507598\&x=20613.854315740457\&y=-6590.296605096237)
* [6-Seat office pack](https://www.rayon.design/app/model/b6f24160-8691-41bf-b741-258888542827?token=rayon-template\&utm_source=assets-templates\&utm_medium=content\&utm_content=b6f24160-8691-41bf-b741-258888542827\&canvas=ymcrpnozgd1\&scale=0.5493502775642123\&x=24951.403933543334\&y=-14090.61526554091)
* [10-Seat office pack](https://www.rayon.design/app/model/001ef932-2099-4982-abf7-ceddaf0870d9?token=rayon-template\&utm_source=assets-templates\&utm_medium=content\&utm_content=001ef932-2099-4982-abf7-ceddaf0870d9)
* [12-Seat office pack](https://www.rayon.design/app/model/aa4d7635-fa82-4200-ad1d-776fcfb10a98?token=rayon-template\&utm_source=assets-templates\&utm_medium=content\&utm_content=aa4d7635-fa82-4200-ad1d-776fcfb10a98)
* [Residential Zoning Plan Template](https://www.rayon.design/app/model/03d914d3-184f-48db-a5f7-8f5f9dffceda?token=rayon-template\&utm_source=assets-templates\&utm_medium=content\&utm_content=03d914d3-184f-48db-a5f7-8f5f9dffceda)
* [Mixed Use Zoning Plan Template](https://www.rayon.design/app/model/6ea735e7-ae31-42b6-81d9-e6ad1cd44b93?token=rayon-template\&utm_source=assets-templates\&utm_medium=content\&utm_content=6ea735e7-ae31-42b6-81d9-e6ad1cd44b93)
* [Site Analysis Template](https://www.rayon.design/app/model/22f577e1-18a9-42bb-bab8-e0fc8d559ae3?token=rayon-template\&utm_source=assets-templates\&utm_medium=content\&utm_content=22f577e1-18a9-42bb-bab8-e0fc8d559ae3)
* [Convenience Store Template](https://www.rayon.design/app/model/465e4018-33d2-42a6-97ab-391c6defb555?token=rayon-template\&utm_source=assets-templates\&utm_medium=content\&utm_content=465e4018-33d2-42a6-97ab-391c6defb555)
***
## **Any questions?**
Feel free to email us at
For a more in-depth look at Rayon's features, check out our [documentation](https://docs.rayon.design/documentation/rayon-documentation) 🔗
# May '25 Product Updates
Discover May's new & improved features.
{% hint style="info" %}
May has seen some major updates: new zoom mode for presentation, improved metadata, a new make unique action for blocks, the addition of a background color for hatches, and much more!
{% endhint %}
**List of May's features...**
* Zoom mode for presentations
* Improved metadata (model-level properties, style properties, and inheritance)
* Background for hatches
* Make unique
* Improved stroke scale
* New templates, new libraries
For a more in-depth look at Rayon's features → check our [documentation](https://docs.rayon.design/documentation/rayon-documentation).
***
## Zoom mode for presentations
We added this month the ability to **zoom inside the presentation mode.** \
This way, people receiving your work will be able to inspect things in greater details.\
More on presentation in our [documentation](/documentation/layout-and-present/presenting-your-project).
## Improved metadata
Rayon finally offers ways to **add metadata on...**
* **Styles**.
* **Layers**
* **Pages**
This way, entities tagged for instance with a specific style will automatically inherit from the metadata of from it. This feature can be especially useful when using wall styles carrying the price, material etc. of walls.\
More on metadata in our [documentation](broken://pages/aaX3paETQpqlJ2wDz4RU).
## Background for hatches
Hatches in Rayon can from now on be complemented of **`Fill`** color. \
More on styles in our [documentation](/documentation/design/styles).
## Make unique
Rayon now has a new mode, **`make unique`**, allowing you to create a new block definition from an existing instance.
More on blocks in our [documentation](/documentation/design/blocks).
## Improved stroke scale
We have spent some time making the whole experience of working with line weight much clearer and simpler. From now on, the **stroke scale** can be found inside the **`Stroke`** dropdown of styles, while the difference of thickness between paper canvas and current canvas is directly explained inside the very same menu.
At the same time, we have **changed how lines are displayed in exported PDF/images.** \
By default, the **lines will be as thick as they appear on-screen** in exports. Toggling the **`Strokes`** option will override this logic, to reflect stroke scale, if need be.
## May libraries
Everything we shipped this month, and available today in the app...
**Blocks**
* Curtain wall blocks (60)
* Fire escape stairs (54)
* Outdoor cafe tables & chairs (21)
* Jewelry armoires (24)
* File Cabinets (36)
* Bedroom accessories (221)
* Commercial Space Accessories (185)
**Templates**
* [Rooftop Terrace Drawing Set](https://www.rayon.design/app/model/f4aaf6d7-75f1-4931-96d9-f0118a253c71?token=rayon-template\&utm_source=assets-templates\&utm_medium=content\&utm_content=f4aaf6d7-75f1-4931-96d9-f0118a253c71)
* [Beach House Drawing Set](https://www.rayon.design/app/model/55293467-daa8-4942-bcee-46d0fbbd4776?token=rayon-template\&utm_source=assets-templates\&utm_medium=content\&utm_content=55293467-daa8-4942-bcee-46d0fbbd4776)
* [Duplex Drawing Set](https://www.rayon.design/app/model/f5e4de08-b69d-4a9b-b48e-f997bdc6c90b?token=rayon-template\&utm_source=assets-templates\&utm_medium=content\&utm_content=f5e4de08-b69d-4a9b-b48e-f997bdc6c90b)
* [Residential Feasibility Study Template](https://www.rayon.design/app/model/d04c51b3-80ff-410c-b449-c552c62427d3?canvas=echM93ubaw2\&scale=619.4003678032481\&x=127508.30531174125\&y=-72444.02411913298\&token=rayon-template)
* [Commercial Zoning Plan Template](https://www.rayon.design/app/model/8e2a4623-534d-47be-a11f-ca00a1bfa5ed?token=rayon-template\&utm_source=assets-templates\&utm_medium=content\&utm_content=8e2a4623-534d-47be-a11f-ca00a1bfa5ed)
* [Office Space Planning Template](https://www.rayon.design/app/model/68a1ed7a-0662-4dd3-93b2-159148275313?token=rayon-template\&utm_source=assets-templates\&utm_medium=content\&utm_content=68a1ed7a-0662-4dd3-93b2-159148275313)
* [Residential Space Planning Template](https://www.rayon.design/app/model/6f87bbe9-e587-401e-b56a-62eaa13c2f83?token=rayon-template\&utm_source=assets-templates\&utm_medium=content\&utm_content=6f87bbe9-e587-401e-b56a-62eaa13c2f83)
* [Door & Window Schedule Template](https://www.rayon.design/app/model/29b48caa-bdcb-430c-8eb7-99d824842e5c?token=rayon-template\&utm_source=assets-templates\&utm_medium=content\&utm_content=29b48caa-bdcb-430c-8eb7-99d824842e5c)
* [6 Staircase Details Pack](https://www.rayon.design/app/model/e083acb2-124a-4613-80aa-e05c0bf11049?token=rayon-template\&utm_source=assets-templates\&utm_medium=content\&utm_content=e083acb2-124a-4613-80aa-e05c0bf11049)
* [US Peninsula kitchen with island](https://www.rayon.design/app/model/635dc76d-bf0f-4b19-baf0-32a9c6c52efd?token=rayon-template\&utm_source=assets-templates\&utm_medium=content\&utm_content=635dc76d-bf0f-4b19-baf0-32a9c6c52efd)
* [Small US Double galley kitchen](https://www.rayon.design/app/model/8adb9cbe-55c5-4d18-a4d7-8c699c37bb4e?token=rayon-template\&utm_source=assets-templates\&utm_medium=content\&utm_content=8adb9cbe-55c5-4d18-a4d7-8c699c37bb4e)
* [Medium US Double galley kitchen](https://www.rayon.design/app/model/4c1b9c41-adc7-4ef0-8ad9-a19d15407318?token=rayon-template\&utm_source=assets-templates\&utm_medium=content\&utm_content=4c1b9c41-adc7-4ef0-8ad9-a19d15407318)
* [Large US Double galley kitchen](https://www.rayon.design/app/model/95b2fdf6-9fb8-40c7-9788-c20809ecd505?token=rayon-template\&utm_source=assets-templates\&utm_medium=content\&utm_content=95b2fdf6-9fb8-40c7-9788-c20809ecd505)
* [Small US L-shaped kitchen](https://www.rayon.design/app/model/728e1345-7fb1-463a-a129-ff7239077dfd?token=rayon-template\&utm_source=assets-templates\&utm_medium=content\&utm_content=728e1345-7fb1-463a-a129-ff7239077dfd)
* [Medium US L-shaped kitchen](https://www.rayon.design/app/model/ca77357e-c554-4e32-886b-2d82c8efdce4?token=rayon-template\&utm_source=assets-templates\&utm_medium=content\&utm_content=ca77357e-c554-4e32-886b-2d82c8efdce4)
* [Large US L-shaped kitchen with island](https://www.rayon.design/app/model/d1aa74c7-a26c-4f0c-8279-fe1b497d53a1?token=rayon-template\&utm_source=assets-templates\&utm_medium=content\&utm_content=d1aa74c7-a26c-4f0c-8279-fe1b497d53a1)
* [Small US U-shaped kitchen](https://www.rayon.design/app/model/76e96c1c-2c5c-4891-bcb3-7ffc467e02cb?token=rayon-template\&utm_source=assets-templates\&utm_medium=content\&utm_content=76e96c1c-2c5c-4891-bcb3-7ffc467e02cb)
* [Medium US U-shaped kitchen](https://www.rayon.design/app/model/1b2d46e0-8441-4b0f-85e1-7624452ad42a?canvas=tW3xQ6pX4R3\&scale=0.8247733487251208\&x=-11743.25661413285\&y=21539.0323746137\&token=rayon-template)
* [Large US U-shaped kitchen](https://www.rayon.design/app/model/5036a23e-f4d9-47f0-92d2-1c07ce9793f1?token=rayon-template\&utm_source=assets-templates\&utm_medium=content\&utm_content=5036a23e-f4d9-47f0-92d2-1c07ce9793f1)
***
## **Any questions?**
Feel free to email us at
For a more in-depth look at Rayon's features, check out our [documentation](https://docs.rayon.design/documentation/rayon-documentation) 🔗
# April '25 Product Updates
Discover April's new & improved features.
{% hint style="info" %}
April has seen some major updates: new presentation mode, new guideline command, a brand new community website, and much more.
{% endhint %}
**List of April's features...**
* Presentation mode
* Guideline
* AI toolbox
* Community
* Import flow
* New templates, new libraries
For a more in-depth look at Rayon's features → check our [documentation](https://docs.rayon.design/documentation/rayon-documentation).
***
## Presentation mode
Rayon allows converting pages into **public presentations**, ready to shared in a single click. \
Presentations can be used cross-browser and cross-device, offering a much more accessible sharing experience. More on presentations in our [documentation](https://docs.rayon.design/documentation/publishing-and-sharing/presenting-your-project).
## Guideline
Rayon finally offers a **guideline** tool, allowing users to create endless projection lines. \
More on guidelines in our [documentation](https://docs.rayon.design/documentation/design/drawing-tools#h_96fce2d1c9-1).
{% embed url="" %}
## AI toolbox
Rayon offers as of this month an AI toolbox for image editing; namely:
* **Upscale images**: Instantly sharpen and enhance your visuals for a more professional, polished look.
* **Remove backgrounds**: Drag and drop images onto your canvas, then remove backgrounds in just a few clicks.
More on AI image editing in our [documentation](/documentation/design/images).
## Community
We are introducing the official [Rayon Community](https://community.rayon.design/), a space where we can all share knowledge and creativity together. Feature requests, discussions, tutorials, etc : the community is here to empower Rayon's community of users, and help find the help they need. Join us today!
## New import flow
We have entirely revamped the way files (DWG and PDF) get imported in Rayon. A dedicated interface now allows scaling files with much more precision than before.
More on import in our [documentation](https://docs.rayon.design/documentation/models-and-team-management/importing-files#h_e434426e1e).
## April libraries
Everything we shipped this month, and available today in the app...
**Blocks**
* Wardrobe typologies (based on the user’s feedback) (242)
* Bedroom accessories (221)
* Bookcases (33)
* Garage doors (57)
* Cinema blocks (132)
* Escape and emergency exit doors (45)
**Templates**
* Urban Apartment Construction Site Management template
* Mall Construction Site Management template
* Eco-Home Construction Site Management template
* Offices Park Construction Site Management template
* Warehouse Construction Site Management template
* Villa Drawing Set Template
* Coffee Shop Drawing Set Template
* Rooftop Garden Drawing Set Template
* Duplex Apartment Drawing Set Template
* Gym Template
* Kids Bedroom Details template
* Bedroom Details template
* L shape Kitchen Millwork Template
* Kitchen Island Millwork Template
* Glass Window & door drawing Template
* Circular Glass Staircase Drawing
* Spiral Staircase Drawing
* L-shape Glass Staircase Drawing
* U-Shape Glass Staircase Drawing
* Wooden Staircase Drawings U-Shape
* Rounded Staircase Drawing
* Single Escalator Drawing
* Double Escalator Drawing
* Rounded Staircase Drawings
* Half-Circle Staircase Drawings
***
## **Any questions?**
Feel free to email us at
For a more in-depth look at Rayon's features, check out our [documentation](https://docs.rayon.design/documentation/rayon-documentation) 🔗
# March '25 Product Updates
Discover March's new & improved features
{% hint style="info" %}
March has seen some major updates: new page and view commands, new bucket command, moreoptions in annotation styles, more blocks, more templates, etc...
{% endhint %}
**List of March's features...**
* New layout menu: **`Page`** command and **`View`** command
* New **`Bucket`** command
* New **extension line** settings in annotation styles
* New **export screen** option for quick exports
* **780+ new blocks** and **10+ templates** added this month.
For a more in-depth look at Rayon's features → check our [documentation](https://docs.rayon.design/documentation/rayon-documentation).
***
## New layout menu
**Page** and **views** can from now on be created from the toolbar, from **our new Layout menu.**\
**More on these new commands in our** [**documentation**](broken://pages/WGOSNtQ7v12ZFSclvL4M)**.**
Pages can be created using the page **`Page`** (PP) command. \
More on pages [here](broken://pages/GqwiFLOXYGLYF6DU9Lhb).
{% embed url="" %}
Views can be created using the page **`View`** (V) command.\
More on views [here](broken://pages/WGOSNtQ7v12ZFSclvL4M).
{% embed url="" %}
## New Bucket command
**We added a new `Bucket` command**, allowing users to create negative shapes, from gaps left between entities on the canvas. The bucket command works like our **`Zone`** tool, but can fill gaps between most types of entities (shapes, pages, views, etc).
{% embed url="" %}
## New extension line styling
From now on, dimension **extension lines** can be styled independently of dimension lines.
## New export screen option
We added **a quicker option to export** what users see on their screen, allowing for a faster export experience.
## March libraries
Everything we shipped this month, and available today in the app...
**Blocks**
* Urban environment blocks (349)
* Windows US (198)
* Wardrobes + housing mix (242)
**Templates**
* Pop-up Store
* Creche
* Coworking floor
* Music Studio
* Bathroom Vanity Millwork
* Tiny apartment
* Veterinarian clinic
* 2-Bedroom Apartment
* Reception Desk Millwork
* Apartment Building
***
## **Any questions?**
Feel free to email us at
For a more in-depth look at Rayon's features, check out our [documentation](https://docs.rayon.design/documentation/rayon-documentation) 🔗
# February '25 Product Updates
Discover February's new & improved features
{% hint style="info" %}
February has seen some major updates: a revamped paper canvas, a new export modal, tons of new fonts, and much more!
{% endhint %}
**List of February's features...**
* **New paper canvas** (canvas background, page design, scale of things, improved page visibility)
* **New export modal** (range, and magnifier, more to come)
* **1000+** new fonts and upload
* **Org-as-a-trial**
* **480+ new blocks** and **10+ templates** added this month.
For a more in-depth look at Rayon's features → check our [documentation](https://docs.rayon.design/documentation/rayon-documentation).
***
## New paper canvas
**We shipped some major updates for Rayon's paper canvas**: from now on, paper canvas will be better suited to create stunning page layouts thanks to a new batch of settings we added this month.
* **`Page background` —** Pages in paper canvases now have a white background, thanks to the `background` property we added to pages.
* **`Canvas background` —** Paper canvases from now have a light gray background, thanks to the `background` property we added to canvases.
* **`Styles x canvas` —** Active styles (text size, arrow size, etc.) are now set at the canvas level, meaning that their size (text size, arrow size, etc.), etc. are at the correct scale, right from the beginning.
## New export modal
**Exporting a set of pages has finally its own, dedicated modal** where the document's name, format, page range and size can be easily set up. \ **Tip**: a magnifier also allows inspecting the exported pages before completing the export.
## 1000+ new fonts & upload
Rayon finally offers **1000+ fonts!** \
And if you cannot find what you like, we now offer custom font upload.
## Org-as-a-trial
From now on, **`Free`** and **`Pro`** users will be able to experience **working as a team**, using organization and team workspaces. A 1-month trial will allow testing out these features.
## February libraries
Everything we shipped this month, and available today in the app...
**Blocks**
* Commercial kitchen layouts
* US & EU windows & arcs
* US kitchen cabinets
* US kitchen layouts
**Templates**
* Electric vehicle charging station & garage
* House solar panel roof plan
* Underfloor heating system for an apartment
* Nursery room floor plan
* Open concept living and dining room floor plan
* Public restrooms floor plan
* Yoga studio floor plan
* Kids'/teenagers' study desk with built-in shelves
* Home gym floor plan
* Entryway shoe cabinet millwork
* Book nook with storage millwork
***
## **Any questions?**
Feel free to email us at
For a more in-depth look at Rayon's features, check out our [documentation](https://docs.rayon.design/documentation/rayon-documentation) 🔗
# January '25 Product Updates
Discover January's new & improved features
{% hint style="info" %}
New override mode for blocks, new export modal, new options for annotations, etc: January kicks off 2025 with a whole lot of new, much-needed additions.
{% endhint %}
**List of January features...**
* New **`override`** option on blocks.
* New options on annotation style.
* New **`save snapshot`** feature.
* New ability to **swap** block instances in place.
* New **class**, in-app, by Thomas Rowntree.
* 450+ new blocks added this month.
For a more in-depth look at Rayon's features → check our [documentation](https://docs.rayon.design/documentation/rayon-documentation).
***
## **New block override**
From now on, blocks in Rayon will be both **editable** and **overridable**; that means that a block instance can be customized, without having to be detached from its definition. More on this feature [here](/documentation/design/blocks#editing-vs-overriding-blocks).
## New annotation style options
Annotation now allow users to decide how to place leader's and dimension's texts, by controlling the annotation **`gap`**, **`rotation`** and **`position`**.
## Save snapshot feature
We added this month a new **save option**, allowing users to capture a model snapshot, give it a name and save it to their model history. This feature can be found by clicking on **`+`** in the history panel, or by hitting **`CMD`** + **`S`**
## In-place block swap
Rayon now offers the ability for users to exchange a block for another, directly on the canvas. More on this feature [here](/documentation/design/blocks).
{% embed url="" %}
## Thomas Rowntree's new class
We worked this month with Thomas Rowntree, architect and educator, to build **a 12 lesson lecture series**, teaching how to go from 0 to 1 for any typical architectural project. The class can be found in the [Tutorial section](https://www.rayon.design/app/files/tutorials) of the app.
## January libraries
Everything we shipped this month, and available today in the app...
* Medical equipment block library
* Surgery room block library
* Examination room block library
* Hospital people block library
* Restaurant block library (kitchen, etc)
***
## **Any questions?**
Feel free to email us at
For a more in-depth look at Rayon's features, check out our [documentation](https://docs.rayon.design/documentation/rayon-documentation) 🔗
# December '24 Product Updates
Discover December's new & improved features
{% hint style="info" %}
New *sweep* mode for `arc`, new `array` command, a *lot* of quality-of-life improvements, and new templates & libraries: December closes the year with some much-needed additions.
{% endhint %}
**List of December features...**
* New **`sweep`** mode for arc command.
* New **`array`** command.
* Ability to reorder canvases.
* Library semantic search.
* New shortcuts.
* Templates added to [Rayon Assets](https://www.rayon.design/assets).
* Blocks and templates added to Rayon's in-app libraries.
* And many quality-of-life fixes: improved text editing mode, improved style pickier, text box validation using **`Shift`** + **`Enter`**, improved filter UI in project manager, etc.
For a more in-depth look at Rayon's features → check our [documentation](https://docs.rayon.design/documentation/rayon-documentation).
***
## New `sweep` mode for arc command
Rayon now allows users to draw arcs using a sweep angle; this new mode was added to the **`arc`** command.
## New `array` command
Rayon now offers a linear **`array`** command, allowing users to duplicate any entity multiple times along a given linear direction. Shortcut **`AR`** .
## Ability to reorder canvases
Canvases can from now on be reorderd manually, like layers or entitties, directly in the layer panel.
## Library semantic search
Libraries got a much-needed improvement: their search is from now on *semantic*, meaning that Rayon can find matches to users' keywords that are not exact matches, but rather close-by matches, keywords in other languages than english, or even find results based on the interpretation of users' keywords. This makes library searching much more effective.
## New shortcuts
A handful of shortcuts have been added to Rayon, to allow faster access to important settings, tools and options.
Command, option, setting
Shortcut
Array command
AR
Close text box
Enter + SHIFT
Collapse left-side panel
Alt + 0
Open layer panel
Alt + 1
Open block panel
Alt + 2
Open style panel
Alt + 3
Open page panel
Alt + 4
Open table panel
Alt + 5
Open comment panel
Alt + 6
Toggle grid mode
G + SHIFT
Toggle wireframe mode
W + SHIFT
Toggle dark mode
D + SHIFT
Toggle snapping mode
S + SHIFT
Reverse selection
A + CMD + SHIFT
Some more preexisting shortcuts were also updated; [see our shortcut page here.](/documentation/design/shortcuts)
## December templates & libraries
Everything we shipped this month, and available today in the app...
**New** **templates...**
* 10 millwork drawings, including shelves, fireplaces or bar unit.
* 7 technical plans, including floor heating, ventilation or plumbing & filtration.
* 5 site plans for different building types: house, office, mall.
* 4 detail drawings/sections.
**New block** **libraries...**
* Improved title blocks library (parametric text added too all fields)
* Kitchen & dining room accessories library
* Bathroom accessories library
* More variations added to people library
* Bedroom accessories library
* Office accessories library
* Dentist office equipment library
***
## **Any questions?**
Feel free to email us at
For a more in-depth look at Rayon's features, check out our [documentation](https://docs.rayon.design/documentation/rayon-documentation) 🔗
# November '24 Product Updates
Discover November's new & improved features
{% hint style="info" %}
Improved selection, better color settings, better search: November has been a month filled with much-needed improvements on all fronts.
{% endhint %}
**List of November features...**
* Improved marquee select.
* Color palettes in styles.
* Smart search in style and block libraries.
* Moving blocks inside leader.
* Referral program for students.
* Styles and templates added [Rayon assets](https://www.rayon.design/assets/libraries).
For a more in-depth look at Rayon's features → check our [documentation](https://docs.rayon.design/documentation/rayon-documentation).
***
## Improved marquee select
Rayon marquee selection is finally offering the **typical CAD selection modes**: by **intersection** and by **containment**.
{% embed url="" %}
## Color palettes in styles
Rayon now offers, on top of the **swatch** selection mode, the **color palette** selection. Colors can be chosen out of 4 different palettes: `spectral`, `pastel`, `natural`, `vintage`.
{% embed url="" %}
## *Smart* search on style and block libraries.
Rayon now supports **semantic search**, a better, richer form of search mechanism on the app's library.
## Moving blocks inside leader
Block in leaders was introduced last month; in November we added the ability for users to move, scale, and rotate leaders' head.
{% embed url="" %}
## Referral program for students
Students can now referrer other students to Rayon and get upgraded to our student plan.
## Styles and templates added to *Rayon assets*
[*Rayon assets*](https://www.rayon.design/assets/libraries) finally support styles and templates, open to all.
## November libraries & templates
Everything we shipped this month, and available today in the app...
* 70 floor plan templates, including houses, rooms, stores and office spaces.
* 15 detail drawing templates, including wall sections, room details and elevations.
* 5 millwork templates for creating kitchen cabinetry or bathroom vanity.
* 5 technical drawings, including lighting, electrical, plumbing and reflected ceiling plans.
* \+ 146 new staircase blocks.
* \+ 204 new doors/windows.
* \+ 70 electrical/lighting symbols (EU, US).
***
## **Any questions?**
Feel free to email us at
For a more in-depth look at Rayon's features, check out our [documentation](https://docs.rayon.design/documentation/rayon-documentation) 🔗
# V2 Product Updates
Discover V2's new & improved features.
{% hint style="info" %}
A quick summary of what our team shipped these past few months, and how these new features round up Rayon V2.
{% endhint %}
**New features...**
* **Views**
* **Multi-canvases**
* **New renderer**
* **Block in leaders**
* **New block libraries**
* **New templates**
More details about this new release in [our blog article right here](https://www.rayon.design/blog/rayon-v2).
For a more in-depth look at Rayon's features → check our [documentation](https://docs.rayon.design/documentation/rayon-documentation).
***
## Views
A view is **a window onto a canvas of a model.** In other words, using views helps create a duplicate representation of your work. Views are the best way to create as many references to an existing drawing as you would like, to then be used for instance in page layouts or as a drawing underlay.
More on views in our [documentation page dedicated to views.](broken://pages/WGOSNtQ7v12ZFSclvL4M)
## Multi-canvases
Rayon models can from now on contain multiple canvases. Canvases come in two different types: **`model`** canvases, and **`paper`** canvases.
More on views in our [documentation page dedicated to canvases.](broken://pages/r8CI73zvqYJHBeeTIXau)
## New renderer
**With Rayon V2, we have invested in our software’s ability to power very large projects. Consequently,** V2 offers a brand-new rendering engine, built from scratch, offering much higher display performance. This new engine combines some of the following technical features: multi-threading, high quality antialiasing, sophisticated memory allocation, single draw call.
Here is a quick demo of our new renderer.
{% embed url="" %}
## Block in leader
Leaders now support **blocks heads**; this allows our users to add blocks of their choice at the end of leaders, to display information within a container.
## **New block libraries**
We have also added a whole **new array of block libraries**; here is an exhaustive list:
Chairs (Branded)
Chairs (Generic)
Restroom: WC stall & booth restrooms
Restroom: Bathrooms & public restrooms
Restroom: Bathroom accessories
Accessible restroom arrangements
Bedroom: Night stands
Bedroom: Mattresses
Bedroom: Layouts
Bedroom: basics
Lounge: Layouts
Lounge: Living room
Lounge: TV & TV units
Lounge: Coffee tables
Kitchen: Kitchen casework modules
Kitchen: Kitchen Appliances
Kitchen: Refrigerators
Kitchen: Stoves & cooktops
Kitchen: Kitchen basics
Kitchen: Layouts
Kitchen: Dining Room
Laundry
Office: Office electrical appliances
Office: Office booth
Office: Office desk & chair
Office: Office space
Office: Meeting room
Sinks & faucets
Closets & storage
Greenery: Vegetation
Greenery: Plants
Stairs & elevators
Heating & cooling appliances
Leisure: Outdoor
Leisure: Music instruments
Leisure: Gym
Lighting fixtures
People
Commercial & store equipment
Animals
Transportation
Transportation
Urban Landscape
Stairs expand
Symbols expand
Title Blocks expand
Openings fix + new doors
## **New templates**
V2 offers revamped **in-app repository of templates**, for a wide array of use cases; we is a list of our new templates:
Bathroom with Bathtub
Bathroom with Shower
Child bedroom
Couple Bedroom
Home office room
Hotel Reception
Hotel Room
L-Shaped Kitchen
Laundry Room
Master Bedroom
Office Kitchen
Separated Toilet Bathroom
Single-Row Kitchenette
Student Room
Teenage Bedroom
Tow-Row Hybrid Seating Kitchenette
U-Shaped Kitchen
Walk-In Closet
Circular Living Room
Focal Point Living room
Free Standing Bathtub Bathroom
House Garage
Parallel Layout Living Room
Poolside Terrace
Rooftop Terrace
U-shaped living room
Island Modular Kitchen
Bathroom with Jacuzzi
4 rooms Apartment
Studio Apartment
Two-Bedroom Apartment
Urban Loft
Duplex Apartment
Triplex Apartment
Beach House
Tiny House
Villa
Cabin
Shotgun house
Ranch House
4 people Meeting room
6 people Meeting room
6-8 people Meeting room
8-12 people Meeting room
Break Room
Conference Room - Small (6 people)
Modern office
Small Startup Office
Conference Room 1 - Large (12 people)
Conference Room 2 - Large (12 people) - Small
Executive Office Suite
Office Reception
Bar Layout
Boutique Store Layout
Cocktail Event Hall Floor Plan
Coffee Shop Layout
Dormitory Floor Plan
Hair Salon Layout
Library Layout
Restaurant Layout
Sports Complex
Supermarket Layout
Barbershop Layout
Hostel/Bed & Breakfast
Clothes Retail Store - Racetrack Layout
School Classroom
Window Trim and Sill Millwork
Window and Door Section Details
Staircase Elevation and Section
Exterior Wall Section Drawing
Outdoor Deck or Patio Section Drawing
Living Room Section with Built-In Furniture
Kitchen Section and Elevation Drawing
Custom Closet Section Drawing
Bedroom Elevation Drawing
Bathroom Section and Elevation Drawing
Reflected Ceiling Plan (RCP) for Living Room
Kitchen Electrical and Appliance Layout Plan
Electrical Layout Plan for Living Room
Bathroom Plumbing and Piping Plan
Apartment Lighting Plan
Kitchen Cabinetry Millwork Drawing
Kitchen Island Millwork Drawing
Custom Wardrobe Millwork Drawing
Built-In TV Unit Millwork Drawing
Bathroom Millwork Drawing
***
**Any questions?**
Feel free to email us at
For a more in-depth look at Rayon's features, check out our [documentation](https://docs.rayon.design/documentation/rayon-documentation) 🔗
# July '24 Product Updates
Discover July's new & improved features
{% hint style="info" %}
In July, the team has been busy adding much-needed features to Rayon: better style logic, new settings, editing tools for walls, and much more!
{% endhint %}
**July features...**
* **New style** panel
* **New canvas** settings
* **New units** panel
* **Offset, Trim, Extend** on Walls
* **New block libraries**
For a more in-depth look at Rayon's features → check our [documentation](https://docs.rayon.design/documentation/rayon-documentation).
***
## New style interface
Rayon welcomes a much more powerful style logic, allowing you to either stylize things quickly or save styles and work at scale.
## Canvas settings section
The settings of your canvas are now available directly in the properties panel.
## Unit panel
Rayon allows you from now on to specify the units and precision of your model, while providing you with much more control over both length units, area units and their display across annotations.
## Offset, Trim, Extend on Walls
Walls can now be edited the same way as shapes, using the `offset`, `trim` and `extend` commands.
## **July new block libraries**
As promised, **we have been creating new block libraries!**
* Office electrical appliances
* Office booth
* Sinks & faucets
* Closets & storage
* Office desk & chair
* Office space
* Meeting room
***
**Any questions?**
Feel free to email us at
For a more in-depth look at Rayon's features, check out our [documentation](https://docs.rayon.design/documentation/rayon-documentation) 🔗
# June '24 Product Updates
Discover June's new & improved features
{% hint style="info" %}
In June the team has been busy improving Rayon models' settings, enriching block libraries, and revamping some of our existing commands.
{% endhint %}
**List of improved features...**
* Discover Rayon's r**evamped layer panel, properties panel, and command bar**
* **Custom units** for surfaces
* Better **boolean command**
* Better drawing **precision**
* More options for **'Select Similar'**
* More **family blocks**
For a more in-depth look at Rayon's features → check our [documentation](https://docs.rayon.design/documentation/rayon-documentation).
## Revamped interface
Discover Rayon's **revamped layer panel, properties panel, and command bar!**
* The properties panel now includes **quick actions, Show/hide, and lock/unlock,** and more!
* The command bar is now **more accessible** for fast drawing and editing.
* New **sleek look** for the layer panel!
## Custom units for SQM
You can now set **custom SQM units** that can be different from the model units. For example, you can show your dimensions as centimeters and your SQM as meters (like in the GIF above).
## Better boolean command
You can now find the **`Boolean`** command in the command bar, shortcut **`B`**!
## Better drawing precision
You can now draw at a precision **accuracy of 0.001mm** (instead of the previous 1mm).
## More options for 'Select Similar'
New options are introduced when you right-click and choose **`Select Similar`** . You can now select elements with the:
* Same style
* Same layer
* Same type
* Same block
## **More family blocks!**
As promised, we will be adding new block families to Rayon's repository each month! Including **top, front, and side view drawings**. During June, we have added the following: **Chairs, Mattresses, Nightstands, Bedroom layouts, Coffee tables, TV & TV units, living room, Lounge layouts, Toilets, Bidets, Bathtubs & Jacuzzi, and Urinates.**
***
**Any questions?**
Feel free to email us at
For a more in-depth look at Rayon's features, check out our [documentation](https://docs.rayon.design/documentation/rayon-documentation) 🔗
# May '24 Product Updates
All of May's new and improved features
{% hint style="info" %}
We've added and improved features to enhance your workflow!
{% endhint %}
**List of new features...**
* New block families
* Access model history
* Leader tool
**List of improved features:**
* Multi-dimension
* Direction mode for dimensions (aligned, horizontal, vertical, rotated)
* Arc mode on the arrow tool
* Better support for transparent background images
For a more in-depth look at Rayon's features, 👉 check our [documentation](https://docs.rayon.design/documentation/rayon-documentation) 🔗
## ✨ **New** block families
We're thrilled to introduce **block families!** Moving forward, selected block libraries will contain **blocks with three views: top, side, and front view.** You can find them in the library categories of **beds, sofas, accessories, and basic blocks.**
## ✨ Access model history
You can now access your model history to **track changes and retrieve your legacy drawings** with a click!
## ✨ Leader tool
We've introduced a new **`leader`** tool for creating architectural drawings faster.
## 💪 Multi-dimensions
From now on, you can apply a **multi-dimension mode** when applying dimensions to your drawings!
## 💪 Direction mode for dimensions
You can now draw **aligned, horizontal, vertical, or rotated** dimensions.
## 💪 Arc mode on the arrow tool
You can now draw **arc arrows** on the canvas.
## **💪 Better support for transparent background images**
Import PNG images into Rayon seamlessly!
***
**Any questions? ☝️**
→ Feel free to email us at 🙌
→ For a more in-depth look at Rayon's features, check out our [documentation](https://docs.rayon.design/documentation/rayon-documentation) 🔗
# April '24 Product Updates
All of April's new and improved features 🙌
We've added and improved features to enhance your Rayon experience!
✨ **New features:**
* New command line
* New Rayon desktop app for Mac and Windows
* New affiliation program for influencers
💪 **Improved features:**
* Arc mode for zone divider
* Better selection between overlapping objects
* Batch-edit annotations
* Better chamfer command
* Page previews in the page panel
For a more in-depth look at Rayon's features, 👉 check our [documentation](https://docs.rayon.design/documentation/rayon-documentation) 🔗
## ✨ New command line
Use the new command line to **activate a command**! Shortcut Cmd/Ctrl+K.
## ✨ New Rayon desktop app for Mac and Windows
Choose between working from your browser or [downloading the new Rayon app](https://www.rayon.design/downloads) onto your Mac or Windows!
## ✨ New affiliation program for influencers
Top-notch content creator for architects and designers? You can now submit your application to the Rayon Affiliate Program and **start growing your revenue & community!** [Apply here](https://b1kzip68v9f.typeform.com/to/tA2ly5rW?typeform-source=linktr.ee) 🚀
## 💪 Arc mode for zone divider
Introducing a new **Arc mode** for the [zone divider](/documentation/design/elements-walls-zones-openings-etc)!
## 💪 Better selection between overlapping objects
You can now **use the TAB button to easily select between overlapping objects**.
## 💪 Batch-edit annotations
You can now **edit faster** with batch-edit annotations!
## 💪 Better chamfer command
We **improved the** [chamfer command](broken://pages/WjBvVuvTMB0JRY3YXD34)!
## 💪 Page previews in the page panel
When opening the [Pages](broken://pages/GqwiFLOXYGLYF6DU9Lhb) Panel, you will see a **preview of each page.**
***
**Any questions? ☝️**
→ Feel free to email us at 🙌
→ For a more in-depth look at Rayon's features, check out our [documentation](https://docs.rayon.design/documentation/rayon-documentation) 🔗
# March '24 Product Updates
All of March's new and improved features 💫
We've improved and made new features to **enhance your Rayon experience**!
✨ **New features:**
* New hatches libraries!
* New ARC mode for walls
* New template categories
* New navigation modes: mouse or pad
💪 **Improved features:**
* Faster trim command
* Search bar in the layer panel
* Precise editing of hatches and textures
* Imperial fractional dimensions
For a more in-depth look at Rayon's features, 👉 check our [documentation](https://docs.rayon.design/documentation/rayon-documentation) 🔗
## ✨ New hatches libraries
You can now browse x4 more hatches in the style panel to bring your drawings to life!
## ✨ New ARC mode for walls
You can now draw [arched walls](/documentation/design/elements-walls-zones-openings-etc) on the go with the **wall ARC mode.**
## ✨ New template categories
We've **restructured the template section** in your workspace. Don't miss out on tons of **new famous building templates** you are welcome to use!
## ✨ New navigation modes: mouse or pad
Customize your navigation experience by **choosing between a mouse or a pad**. [Dive in here](/documentation/rayons-basics/navigation-and-command-access) to get more info on how to do so!
## 💪 Faster trim command
You can now **select multiple items to be trimmed** at once!
## 💪 Search bar in the layer panel
Find the [layer](/documentation/design/layers) you want faster with the new **layer panel search bar**.
## 💪 Precise editing of hatches and textures
Edit hatches and textures to a T by **inputting exact values** in the [style ](/documentation/design/styles)editing panel.
## 💪 Imperial fractional dimensions
**Imperial and inch** units now show **fractions instead of decimal** values, making your drawing experience more precise!
***
**Any questions? ☝️**
→ Feel free to email us at 🙌
→ For a more in-depth look at Rayon's features, check out our [documentation](https://docs.rayon.design/documentation/rayon-documentation) 🔗
# February '24 Product Updates
All of February's feature improvements ✨
February was all about improving key features for you!
💪 **Improved features:**
* Openings orientation
* Simpler PDF export
* Command and mode memorization
* More keyboard-controlled features
* Double-click to edit
* Revamped paywall
For a more in-depth look at Rayon's features, 👉 check our [documentation](/documentation/rayon-documentation) 🔗
## 💪 Openings orientation
You can now **select the direction** of door and window openings upon insertion!
## 💪 Simpler PDF export
You can now export PDFs from **both the Page panel and the main menu** to make it simpler.
## 💪 Command and mode memorization
From now on:
* Once you **enter a value for a command** (like distance, for example), you can **re-apply it** with the **`tab`** button!
* When choosing a **mode on a command**, it is **applied the next time you use that command.**
## 💪 More keyboard-controlled features
You can now use the keyboard to activate more commands, like **`Dimension`**, **`Offset`**, and others! You will also find that the **`Zone`** and **`Copy`** commands can now be deactivated by using the **`Enter`** button.
## 💪 **Double-click to edit**
**Double-click to edit** now applies to more objects, like **`path`, `text`, `block`, `group`,** and more!
## 💪 Revamped paywall
We **redesigned the paywall** in the app and our website to clarify the difference between the account tiers.
***
**Any questions? ☝️**
→ Feel free to email us at 🙌
→ For a more in-depth look at Rayon's features, check out our [documentation](/documentation/rayon-documentation) 🔗
# January '24 Product Updates
All of January's new and improved features 🔥
We've **added and** **improved features** to enhance your workflow!
✨ **New features:**
* Opening command (doors & windows)
💪 **Improved features:**
* Wall re-editing
* In-app template section
* Insertion point of DWG import
For a more in-depth look at Rayon's features, 👉 check our [documentation](/documentation/rayon-documentation) 🔗
## ✨ Opening command (doors & windows)
Placing an opening within a wall just got much faster! Click on the **`Opening (OP)`** command in the bottom toolbar for **fast access to the door and window blocks.**
## 💪 Wall re-editing
You can now edit a wall placement by selecting it and **inputting a distance** to adjust its location on the canvas.
## 💪 In-app template section
All of **the Rayon tutorials are now available on the left panel of the project manager** for quick access when you need a hands-on explanation!
## 💪 Insertion point of DWG import
You can now **pick an insertion point** when importing DWG files directly to the canvas!
***
**Any questions? ☝️**
→ Feel free to email us at 🙌
→ For a more in-depth look at Rayon's features, check out our [documentation](/documentation/rayon-documentation) 🔗
# Rayon's '23 Product Evolution
We've worked tirelessly throughout 2023 to improve Rayon just for you! Take a moment to ensure you're using all the features at your fingertips... 👉
## 💪 Import & edit floor plan files faster
Rayon allows you to[ import](/documentation/import-export/dwg-dxf-import) floor plan files (PDF/DWG/Image) directly onto the canvas and **converts PDF and DWG files into editable lines**, giving you the flexibility to modify the floor plan layout!
## 💪 Tap into loads of block libraries
Access dozens of [block libraries](/documentation/publishing-and-sharing), including **over 2,000 blocks of various use cases**: residential, office, commercial, outdoor, and more. **Drag and drop blocks on the canvas** to customize them and run test fits on layouts!
## 💪 Create professional-looking floor plans
Design stunning floor plan[ styles](/documentation/design/styles) that reflect your **brand look and feel** with Rayon's in-app textures, hatches, and colors - or create custom ones!
## 💪 Generate automatic tables of data from your floor plan
Create [tables](broken://pages/aaX3paETQpqlJ2wDz4RU) **in a snap and export them to an Excel sheet!** For example, create a table…
* Stating each **room's name and SQM** with a total sum.
* **Listing all furniture pieces**, their supplier, price, and amount.
* Marking **vacant vs. occupied** rooms of a floor plan.
## 💪 Designer/Architect? Your go-to tools are here!
We aim to be the best 2D, light BIM web-based tool out there for you. Feel at home with [Rayon](https://docs.rayon.design/other-resources/product-updates/www.rayon.design), using the tools you need to **edit a floor plan or draw one from scratch:** Offset, fillet, chamfer, layers, blocks, and many more!
Stay tuned for all the **advanced features coming up in 2024** 💫
***
**Any questions? ☝️**
→ Feel free to email us at 🙌
→ For a more in-depth look at Rayon's features, check out our documentation 🔗
# November 2023 Changelog
All of November's improved features and news 🌟
We've **improved features and added new things to our ecosystem!**
🫶 **New in our ecosystem:**
* Demos and webinars are now available to all!
💪 **Improved features:**
* In-app template section
* Path editing
* Comments on canvas & emoji reactions
For a more in-depth look at Rayon's features, 👉 check our [documentation](/documentation/rayon-documentation) 🔗
## 🫶 **New in our ecosystem**
Anyone can now [book a demo or sign up for our weekly webinars!](https://b1kzip68v9f.typeform.com/to/Hgr0eQ4k#source=website)
## 💪 In-app template section
You can now find a new Template section in the main panel of your workspace, including many templates to get you started drawing!
## 💪 Path editing
We've revamped the path edition for a more clear editing experience.
## 💪 Comments on canvas & emoji reactions
You can now open a comment directly on the canvas and add emoji reactions to it!
***
**Any questions? ☝️**
→ Feel free to email us at 🙌
→ For a more in-depth look at Rayon's features, check out our documentation 🔗
# October 2023 Changelog
All of October's new and improved features 🔥
Take a look at last month's **new and improved Rayon features!**
✨ **New features:**
* New product tour
* New 'Favorites' section
💪 **Improved features:**
* Basic math in property inputs
* Better editing mode
* Distance-Polyline mode
* Mention your collaborator in a Comment!
For a more in-depth look at Rayon's features, 👉 check our [documentation 🔗](/)
### ✨ New product tour
New to Rayon? We put in place an improved **product tour** just for you!
### ✨ New 'Favorites' section
From now on, you can add models to the **"Favorites" section** from your project manager!
### 💪 Basic math in property inputs
Draw faster by **using basic math** to define a property dimension.
### 💪 Better editing mode
We **revamped the edition bar** placement for a more fluent workflow.
### 💪 Distance polyline mode
You can now **measure multiple dimensions faster** using the Polyline mode of the Distance tool.
### 💪 Mention your collaborator in a comment!
You can now **mention the people** you invite to your model in a [comment](/documentation/rayons-basics/sharing-commenting-annotating)! Type in @theiremail, and they will get a notification.
***
#### Any questions? ☝️
→ Feel free to email us at 🙌
→ For a more in-depth look at Rayon's features, check out[ our documentation](/) 🔗
# September 2023 Changelog
All of September's new and improved features 💫
**We've improved and made new features to enhance your Rayon experience!**
**✨ New features:**
* Image blocks
* New onboarding
**💪 Improved features:**
* Better page export
🫶 **Revamped ecosystem:**
* New kits & blog
* Revamped tutorials
For a more in-depth look at Rayon's features, 👉 check [our documentation](https://docs.rayon.design/documentation/rayon-documentation) 🔗
### ✨ Image blocks
You can now **turn images on the canvas into blocks** and create **custom image** [**block libraries**](/documentation/publishing-and-sharing)!
### ✨ New onboarding
Our onboarding is now tailored to your use case by providing **custom example models, student accounts,** and more!
### **💪** Better page export
[Export Pages](broken://pages/GqwiFLOXYGLYF6DU9Lhb) **faster and with better-quality** embedded images!
### 🫶 New kits & blog
Our website now hosts:
* [Kits](https://www.rayon.design/kits/blocks), our free, high-quality **2D blocks repository**!
* The [Rayon Blog](https://www.rayon.design/blog)
### 🫶 Revamped tutorials
{% embed url="" %}
Check out our **revamped tutorials**, made with lots of care and a teaspoon of personal touch!
***
### Any questions? ☝️
→ Feel free to email us at 🙌
→ For a more in-depth look at Rayon's features, check out [our documentation](/documentation/rayon-documentation) 🔗
# August 2023 Changelog
All of August's new and improved features 🔥
**We are constantly working on improving and revamping Rayon's features for our users! Here is what you can find scrolling below:**
**✨ New features:**
* Templates
* DWG import from within a model (2mo limit)
**💪 Improved features:**
* Revamped chamfer command
* Better text editing
For a more in-depth look at Rayon's features, 👉 check [our documentation](/documentation/rayon-documentation) 🔗
## ✨ New templates
Create a **personalized template model** to harmonize your work and **share it with others** on your team!
## ✨ DWG import from within a model (2mo limit)
We enabled importing a DWG file (up to 2mo) **directly on the canvas** from within a model!
## 💪 Revamped chamfer command
You can now **input values** to Chamfer a shape more accurately!
## 💪 Better text editing
From now on, adding and editing text is done **directly on the canvas** for a seamless experience.
***
### Any questions? ☝️
→ Feel free to email us at 🙌
→ For a more in-depth look at Rayon's features, check out [our documentation](/documentation/rayon-documentation) 🔗
# July 2023 Changelog
All of July's new and improved features 🌟
**We've made some new features and improved some existing ones!**
#### ✨ **New features:**
* New chamfer command
#### 💪 **Improved features:**
* Better support for **imperial units**
* Revamped edit button
#### 🫶 **Better website & Social:**
* New [Rayon Website](https://rayonapp.com/files/workspace/personal/folder/root)
* New [YouTube Channel](https://www.youtube.com/channel/UCJBizn67P0CRTW_l1i6NT3g)
For a more in-depth look at Rayon's features, 👉 [check our documentation](/) 🔗
### ✨ Chamfer command
**Chamfering a corner** has never been faster! Just follow the command bar to **`Chamfer`** with a few clicks. 👉 More about it in [our documentation!](broken://pages/WjBvVuvTMB0JRY3YXD34)
### 💪 Better support for imperial units
From now on, you can use **inches and feet** **seamlessly**!
### 💪 Revamped edit button
To edit a shape or block on your canvas, click on it and then on the **`Edit`** button that will appear on the bottom toolbar!
***
## Any questions? ☝️
→ Feel free to email us at 🙌
→ For a more in-depth look at Rayon’s features, [check out the Documentation](/documentation/rayon-documentation) 🔗
# June 2023 Changelog
Check out June's new and improved features ☄️
**We've improved and made new features to enhance your Rayon experience!**
✨ **New features** **you can now use:**
* Mirror command - Quickly draw and edit
* Workspace trash - Keep your files safe
💪**Things that got better:**
* Revamped snapping options
🫶 **Better support:**
* Refreshed [documentation](/documentation/rayon-documentation) and up-to-date [tutorials](broken://pages/9vA1EcrHo1TnaSOI9zVx)
* Live support chat: We are here to help you out!
* In-app billing plans for those who want to upgrade from the free plan
* New product tour for first-timers on the App!
For a more in-depth look at Rayon's features, 👉 [check our Documentation](/documentation/rayon-documentation)
### ✨ Mirror command
You can now draw faster using the **`Mirror`** tool! 👉 More about it on the [Editing Commands page](broken://pages/WjBvVuvTMB0JRY3YXD34)
### ✨ Workspace trash
From now on, your deleted models will be transferred from your workspace to the **Trash,** and you can always **`Restore`** them to your workspace or **`Delete Forever`** - Keeping your work safer! 👉 More about it on the [My Workspace page](/documentation/rayons-basics/your-workspaces)
### 💪 Snapping options
New **snapping options** were added and are all available in the **bottom right panel.** 👉 More about it on the[ Drawing page](/documentation/rayons-basics/drawing)!
***
## Any questions? ☝️
→ Feel free to email us at 🙌
→ For a more in-depth look at Rayon’s features, [check out the Documentation](/documentation/rayon-documentation) 🔗
# End of May 2023 Changelog
Here are some new and improved features added to Rayon!
**We are excited to share some new and improved features we're sure you will love!**
\
Here are the **new things you can now do** ✨
* DWG & DXF export
* Offset command
And here is what **just got better** 💪
* Block search
For a more in-depth look at Rayon's features, 👉 [check our Documentation](/documentation/rayon-documentation)
## Some things are new ✨
### ✨ DWG & DXF export
From the main toolbar, select **Export > To File > DWG/DXF**. As simple as that.
### ✨ Offset command
Select the **`offset`** command from the toolbar, and **offset a line manually or by entering a distance.**
## And some are better 💪
### 💪 Block search
From now on, the result of a block search will show **both items and libraries** (plus, **we revamped and increased** the Rayon block library!).
***
## Any questions? ☝️
→ Feel free to email us at 🙌
→ For a more in-depth look at Rayon’s features, [check out the Documentation](/documentation/rayon-documentation) 🔗
# May 2023 Changelog
Take a look at the Rayon features that got improved this month, just for you!
Here are the **features that got better**💪
* Styles
* Shortcuts
For a more in-depth look at Rayon's features, 👉 [check out our Documentation](/documentation/rayon-documentation)
## Features that got better 💪
### Styles 💪
* **Create a new style** by simply clicking on an element and editing its style
* **Assign a style** by clicking on the drop-down in the side panel or by using the style picker!
* **Edit a style** by hovering over it and clicking the **`Edit`** button
👉 More about styles [in our Documentation!](/documentation/design/styles) 🔗
### Shortcuts 💪
We have added **new shortcuts** and revamped the existing ones to help you work faster! 💥 Check them all out [in our Documentation!](/documentation/design/shortcuts) 🔗
***
## Any questions? ☝️
-> Feel free to email us at 🙌
→ For a more in-depth look at Rayon’s features, [check out the Documentation](/documentation/rayon-documentation) 🔗
# April 2023 Changelog
All of April's new and improved features 🌟
#### We are constantly working on improving and revamping Rayon's features for our users!
Here are new features that just got better💪
* New pages system
* Improved wall drawing experience
* New dashed lines styles
For a more in-depth look at Rayon's features, 👉 [check out the Documentation](/documentation/rayon-documentation)
## Features that got better 💪
### New pages system 💪
You can now "Nest" items onto a page! This will enable you to scale the page's content before exporting it to a PDF. 👉 More about Pages in [our Documentation!](broken://pages/GqwiFLOXYGLYF6DU9Lhb)
### Improved wall drawing experience 💪
You can now shift the wall center line left or right for a more precise drawing experience! 👉 More about Walls [in our Documentation!](/documentation/design/elements-walls-zones-openings-etc)
### New dashed lines styles 💪
We have revamped the dash line families to offer you a greater variety! 👉 More about Line Styles [in our Documentation!](/documentation/design/styles)
***
## Any questions? ☝️
-> Feel free to email us at 🙌
→ For a more in-depth look at Rayon’s features, [check out the Documentation](/documentation/rayon-documentation) 🔗
# March 2023 Changelog
All of March's new and improved features 🔥
#### We've made some improvements to selected features to make your Rayon experience seamless!
Here is what got better 💪
* Blocks: scaling text
* Style: texture offset and rotation by individual zone
* Tables: 'group by' option
For a more in-depth look at Rayon's features, 👉 [check out the Documentation](/documentation/rayon-documentation)
## Features that got better 💪
### Blocks: scaling text 💪
Text embedded within a block does now scale seamlessly! 👉 More about Blocks [in our Documentation!](/documentation/publishing-and-sharing)
### Style: texture offset and rotation by individual zone 💪
From now on, zones with the same texture style can be controlled independently to set their offset and rotation! 👉 More about Styles [in our Documentation!](/documentation/design/styles)
### Tables: 'group by' option 💪
Tables are meant to list and count elements on a floor plan. Now, you can also group these elements! 👉 More about Tables [in our Documentation!](broken://pages/aaX3paETQpqlJ2wDz4RU)
***
## Any questions? ☝️
-> Feel free to email us at 🙌
→ For a more in-depth look at Rayon’s features, [check out the Documentation](/documentation/rayon-documentation) 🔗
# February 2023 Changelog
Check out February new and improved features 🎇
#### We are happy to share the progress and features added in Rayon to make drawing faster and easier for you!
\
Here are the new things that were added this month✨
* Patterns
* Annotations
* Boolean operations
* Zone divider
* Arc
* Match properties
And here is what got better 💪
* Offsetting door & window openings
* PDF import
For a more in-depth look at Rayon's features, 👉 [check out the Documentation](/documentation/rayon-documentation)
## Some things are new ✨
### Patterns ✨
Floor plans commonly include hatches and textures for informative reasons (indicating the material) and aesthetic reasons (preparing a drawing for presentation). From now on, **choose a pattern and edit it with advanced options** - all on the Rayon canvas.
### Annotations ✨
Adding information to your floor plan can now be done faster using **customized annotations:** straight or curved, one or double-sided Arrows, pins, and more!
### Boolean operations ✨
Draw **complex shapes** with the new boolean operation feature enabling you to:
* Subtract
* Union
* Intersect
* Exclude
### Zone divider ✨
Often, open space areas have sub-divisions according to their use case. That's why we've added a Zone Divider, allowing you to **add a zone freely, with no wall partition**. 👉 More about the wall and zone features [in our Documentation!](/documentation/design/elements-walls-zones-openings-etc)
### Arc ✨
The editing tools now include an Arc! You can implement it in 2 ways:
* By using the arc tool to draw an arc.
* By drawing a polyline and implementing an arc as a part of it: either click on the **`Arc (AC)`** or on the **`Line (L)`** to go between a straight or arched line!
### Match properties ✨
You can now use the **`eyedropper`** button to match the style properties of elements on the canvas! 👉 More about the style properties [in our Documentation!](/documentation/design/styles)
## And some are better 💪
### Offsetting door & window openings💪
When adding an opening block such as a door or a window, hover over it to detect the light blue dashed line: then **drag it to determine the offsetting** of the component! 👉 More about opening and furniture blocks [in our Documentation!](/documentation/publishing-and-sharing)
### PDF import💪
When importing a PDF file, Rayon will ask you to **set an estimated distance for reference**. This will help scale and **convert the PDF file into a Rayon model**. 👉 More about importing, exporting, and sharing [in our Documentation!](/documentation/team-management-and-billing)
***
## Any questions? ☝️
-> Feel free to email us at 🙌
→ For a more in-depth look at Rayon’s features, [check out the Documentation](/documentation/rayon-documentation) 🔗
# Rayon V1
Introducing walls and tables 🧨
Dec. 6th '22
## You asked, we listened! 🎉
### A new version of Rayon is here, and we have a lot of new things for you…
Here is a sneak peek at new things ✨
* The Walls
* The Tables
Here is a sneak peek at things that got better 💪
* The Styles
For a more in-depth look at Rayon’s features, 👉 [check out the Documentation](/documentation/rayon-documentation)
## Some Things are New ✨
### Walls ✨
Drawing a plan is mostly about **laying down walls and partitions.**
Rayon now allows you to draw such walls, snap windows and doors in them, and mark room surfaces using Zones. 👉 More about this new feature [in our Documentation!](/documentation/design/elements-walls-zones-openings-etc) 🔗
### Tables ✨
People like to **list and count objects in floor plans.**
That's why we built the tables: in just a few clicks, you can now give properties to objects, list them and keep quantities in check. 👉 More about this new feature [in our Documentation!](broken://pages/aaX3paETQpqlJ2wDz4RU) 🔗
## Some Things got Better 💪
### Styles 💪
* Styles have been improved!
* We now have a revamped placing of active styles and selected styles; Simply, a new (and easier) way to work with styles in Rayon
***
## Any questions? ☝️
-> Feel free to email us at 🙌
→ For a more in-depth look at Rayon’s features, [check out the Documentation](/documentation/rayon-documentation) 🔗
# Rayon V1 RC
Dimensions, right click, and more! 🚀
Nov. 15th '22
## You asked, we listened! 🎉
#### A new version of Rayon is here, and we have a lot of new things for you…
Here is a sneak peek at **new things** ✨
* The Quick Action Bar
* The Dimension Tool
* The Right-Click
* The Active Bar
Here is a sneak peek at **things that got better** 💪
* The Styles
* The Layers
* The DWG/DXF Import
For a more in-depth look at Rayon’s features, 👉 [check out the Documentation](/documentation/rayon-documentation)
## Some Things are New ✨
### Quick Actions ✨
We know that editing things should be fast. That’s why we just created the **quick action bar!** This bar **shows up each time you select something** and gives you access to fast, off-the-shelf actions (alignment, rotation, flipping, deleting, hiding, locking).
### Dimensions ✨
Rayon now allows you to draw dimensions. The dimensions command can be found in the toolbar and enables users to **quickly mark distances on their plans.**
### Right Click ✨
Having a right click is a must-have, and it is now something you have in Rayon. Right-clicking on the canvas will give you **a quick way to access a whole lot of options** (clipboards, transform, Help… To get to the documentation, and many other things)!
## Some Things Got Better 💪
### Styles 💪
Styles have been improved. It is now much **easier to edit, manage, and swap styles** in your drawing.
### Layers 💪
Layers have been revamped to make sure it gets easier to work with them. **Shuffling items, editing groups, and blocks, but also simply visualizing selected elements** in the layer panel, got a whole lot simpler.
### DWG/DXF Import 💪
Importing CAD files can be a pain. We made things much simpler; when importing a DWG or DXF file to your workspace, we offer you **a few simple steps to make sure the model units and size are just fine.**
***
## Any questions? ☝️
-> Feel free to email us at 🙌
→ For a more in-depth look at Rayon’s features, [check out the Documentation](/documentation/rayon-documentation) 🔗
# Apps
Smalls apps, big help
We have put together **a few standalone web apps** to help you tackle simple, common tasks, in an instant: publishing a public portfolio, extracting a given site's CAD data, etc.
# Maps
Site data for architects in 3 simple steps
{% hint style="info" %}
Please note that this app is in **Beta** for now; any feedback you have is more than welcome!
{% endhint %}
**Maps creates site CAD data, for any site, worldwide.** \
The app is built on top of OpenStreetMap data and turns it into clean, editable CAD files — perfect for architects, planners and designers who need real-world context in their drawings. To get started, click below :arrow\_down:
Open Maps
### How to use Maps?
Here is a short tutorial that will run you through the app feature set.
{% embed url="" %}
### FAQ
What kind of data does Maps produce?
Maps creates a DXF files, organized into layers...
* Buildings
* Roads & path
* Railways
* Nature
* Water
* Trees
How big an extract can Maps do?
The app allows to extract up to 100 km2; however, we advise you stay below 10km2 to the app from crashing. Very wide extract will be a strain on your browser and your machine. Try small extracts first, and increase the selection area gradually.
What data is Maps using?
We use OSM data, Open Street Map, that is open source data. The data will eb as precise as OSM is.
Can Rayon open Maps data?
Of course! For files up to 20Mo.
# Portfolio
How to create a portfolio in a click
{% hint style="info" %}
This is feature is in **`Beta`**; that means it is fully accessible and useable, but might evolve in the future.
{% endhint %}
[Our portfolio app](https://portfolio.rayon.design/) is both a **free** **PDF portfolio viewer** that transforms any PDF into an elegant, shareable flipbook, and **a public gallery**, to showcase our users work. A ideal platform for interior designers, architects, students, etc who want to broadcast their work in a beautiful, interactive format.
{% embed url="" %}
### Creating a portfolio
To create a new portfolio, [head to this page](https://portfolio.rayon.design/), and follow the steps below\...
{% stepper %}
{% step %}
**Upload your PDF**
* **Click to upload**: Or click the upload zone to browse files
* **File size limit**: Maximum 20 MB per PDF
* **Instant cloud storage**: Files are automatically saved to the cloud
{% endstep %}
{% step %}
**Create an account to save your portfolio**
You will have to create an account to be able to save your portfolio, and share it with others. Clicking on "Create an account" will redirect you to the signup page.
{% endstep %}
{% step %}
**Browse through your portfolio**
Now that your portfolio is saved...
* You have access to a public link to share it with others.
* At the same time, your portfolio is added to Rayon's public portfolio gallery. People can now see your work, like it, and reshare it, giving you more visibility. More about the gallery below.
{% embed url="" %}
While in the viewer, multiple things can be done...
* **Browsing through your work:**
* **Realistic page flipping**: Animated page turns with shadow effects
* **Keyboard navigation**: Use left/right arrow keys to navigate
* **Click navigation**: Use chevron buttons on each side to navigate between pages
* **Zoom mode**: Click on any page to zoom in. Click **`exit`** to exit zoom mode
* **Adaptive Sizing**: Automatically adjusts to screen size and PDF aspect ratio
* **Checking your stats and likes**: Open the stats page to know how much attention your work is really getting.
* **Sharing your work: clicking on the link icon will copy** a unique shareable URL address, that you can then reshare with anyone.
* **Deleting your work**: a delete icon allows to remove your work from our platform at any point.
{% endstep %}
{% endstepper %}
### The gallery
At any point you can **visit the** [**gallery**](https://portfolio.rayon.design)**.**\
**The portfolio gallery gathers the work uploaded to our platform**, with a light curation made by our team. If you uploaded your portfolio to the app, there is good chance that if will appear here.
**Why the gallery?** A lot of our users want to reach a wider audience, find an employers or simply broadcast their last project. The gallery is here precisely for that. Portfolio can be viewed, liked and reshared, to give portfolio owners more visibility.
### Your account
To manage and curate your portfolios, **the app offers** [**an admin page**](https://portfolio.rayon.design/account), from which you can...
* **Inspect** you current portfolios (likes and views)
* **Delete** your work
* **Upload** new PDFs
# Rayon for studying
All you need to know about using Rayon in the academic context.
**Rayon is free for the academic world.**
Our hope by opening the software for free to students, faculty and universities at large is **to finally offer a collaborative CAD environment that provides architecture and interior architecture/design curriculums the means to learn and teach with a modern tool set**. As a professional CAD environment that supports multiplayer editing and reviewing, Rayon is essentially the ideally platform to gather architecture/interior design students and faculty.
Today, Rayon offers free accounts to students and faculty through its ***student plan.*** Rayon also offers more control to academic institutions (admin rights, SSO, repository curation, etc), thanks to its ***academic plan***. Both are free, and can be explored below.
To get started, **click on the option below that best represents who you are...**
***
### We are always available
Book a demo with our team, [right here](https://b1kzip68v9f.typeform.com/to/Hgr0eQ4k#source=docs).\
To get some support, reach out to us through our **in-app support chat**. \
More about [our support policy right here](/other-resources/others/support-policy).
# Rayon for students
Everything about our student plan, and how to get it.
## Rayon is the best online CAD app, enabling faculty and students to teach and learn architecture/interior design in a modern, collaborative platform. Rayon is **free for students from accredited institutions!**
* To set up your account, you can create your **free student account** [**at this link.**](https://www.rayon.design/app/auth/student-signup)
* If you institution is not accredited, [**simply feel in this form.**](https://b1kzip68v9f.typeform.com/to/d9WNl3bl#source=docs)
***
### What is Rayon?
Rayon is an **online, collaborative app for architects, interior designers**, etc allowing users to draft, stylise and present their work. It is a one-stop-solution to create complete drawing sets. More importantly, Rayon is **a professional CAD tool**, that offers the full depth that is typical to well known drawing app in the AEC.
Here are some useful links to discover Rayon...
* [Rayon 20 minute demo](https://www.youtube.com/watch?v=B2kc4kXJrkA)
* [Rayon's website](https://rayon.design)
* [Rayon's signup page](https://www.rayon.design/app/auth/student-signup)
### Why use Rayon us Rayon to study?
Our hope by opening the app for free to students is **to finally offer a collaborative CAD environment that provides young architecture and interior architecture/design practitioners the means to learn teach in a modern tool set**.
As a professional CAD environment that supports multiplayer editing and reviewing, Rayon is essentially **the ideally platform to gather architecture/interior design students,** and is adopted by 150k+ of them around the world.
### Account creation
To get a student account, please follow these few steps:
* Create a Rayon account, [at this link](https://www.rayon.design/app/auth/student-signup), using an academic institutional email. Note that generic emails (like gmail, hotmail, etc.) will not be eligible for a student account.
* During the onboarding, when asked, please don't forget to select the ‘I am a student’ option.
* **If your school is already in our student program**, then you will automatically be set on the student plan.
* **If your school is not yet in our student program**, and you declared in the onboarding that you were a student, then you will receive a form by email, a few minutes after signing up, allowing you to submit your application to get a student plan. If you are validated, we will bump you to our student plan, and add your university to our list of partner universities. This way, all students signing up to Rayon after you will receive automatically a student status.
* **Your student plan will give you access to all the features of our Pro plan**: watermark-less exports, access to Rayon's entire libraries, etc.
### FAQ
Questions students usually ask, answers we usually give!
Is my school accredited already?
To know, simply create a Rayon account using your institutional email, and choose the "student/faculty" option in the onboarding. If your school is accredited, you will receive a validation email right after the end of your onboarnding, confirming that you have been granted a student account
My university does not provide students with institutional emails. Can I send you my student ID for proof?
Unfortunately, no. Non-institutional emails (like Gmail, Hotmail, etc.) will not be eligible for a student account.
I created a Rayon account, but I did not mention I am a student in the onboarding. How can I fix this?
That should not be a problem; even if you did not take the right step during the onboarding, you should have received a free student plan if your institution is accredited.
My school gave me an alumni email; can I use it to get a student plan?
Unfortunately, no. We only grant a student plan to active/enrolled students. Alumni email are therefore not accepted.
I am graduating, and will lose my academic email and access to my Rayon account; how can I transfer my work to another account?
Yes, we know that this is an issue most students face at graduation. The answer is simple: you can transfer your work, but the process is not a really smooth one. \
Rayon does not allow swapping your account's email. So the work around here would be to... \
(1) create a new Rayon account\
(2 invite that new account as an editor on all your student account's model \
(3) duplicate each model to your new account.
We know this is not ideal, and will soon come up with a better way to transfer your work; for the time being, this method at least helps you move forward and keep your work!
***
### We are always available
Book a demo with our team, [right here](https://b1kzip68v9f.typeform.com/to/Hgr0eQ4k#source=docs).\
To get some support, reach out to us through our **in-app support chat**. \
More about [our support policy right here](/other-resources/others/support-policy).
---
[Next Page](/llms-full.txt/1)


.png?alt=media&token=4c400709-4bae-4759-80c3-17699e17ce35)


.png?alt=media&token=72c20806-cf4e-40c2-9a1b-d7a085967b03)


.png?alt=media&token=35c4e683-f07d-48d1-b43d-effe2faf5192)


.png?alt=media&token=0cdfac36-d819-42f0-b0ba-f9962cbc6001)


.png?alt=media&token=821e0e56-f835-4a6b-a7f2-76a77d21bc2d)
.png?alt=media&token=dbd73a93-d4b6-4252-9bd1-30cdf8b97d19)

.png?alt=media&token=4555e6b4-c852-40e2-a315-06d709068bad)
.png?alt=media&token=46ef1bee-b6d5-495d-97a2-cd0159b0ff29)
.png?alt=media&token=48a64891-daf7-42f6-aa6c-5a0b7abf27e2)
.png?alt=media&token=e1e15008-abbe-4d1d-ad3c-802255be6045)
.png?alt=media&token=647e735f-add8-41aa-8a9b-4d390ae68ba6)

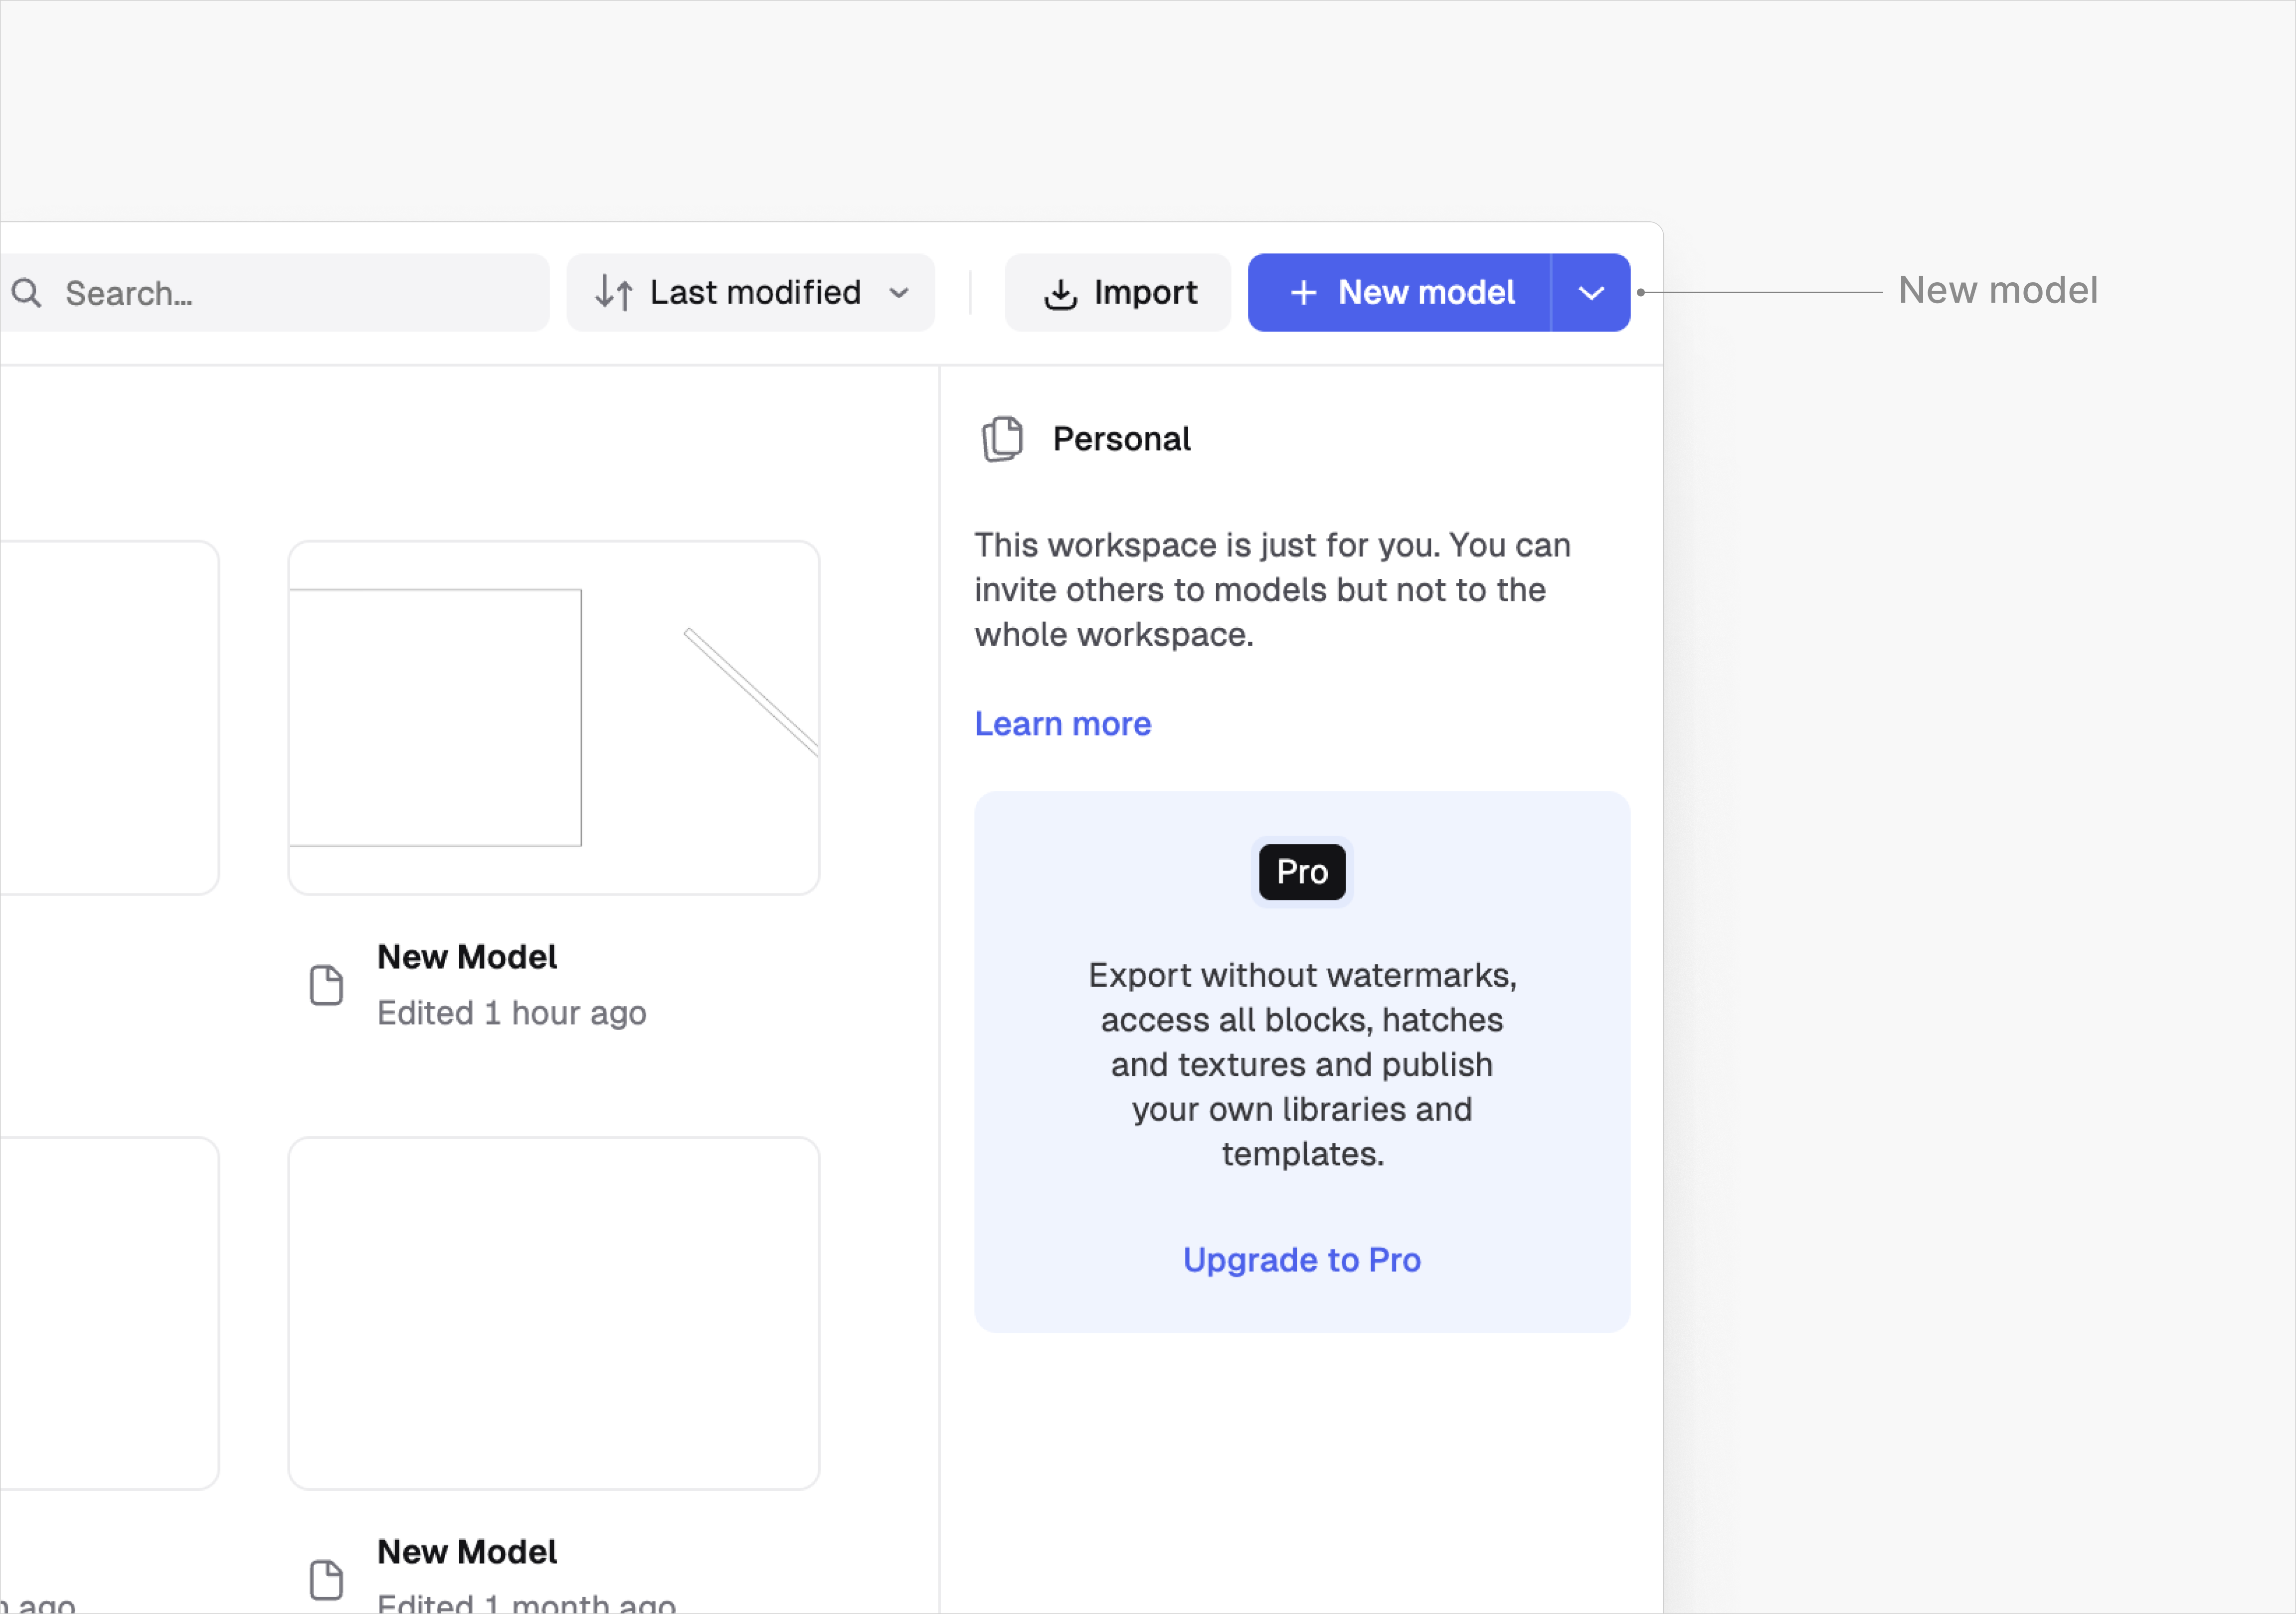
.png?alt=media&token=3c7ca091-3637-40f8-a5f9-73d9a4bfcbfd)


.png?alt=media&token=e6977337-d5b3-4686-b6f3-576c5922971f)


.png?alt=media&token=9c51ead7-8700-4b30-a61f-c1d72994cb95)


.png?alt=media&token=3d7f75bf-2508-4bd7-bb3f-3b4ae8ac9351)


.png?alt=media&token=a9bb201b-3183-416a-814d-081528704c46)

.png?alt=media&token=f39de372-12d3-4077-88dc-12259a335198)


.png?alt=media&token=f97794eb-80d1-4b8c-872d-c71e15853ba1)

.png?alt=media&token=1048fa5c-0518-40e3-936f-ebcb379a6e41)
.png?alt=media&token=6f1a42b3-15cb-4b2e-bd49-e3d7ad619f5d)
.png?alt=media&token=d00e8855-19c5-4110-ab8d-77021befefa6)
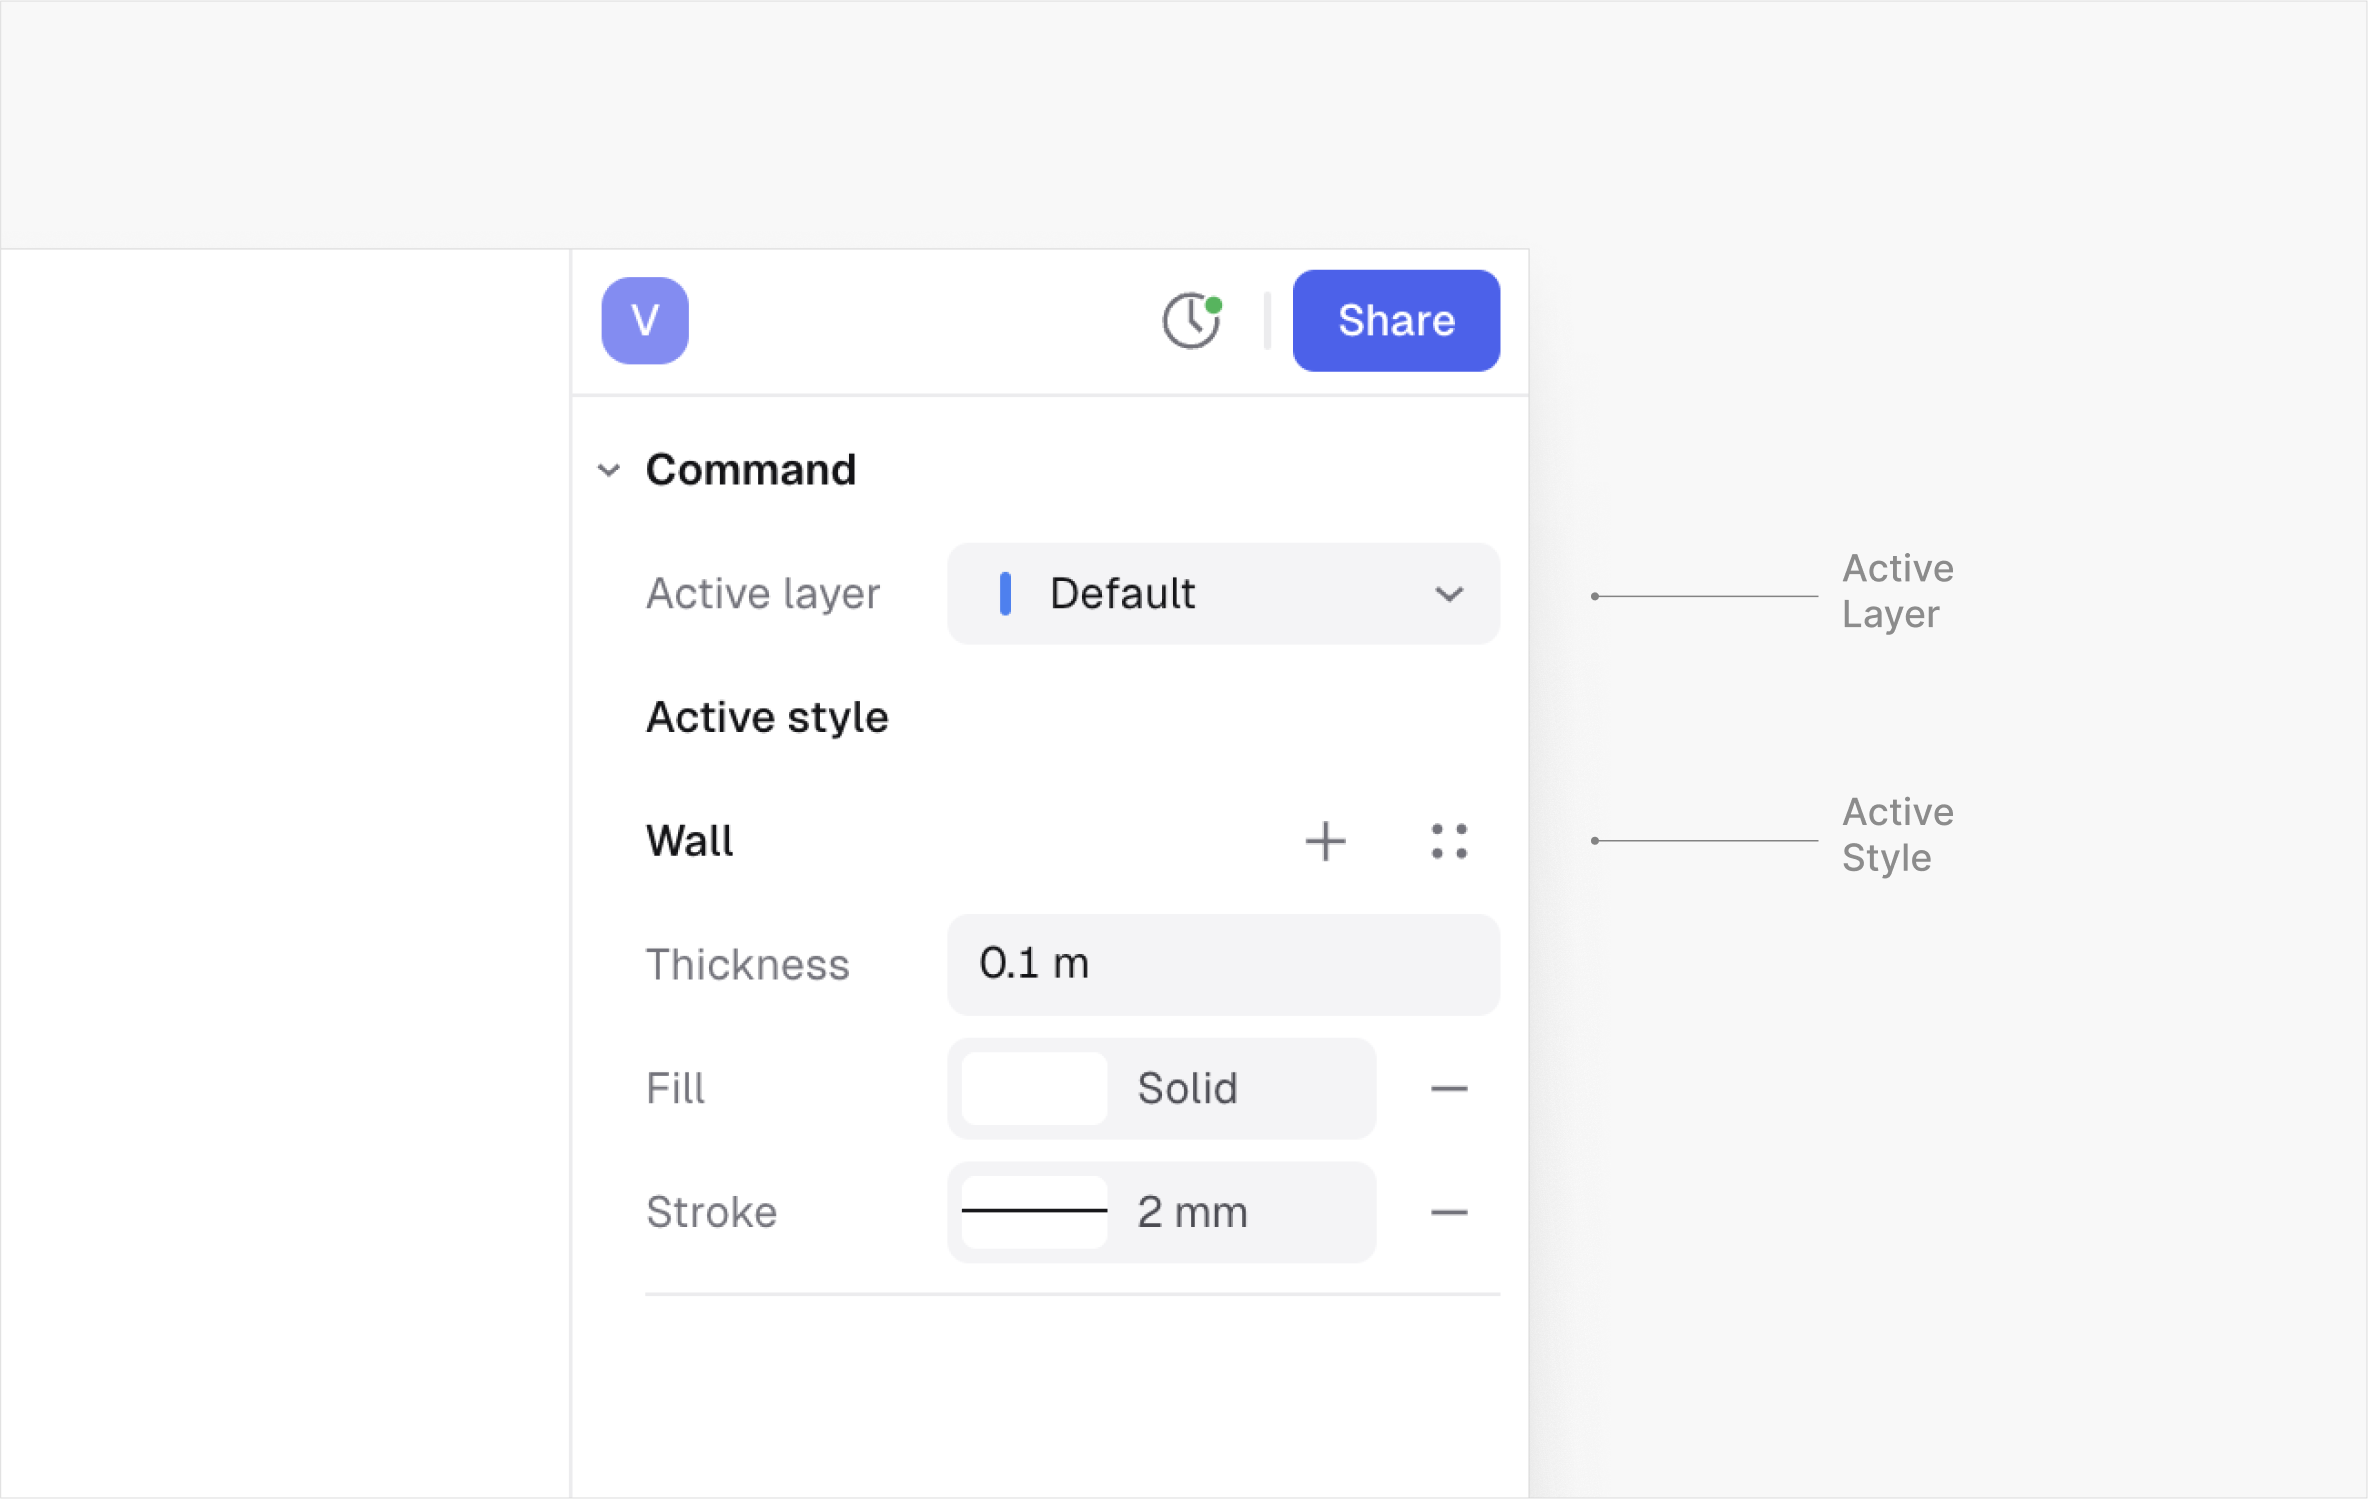
.png?alt=media&token=0f2ebbb9-e109-4ffb-b2cf-765604736b5b)
.png?alt=media&token=61257b9f-815a-46dd-90e5-d4f3063e0fe8)

.png?alt=media&token=009ab65a-cb4a-4601-acde-3ef7e7d8c063)


.png?alt=media&token=0d88863b-5af1-419a-8e19-d854ab512075)


.png?alt=media&token=5f7552b6-755d-478a-8cd6-145fe476ccdb)
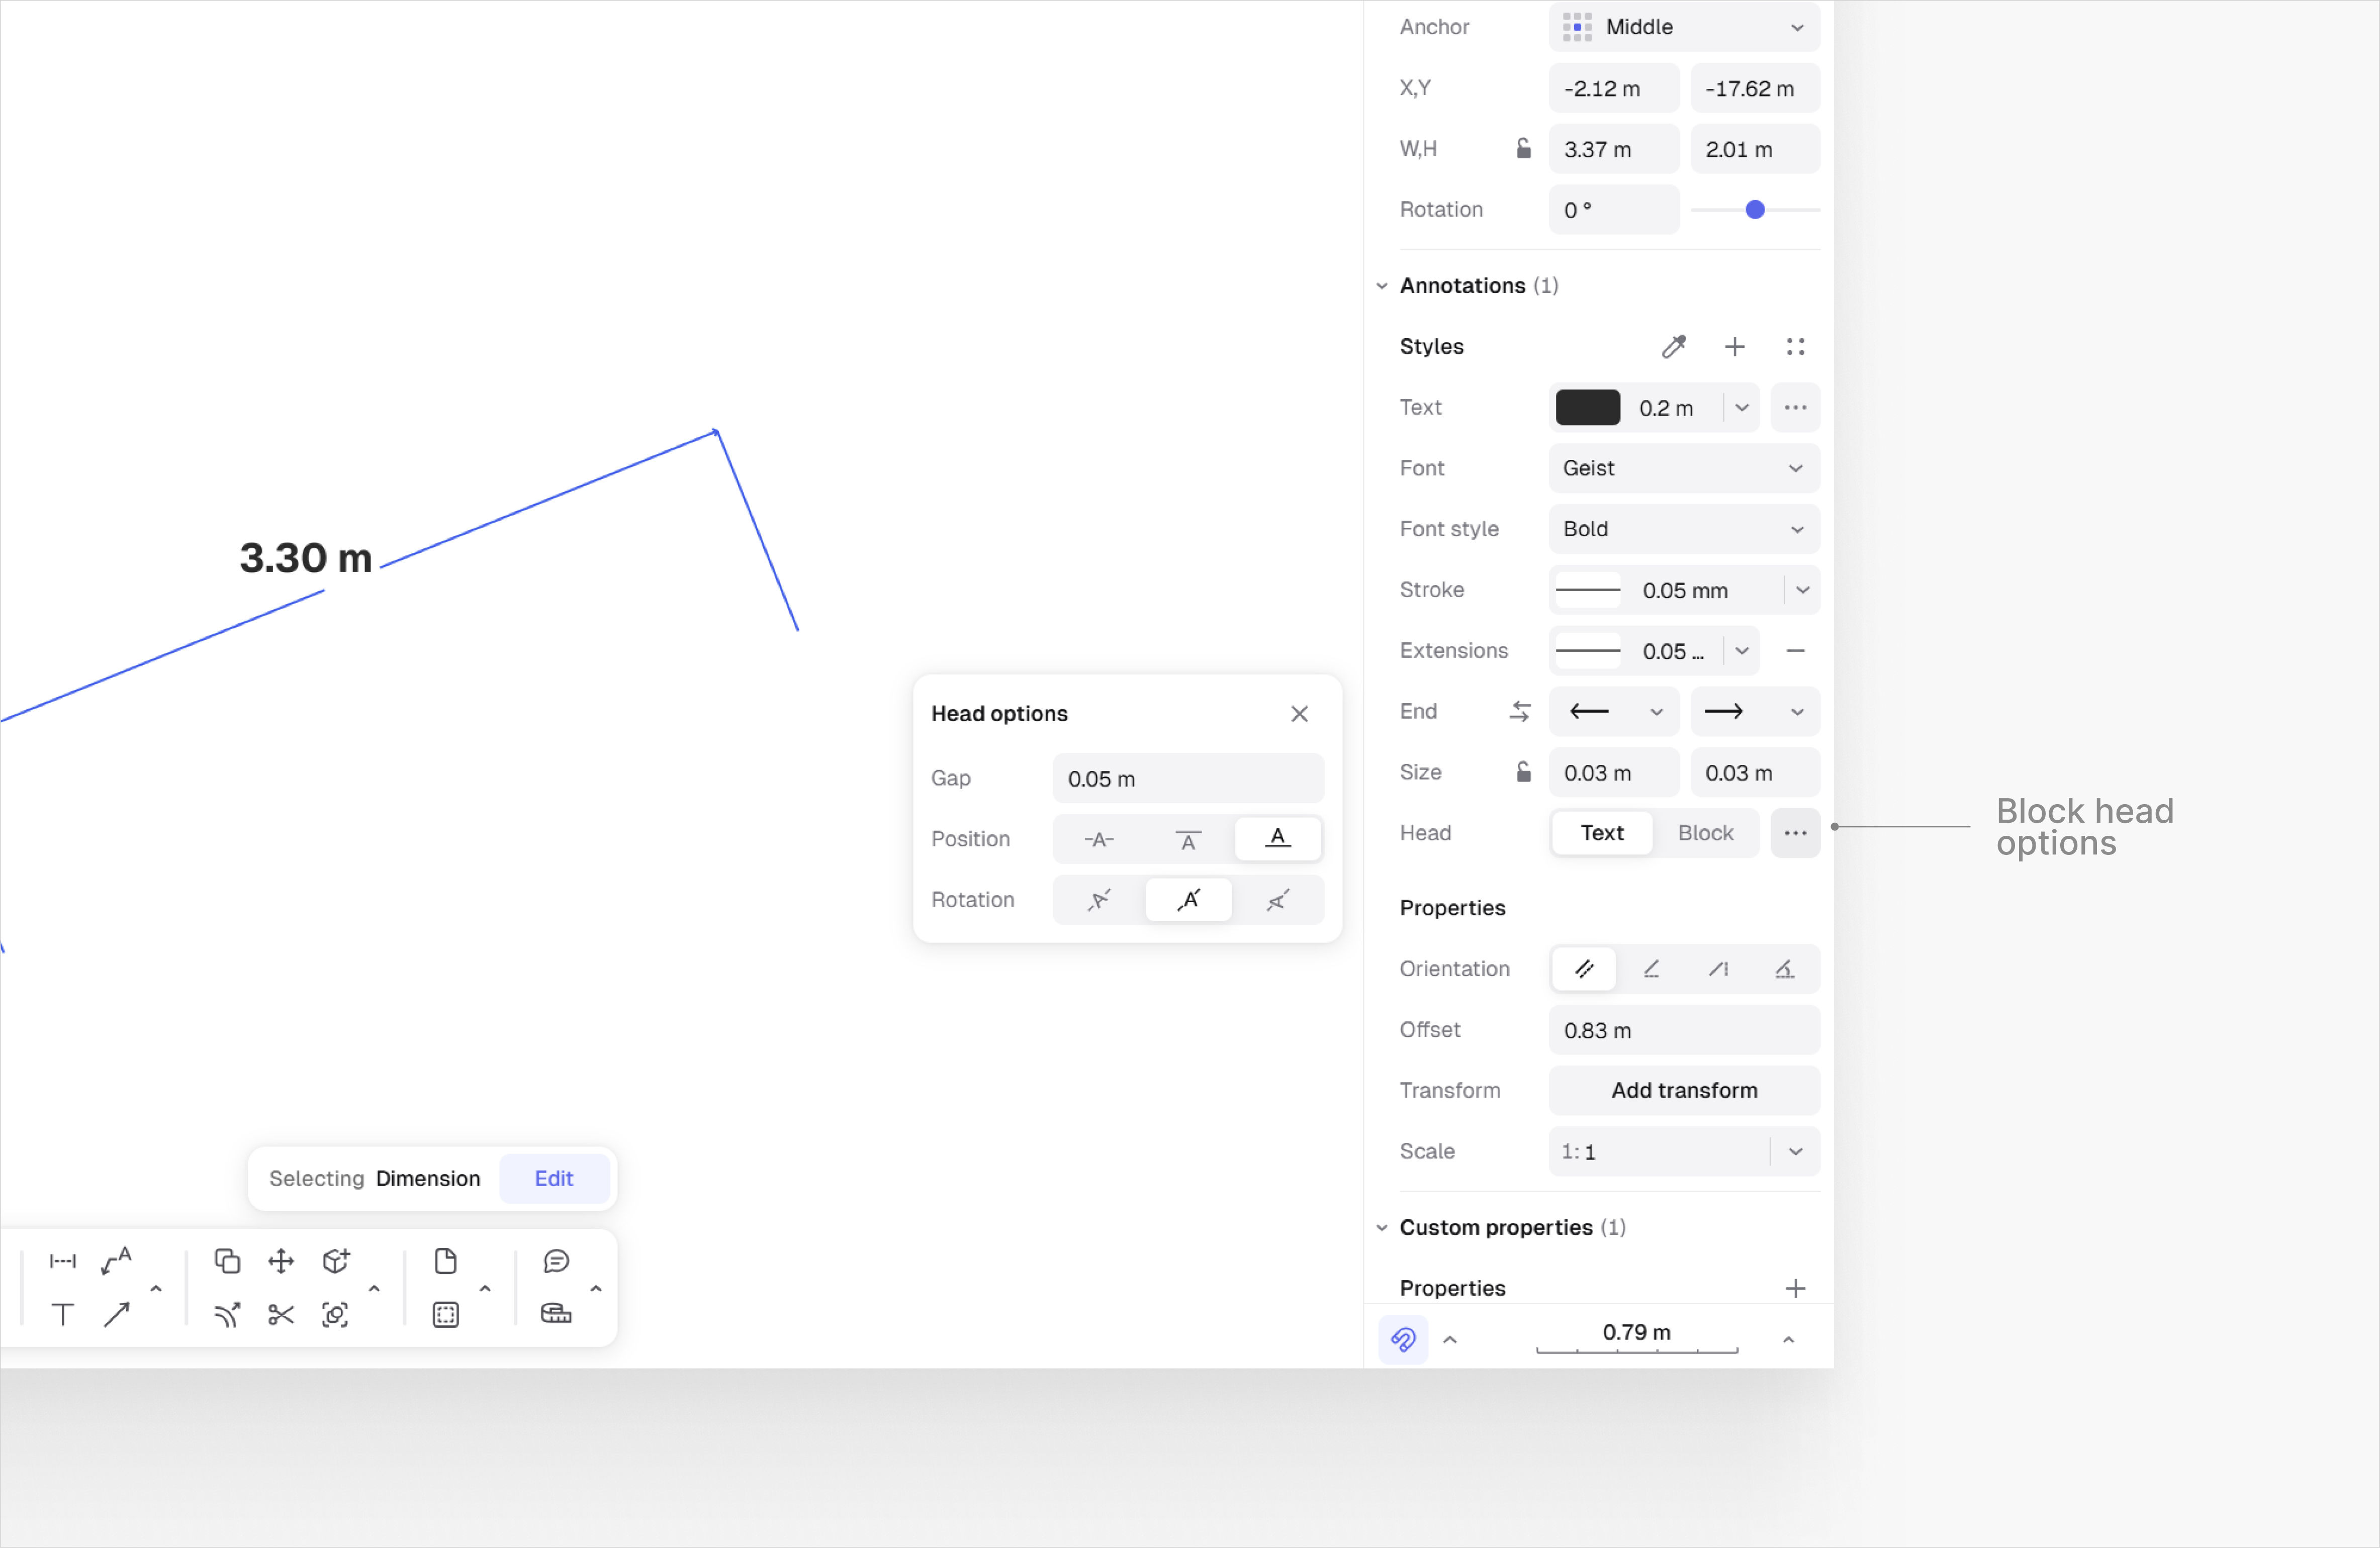

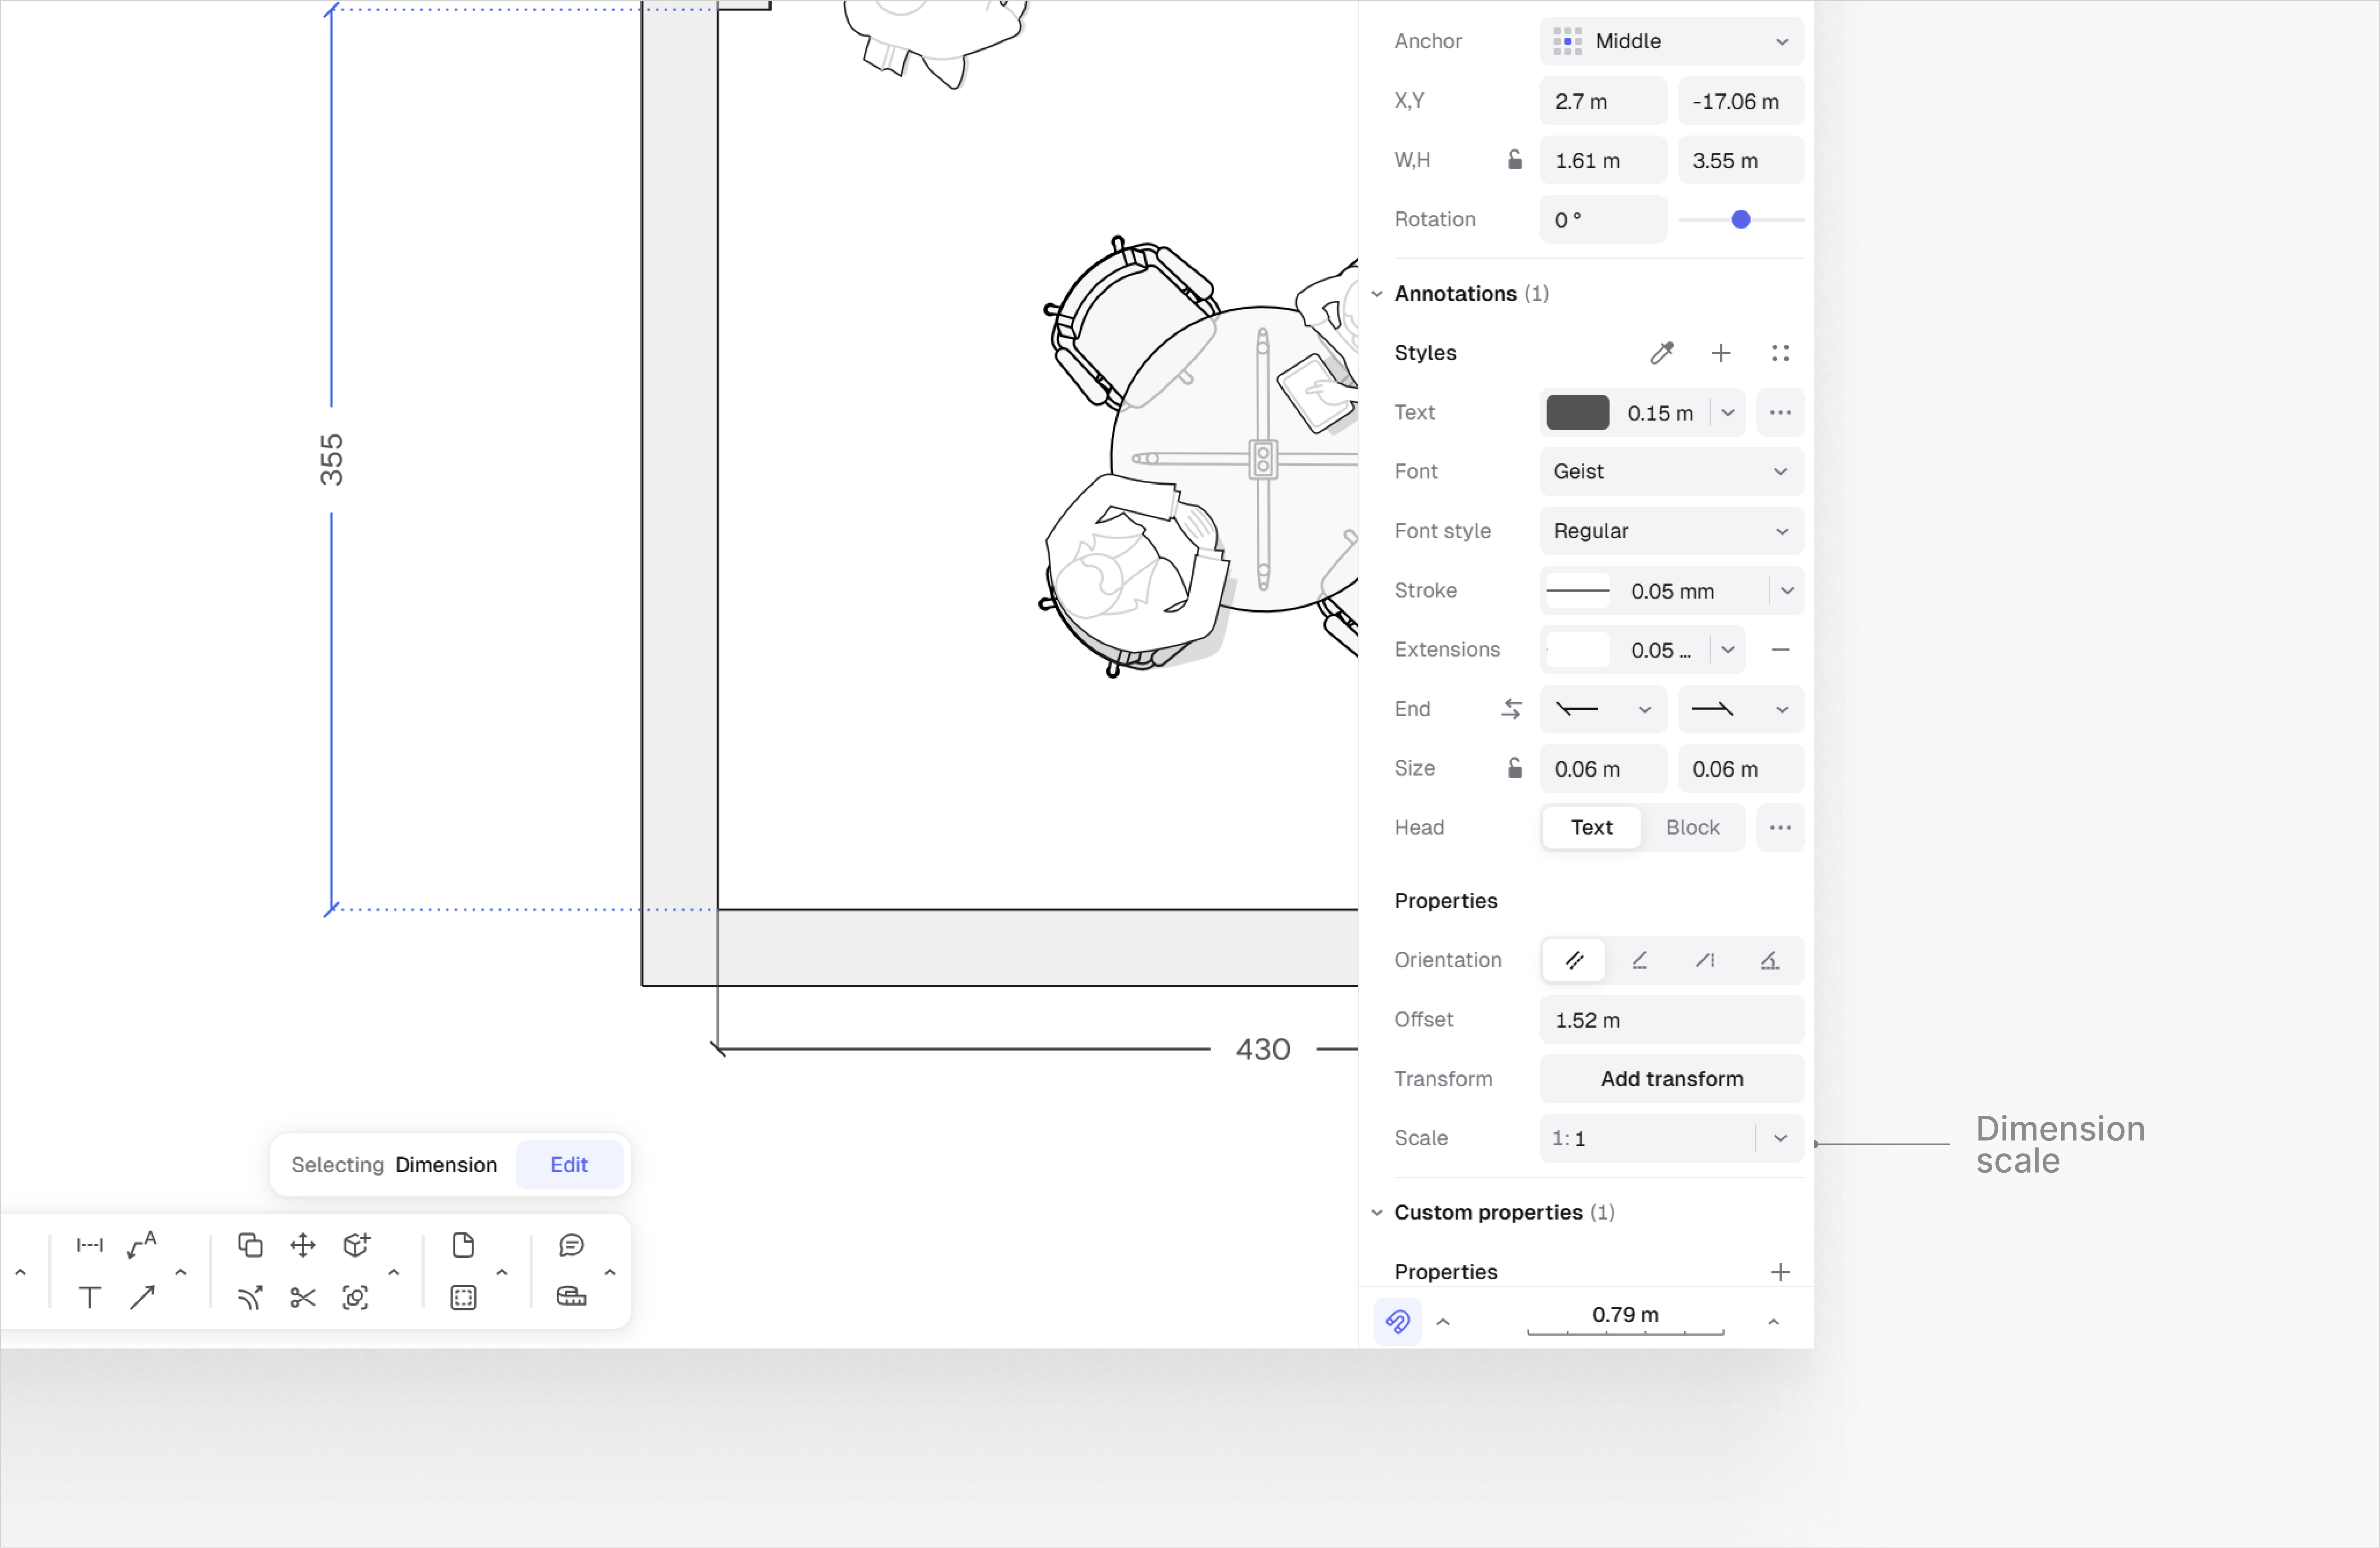
.png?alt=media&token=49347597-4542-4ad9-b257-dabe02f0dc39)
.png?alt=media&token=00d23183-b5cc-4a7c-b45c-d432dc7d69b0)


.png?alt=media&token=3173e872-b042-4cb8-89e1-8ed38e5face6)

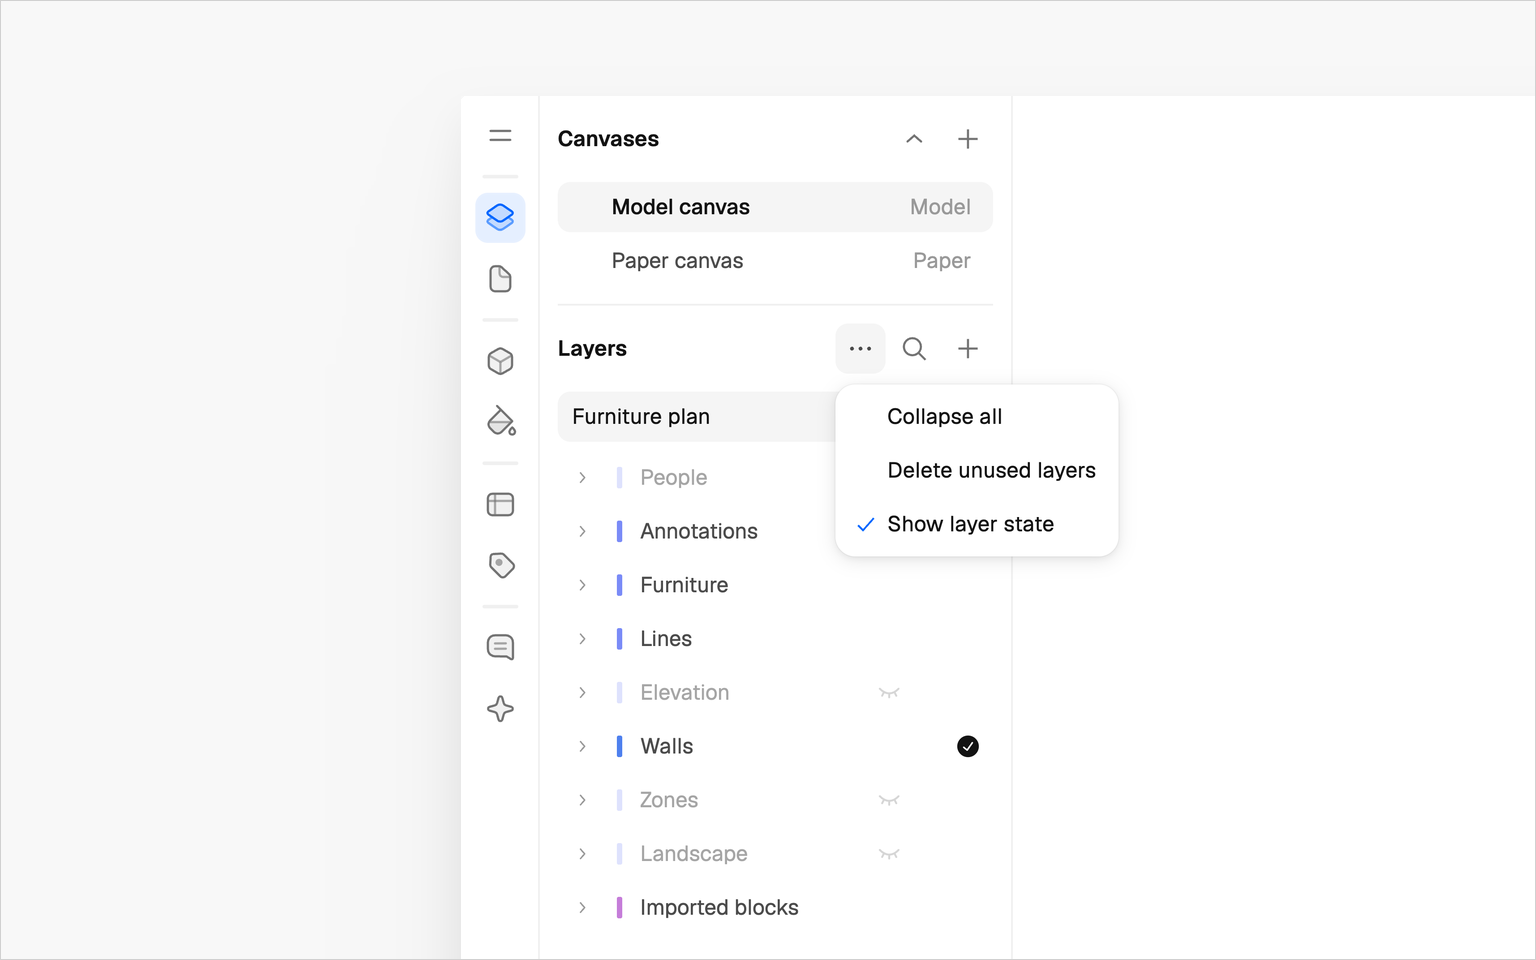
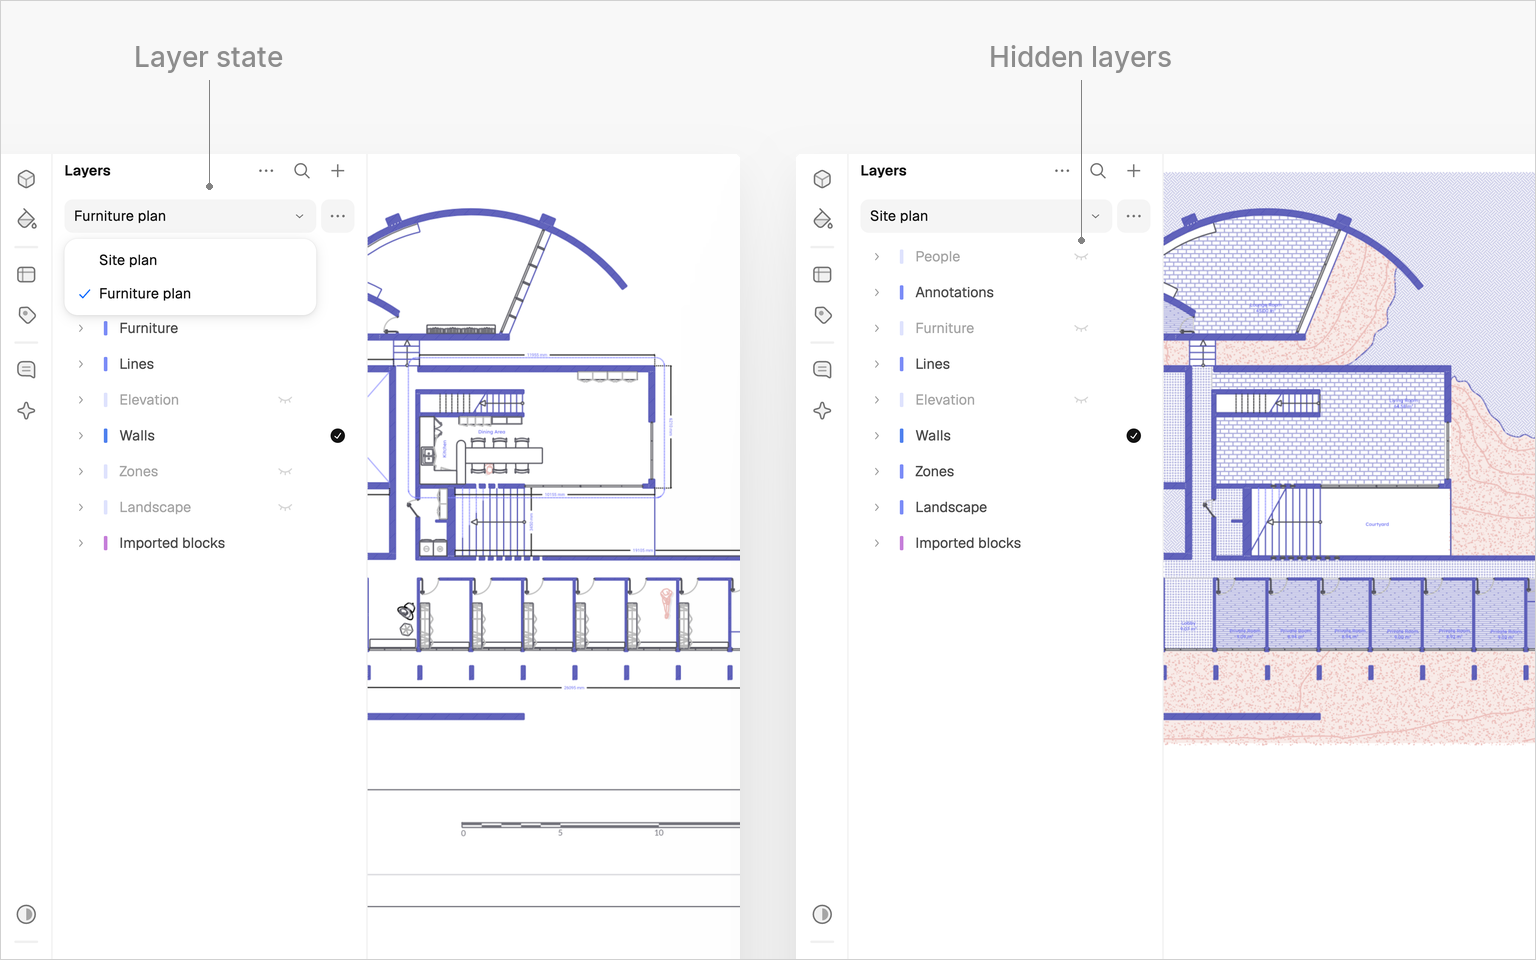
.png?alt=media&token=e52c98a9-3b25-4919-aefa-d3135d805792)
.png?alt=media&token=e70395ad-2f80-4eb3-a31e-02bb1a85e108)
.png?alt=media&token=06971a83-4ad7-460d-9ca2-42738dfd90eb)
.png?alt=media&token=3057ab0b-8990-4548-b845-930b18874257)
.png?alt=media&token=d94569f4-fe50-41fc-ad7b-42eee9ee1f66)
.png?alt=media&token=9c3b407a-5234-4942-8e6a-52220cfd866b)
.png?alt=media&token=e4eea2e8-4552-44be-8a66-1aef50c2bf82)
.png?alt=media&token=0f9082b6-b85c-4caf-a18d-062f5b0c2006)
.png?alt=media&token=d3c1db14-9e53-4dc3-95ba-e622cab1f1de)
.png?alt=media&token=e96f093f-2597-4b56-a364-da98064c4edd)
.png?alt=media&token=95a574ef-5a48-4d6a-a7d4-e7bc921e555c)

.png?alt=media&token=12bfcbfe-3ae4-4003-b214-3242dfec3c73)
.png?alt=media&token=ca4afec4-0ed1-4b7d-9e70-ff9f568d189b)
.png?alt=media&token=5102f74b-ec7f-4c35-9f50-dfb9aa579f90)
.png?alt=media&token=71ccc852-efa2-419c-9ca7-607d8e5d9ad8)
.png?alt=media&token=bdfd2aa0-1838-44fe-a9fc-c143bcdf3109)
.png?alt=media&token=01646b86-f404-428f-93be-e21ecdc1537e)
.png?alt=media&token=0c7b0803-3c15-4361-8ca8-19f6735a8e84)
.png?alt=media&token=22fe444c-5b01-4430-aa62-832ac15cf7b1)
.png?alt=media&token=83f67d1a-d7b2-4261-9fbb-1aa1e0195aa9)

.png?alt=media&token=8d43b82b-b737-41ff-84ee-32da8d626329)
.png?alt=media&token=e62f8c45-caa8-4732-88ed-eafcd58f9abc)
.png?alt=media&token=d24e4b1a-facf-489e-9ec8-ad76c79675fe)
.png?alt=media&token=afe937e8-f754-4e93-885c-a5400d220487)
.png?alt=media&token=b703f051-e8ee-4b64-ac20-bb113cb3ea75)
.png?alt=media&token=c6801e15-d7ec-4aa7-98ab-16b97b83cf3a)
.png?alt=media&token=18dc4c3b-7188-4b88-85eb-9a5d50de8d89)
.png?alt=media&token=0bec65ca-3a90-4910-8993-ed70fed89c9c)

.png?alt=media&token=e107c2fa-e9b6-401e-ad24-b8e9bf33ba9b)
.png?alt=media&token=64d5573e-2c8d-402c-8a4b-2f029615b9ba)
.png?alt=media&token=6316c35a-13fc-4d29-ada2-4a7cf8643372)
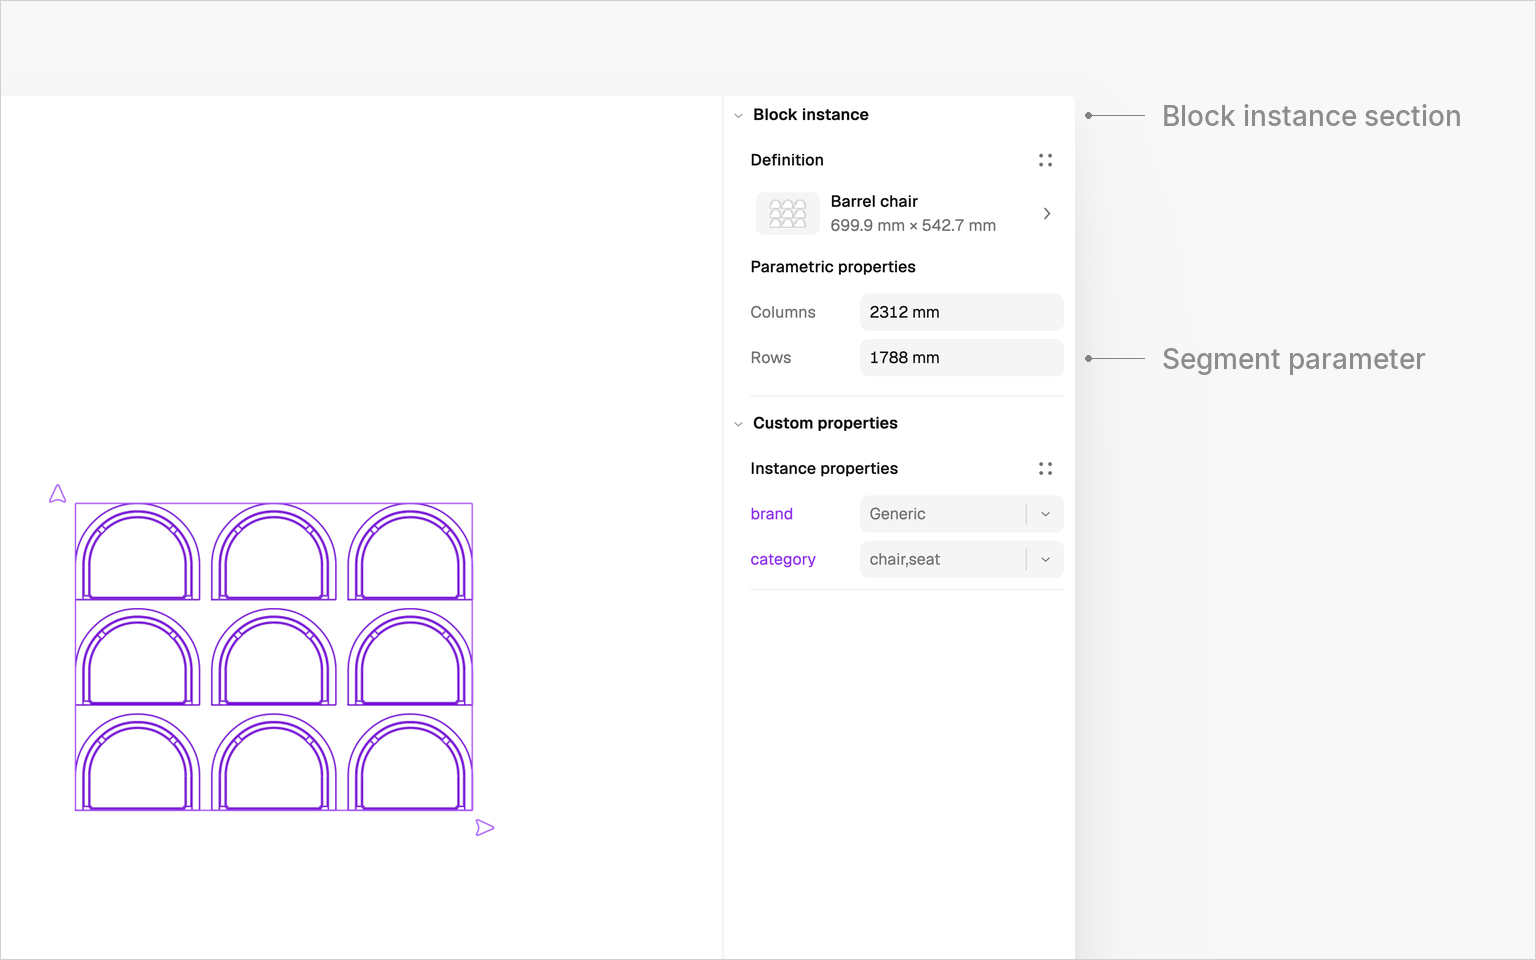
.png?alt=media&token=cfc0d02f-775f-4d5a-a278-aba45f571863)

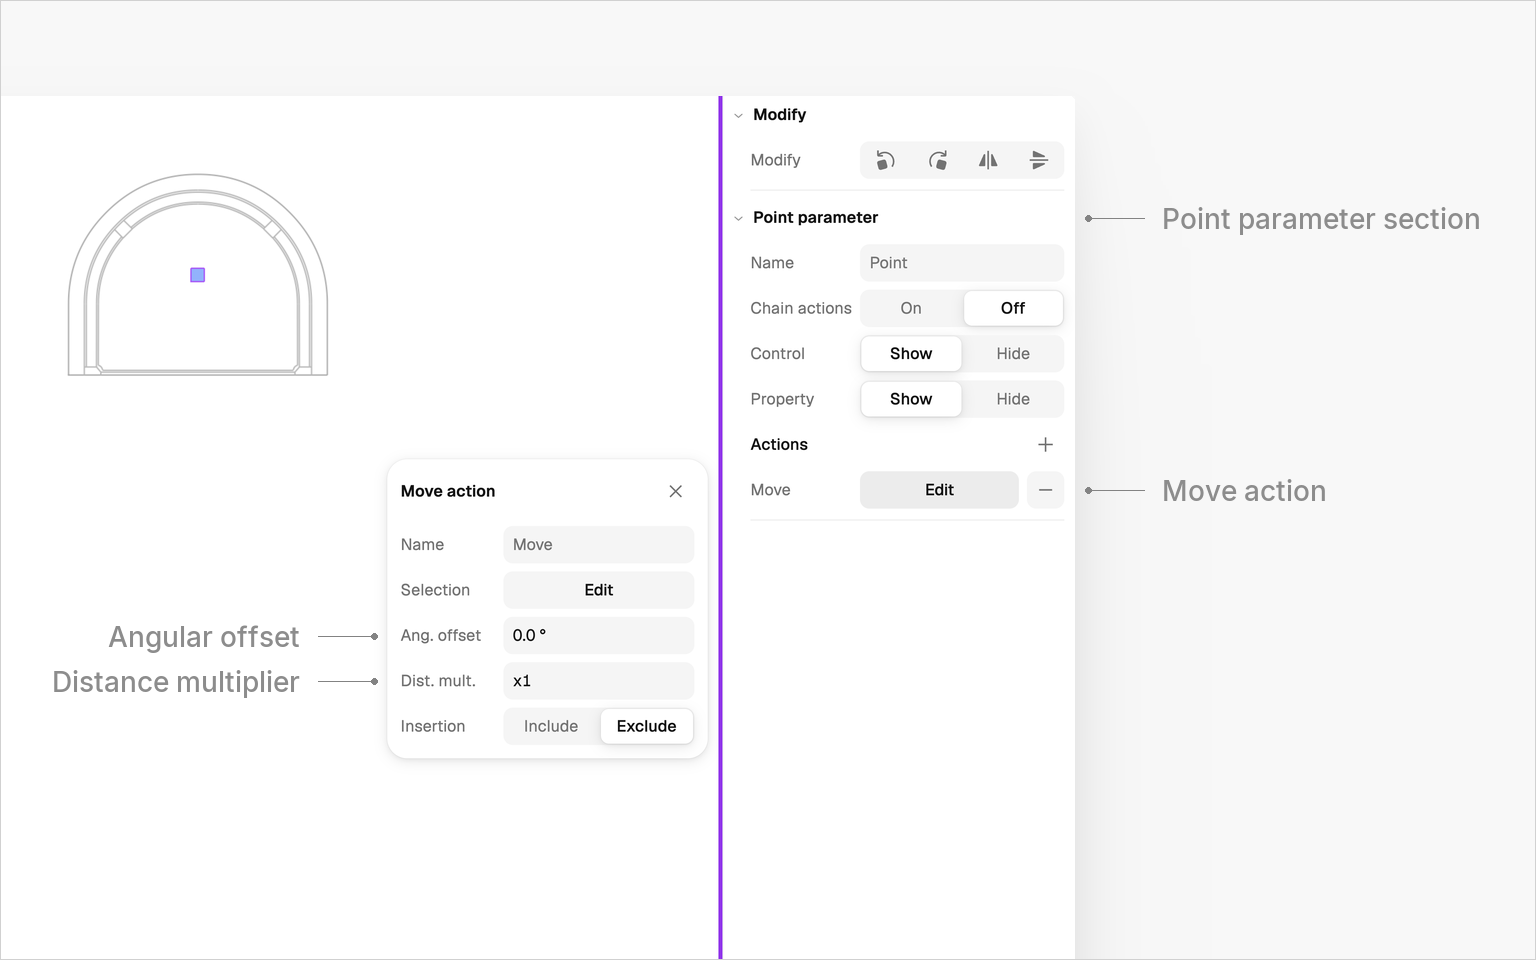
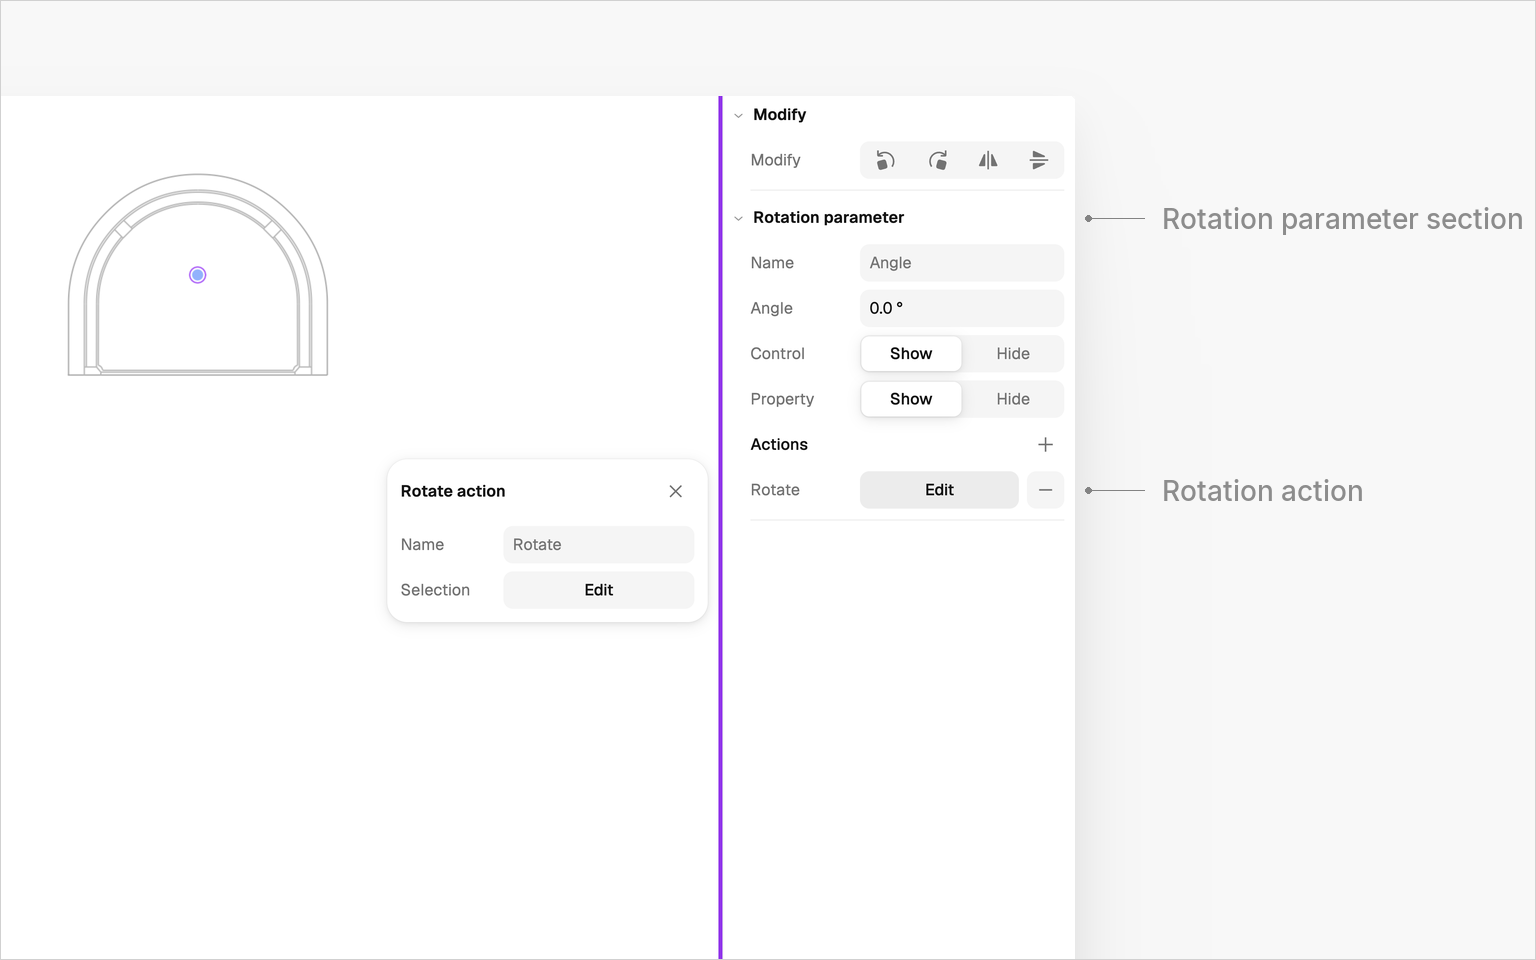
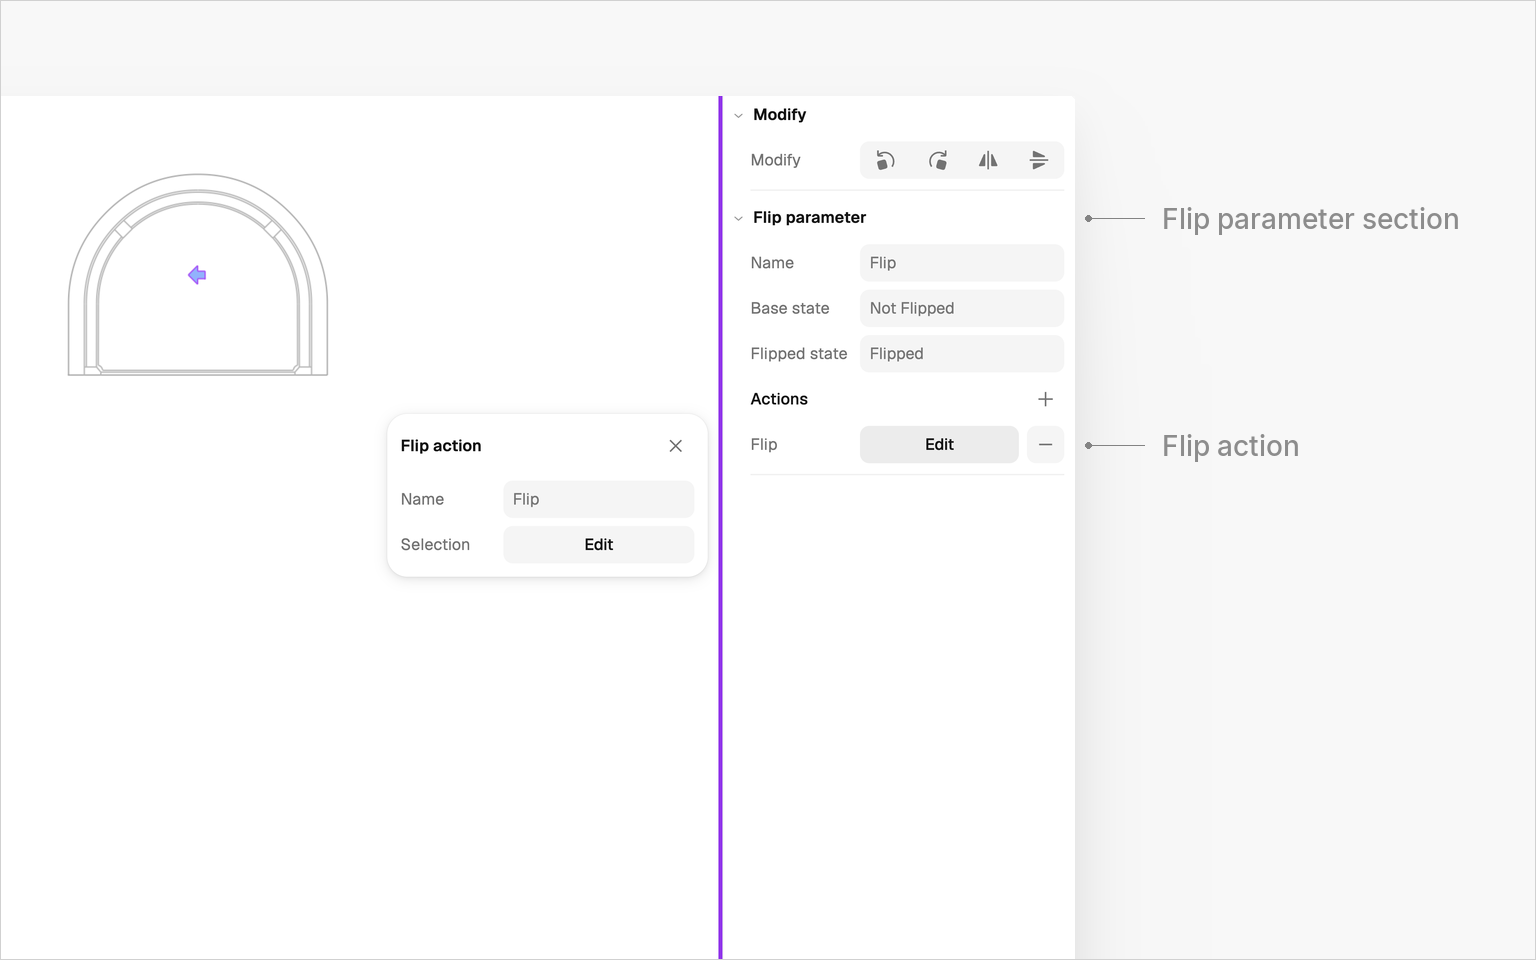
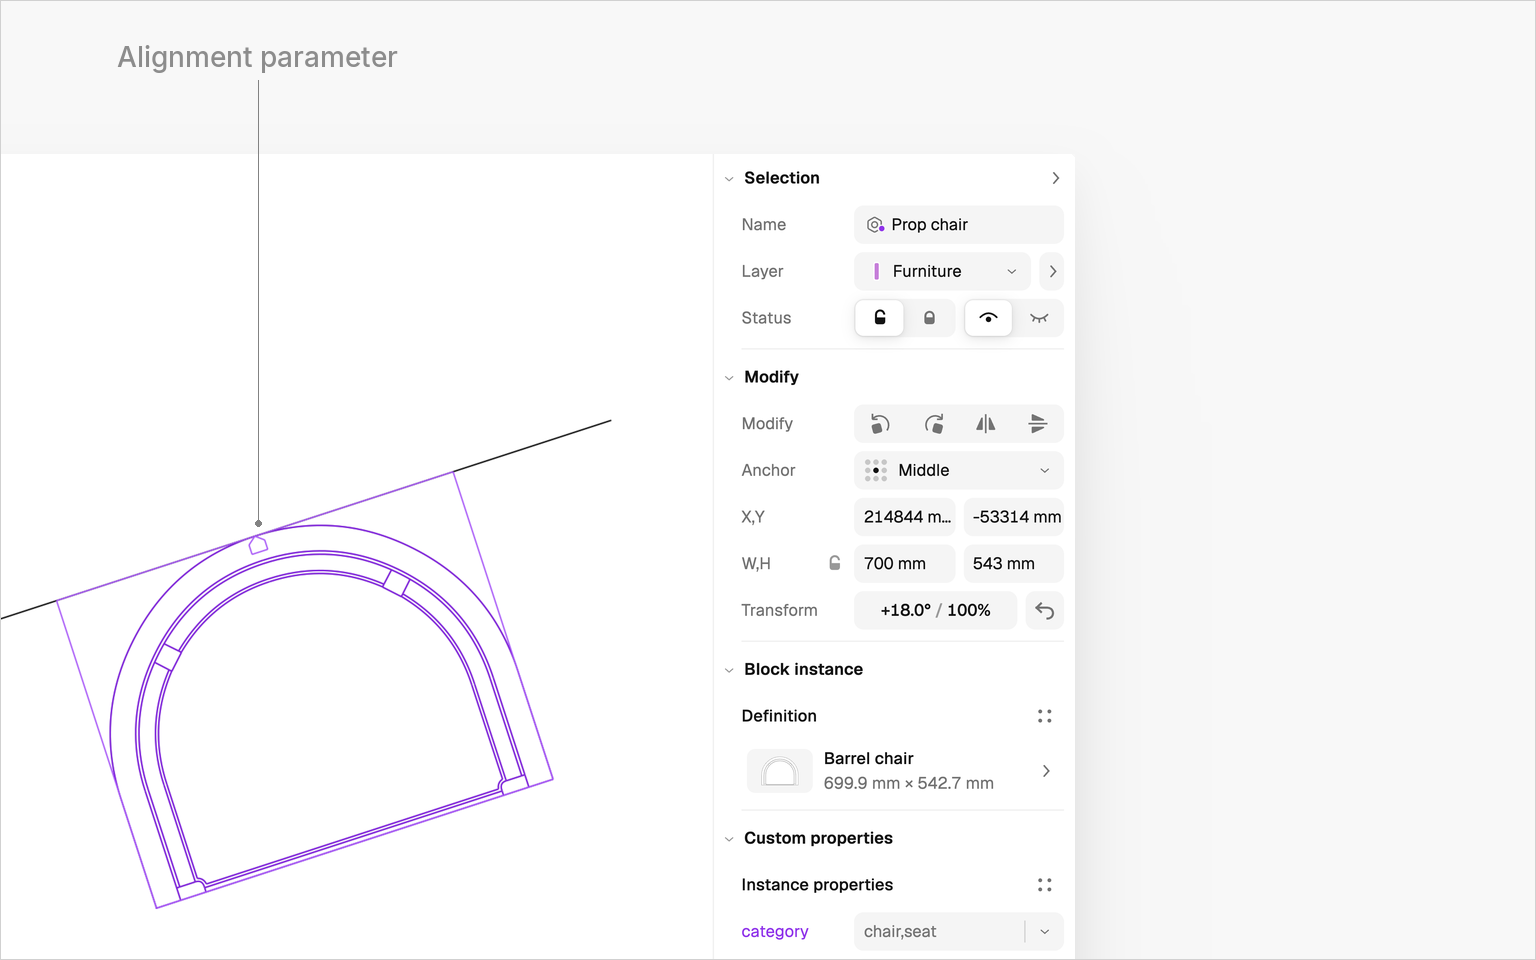


.png?alt=media&token=23784c03-797d-4741-9055-d83618f751f4)

.png?alt=media&token=5c38a549-868e-4904-a489-f22c695790fe)
.png?alt=media&token=f85ed1ac-35ad-4ace-ad0d-7cd2b68f5c2b)
.png?alt=media&token=60e4f8c3-24c3-4922-a529-67e223b5b766)
.png?alt=media&token=8e1e9cb8-5c17-4855-bcee-84daf9a86e70)
.png?alt=media&token=107e5a98-4e82-41ed-a5fb-7739384b7e8d)
.png?alt=media&token=9a365837-4bd9-44fc-a686-4411e0670e02)
.png?alt=media&token=501623a0-375e-48c2-a8f3-9997eee0aff3)


.png?alt=media&token=7b1c119b-8dc0-426c-82b8-d6716b3307ba)
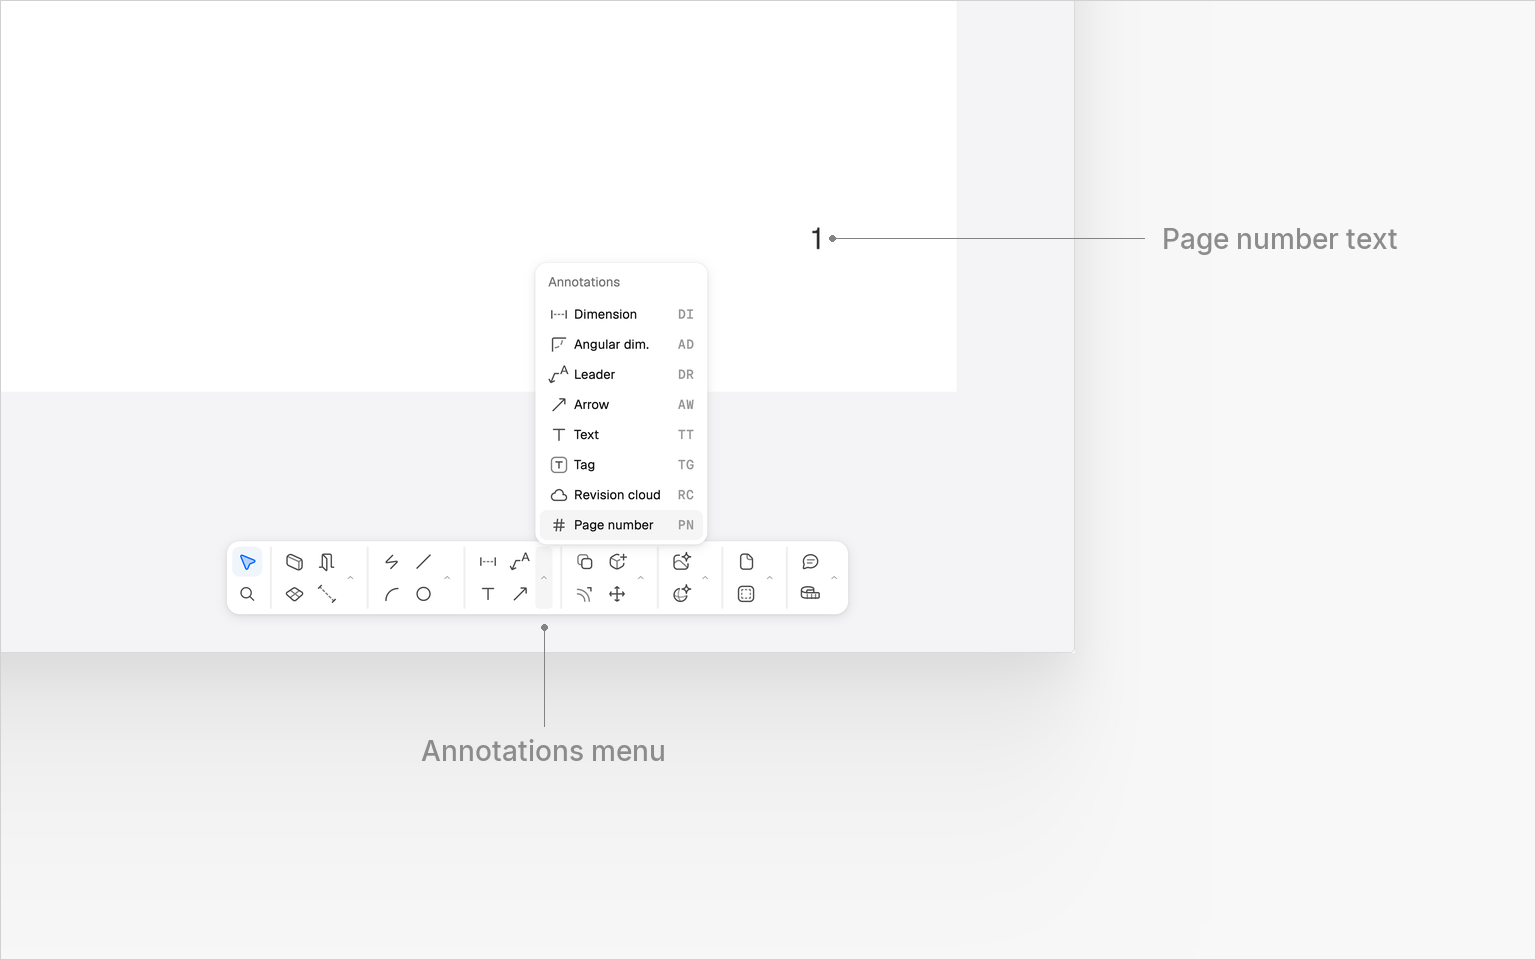


.png?alt=media&token=219a5a58-dfca-403e-9bbc-a3c2b2c36ba9)
.png?alt=media&token=6166eb18-5454-4975-b5c1-223329ee5ff4)
.png?alt=media&token=7ca17820-00cb-411b-be17-3e571098d8cd)


.png?alt=media&token=c1210c6a-0915-42e8-891b-5313642e8edd)
.png?alt=media&token=5b5c7eab-7fc2-4bd3-aca2-6a14109396d9)
.png?alt=media&token=3b2c5cc0-80a2-4786-b2c7-ca98ab98ab38)

.png?alt=media&token=09b12c71-4459-4d10-90bf-5ba700047166)
.png?alt=media&token=95a52709-b205-4b7f-b45b-de8de38288df)

.png?alt=media&token=21d63b0f-a84d-4179-b0a2-e5b8af60e783)


.png?alt=media&token=83a136f0-4fb3-4cfc-994a-1b74633aa18d)
.png?alt=media&token=1cca56ca-b131-444f-81ca-45eb2a3794b7)

.png?alt=media&token=ad5aedaf-9a1d-4dad-9f36-2cd66b5cc25f)
.png?alt=media&token=756d93d4-bf7a-447a-9c9e-be38b103717c)
.png?alt=media&token=727e65f7-d1dd-4a8a-aa97-7e38b86c8eca)


.png?alt=media&token=fb623590-af4c-40de-95b8-e0a31c008632)
.png?alt=media&token=3a999e0a-aca3-41a0-800d-738eb51391f7)

.png?alt=media&token=064a6266-c121-4c3d-9de9-01add89278ba)
.png?alt=media&token=ddc789c3-a123-412c-b428-718913dfffbf)

.png?alt=media&token=576588d5-68f1-4e14-9c91-85d12475e3c2)

.png?alt=media&token=ddf726b9-9bc7-4f4b-8d00-09532c1ca8a0)
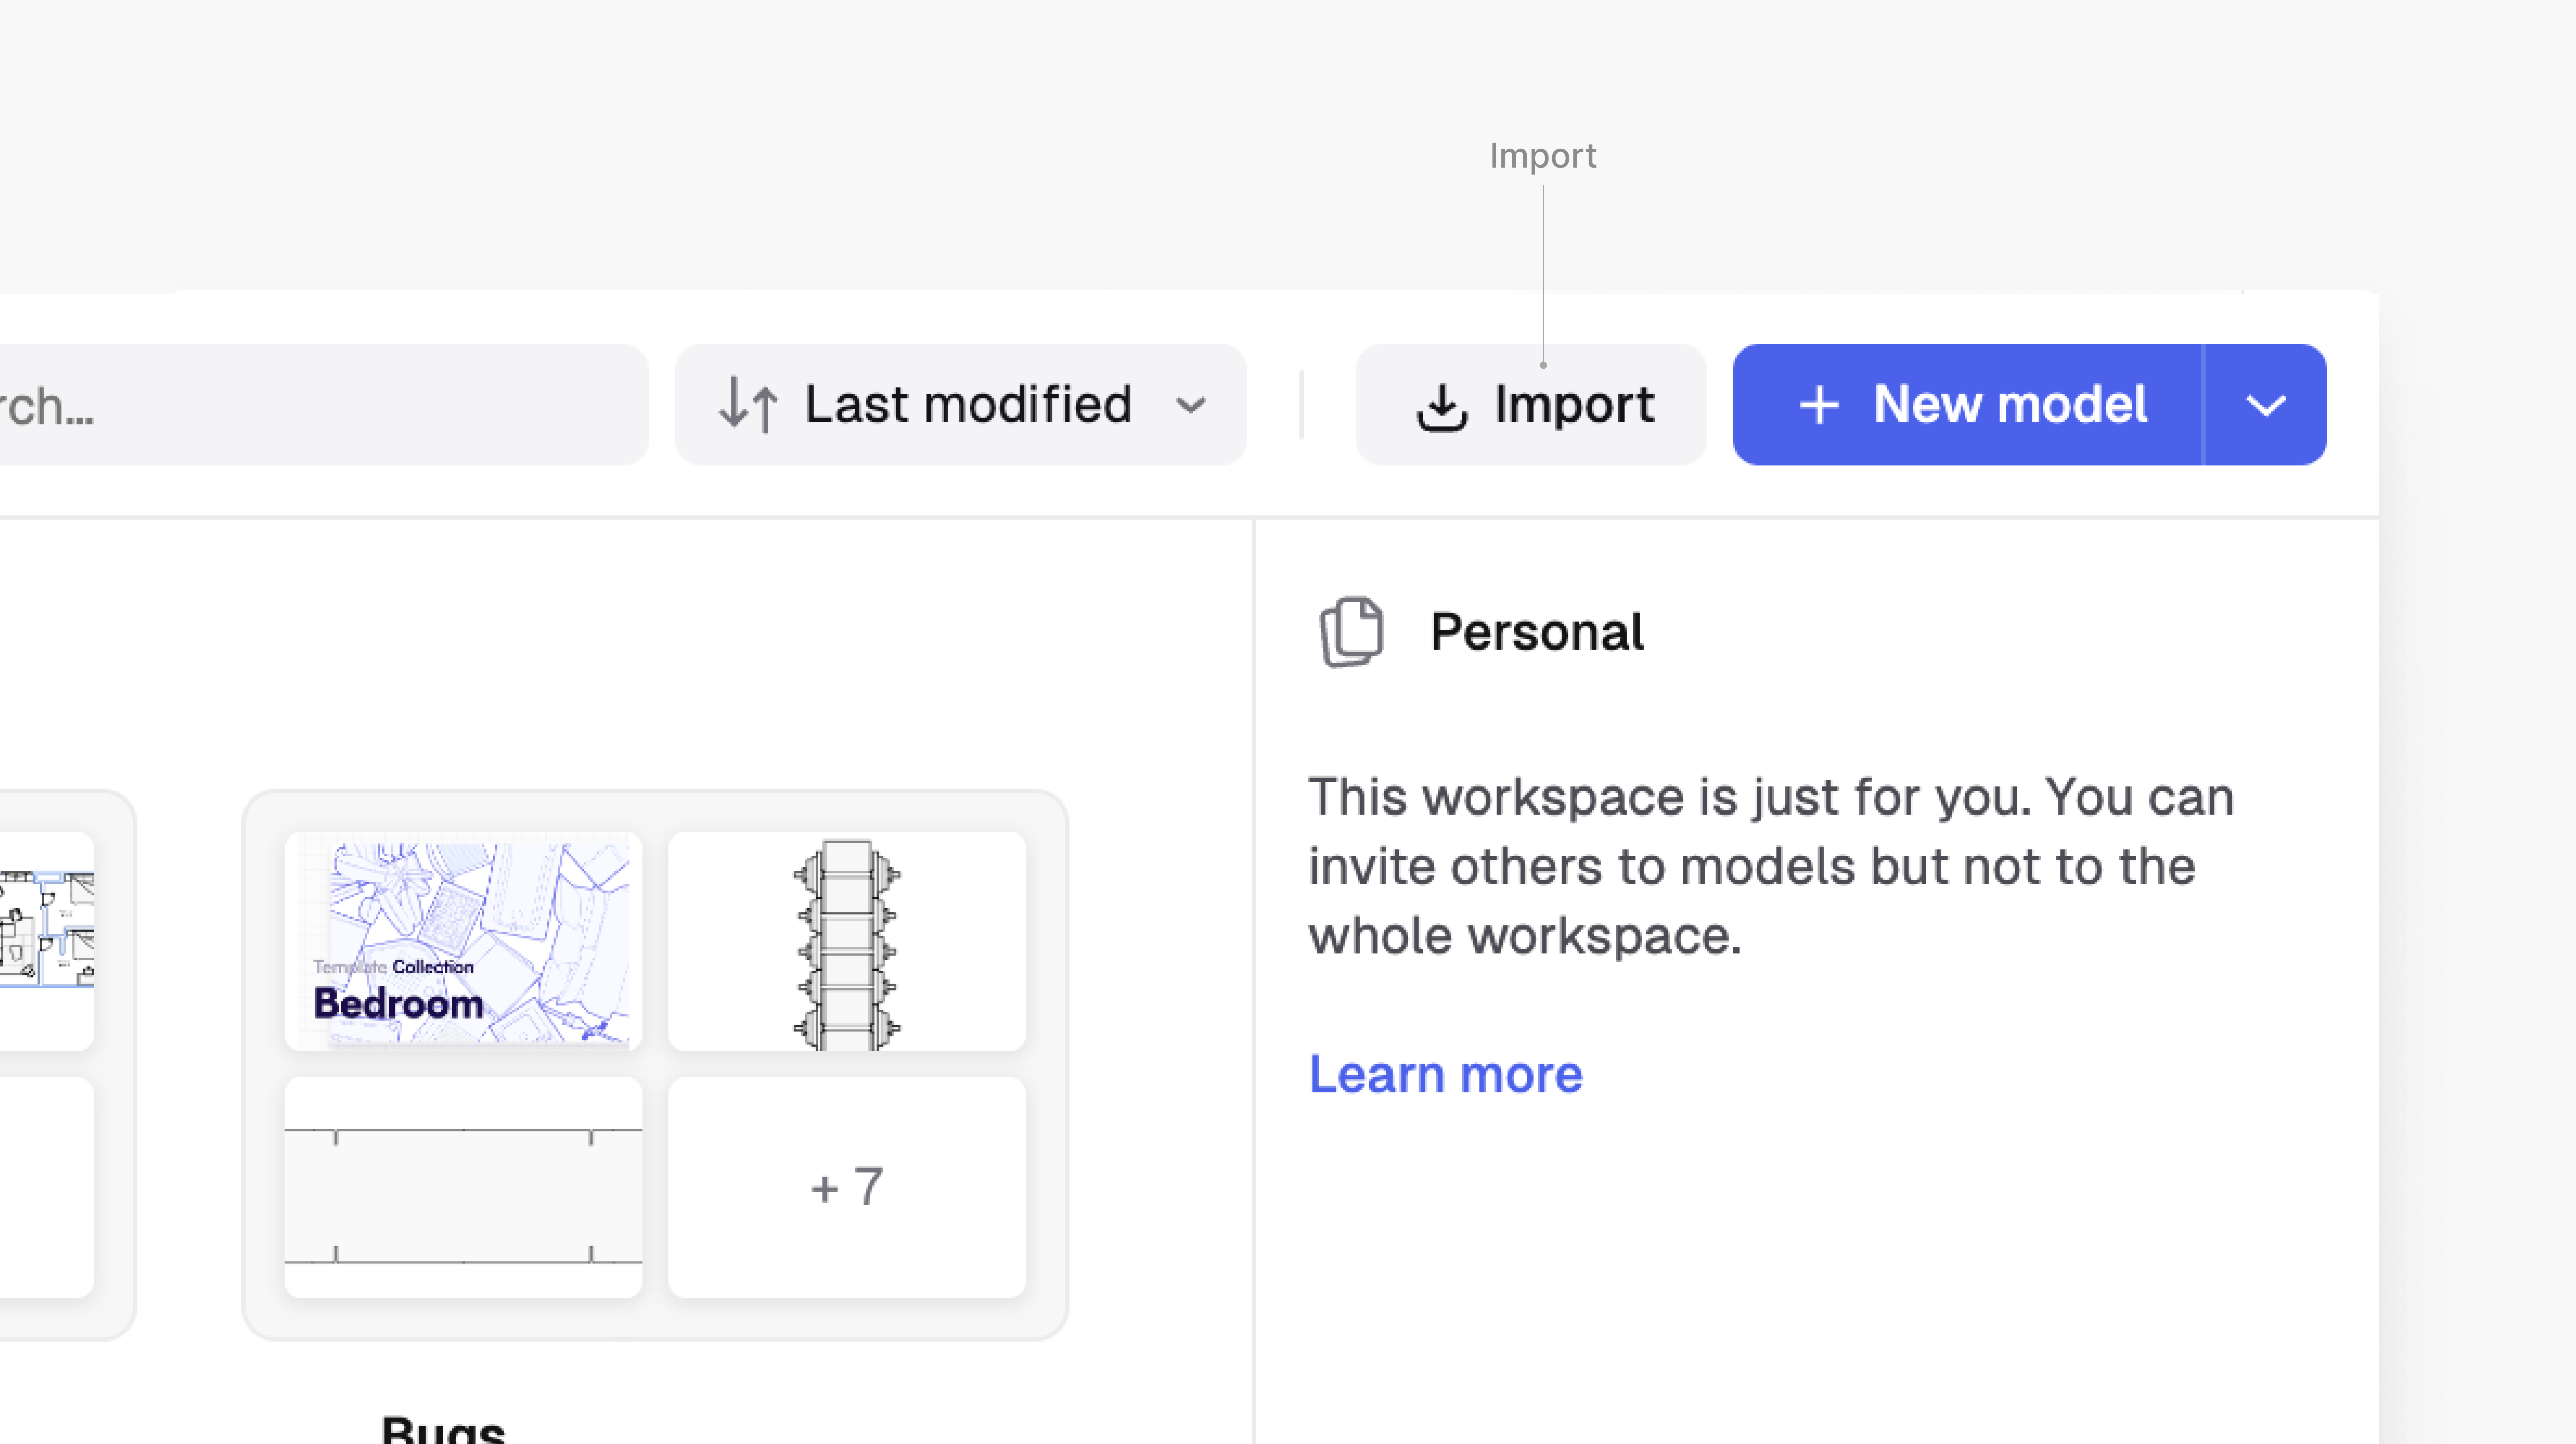
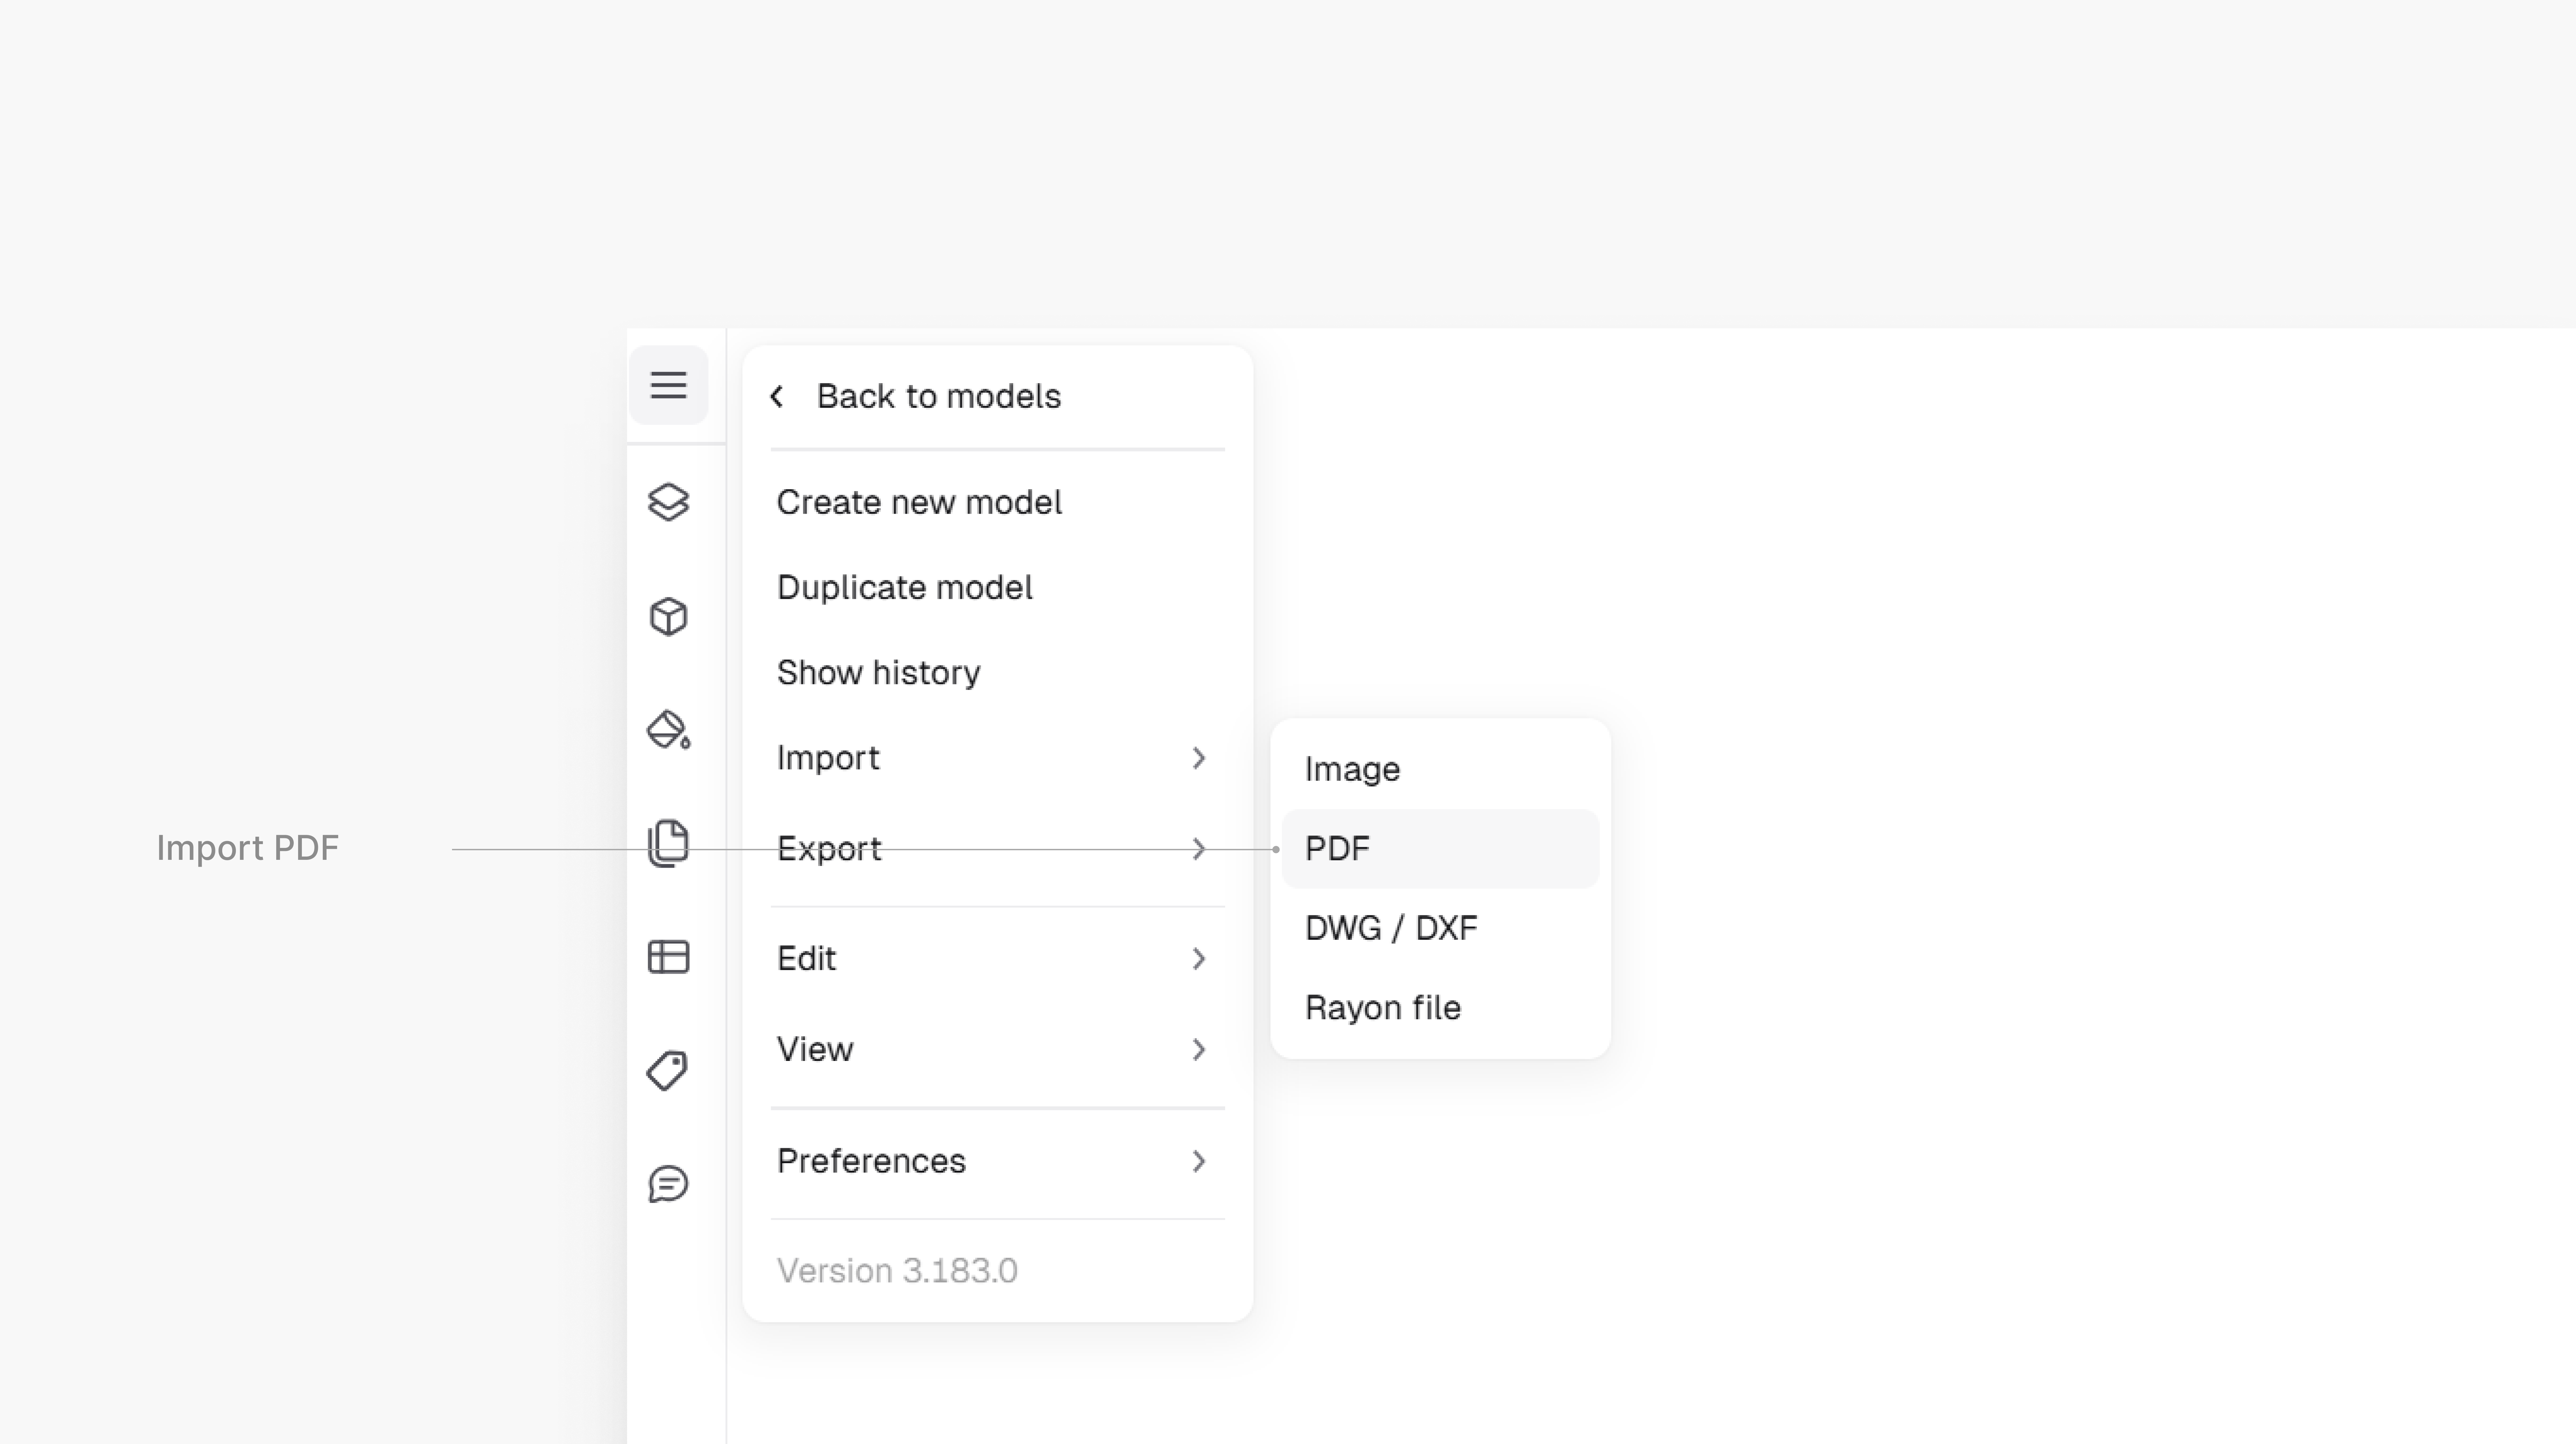
.png?alt=media&token=af515e88-a8e4-4498-8151-1b1a5f274c98)
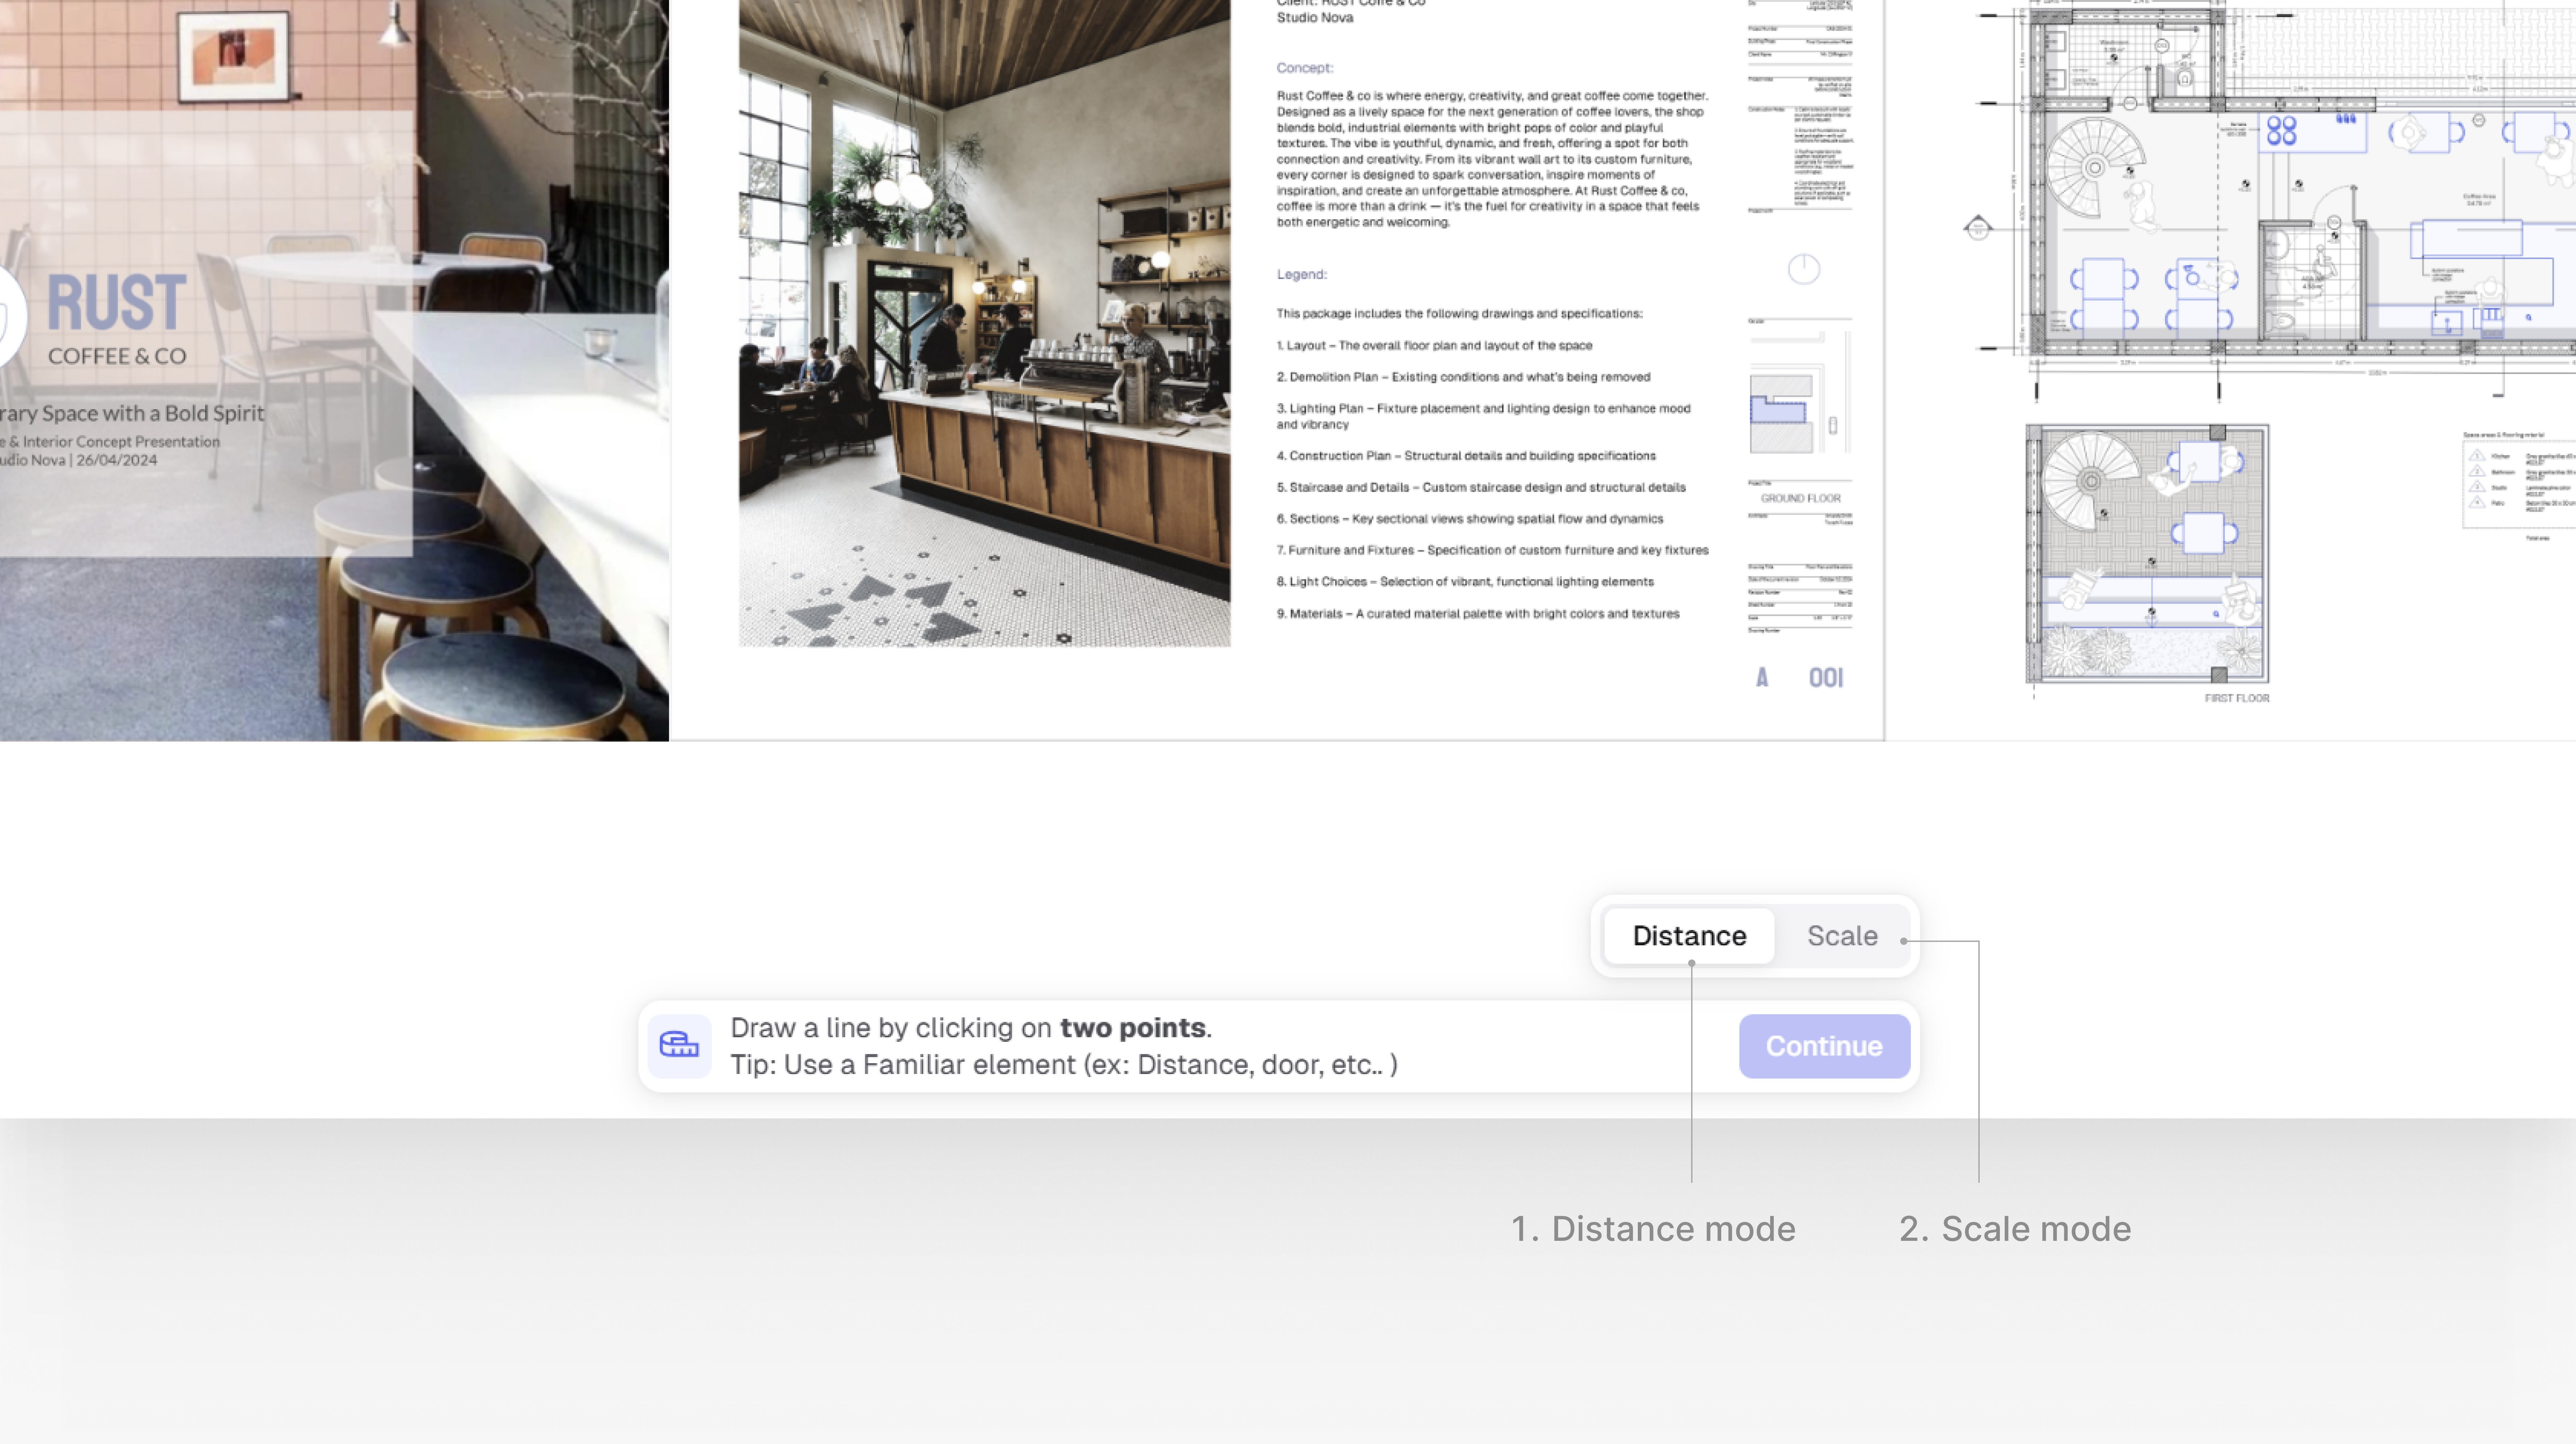
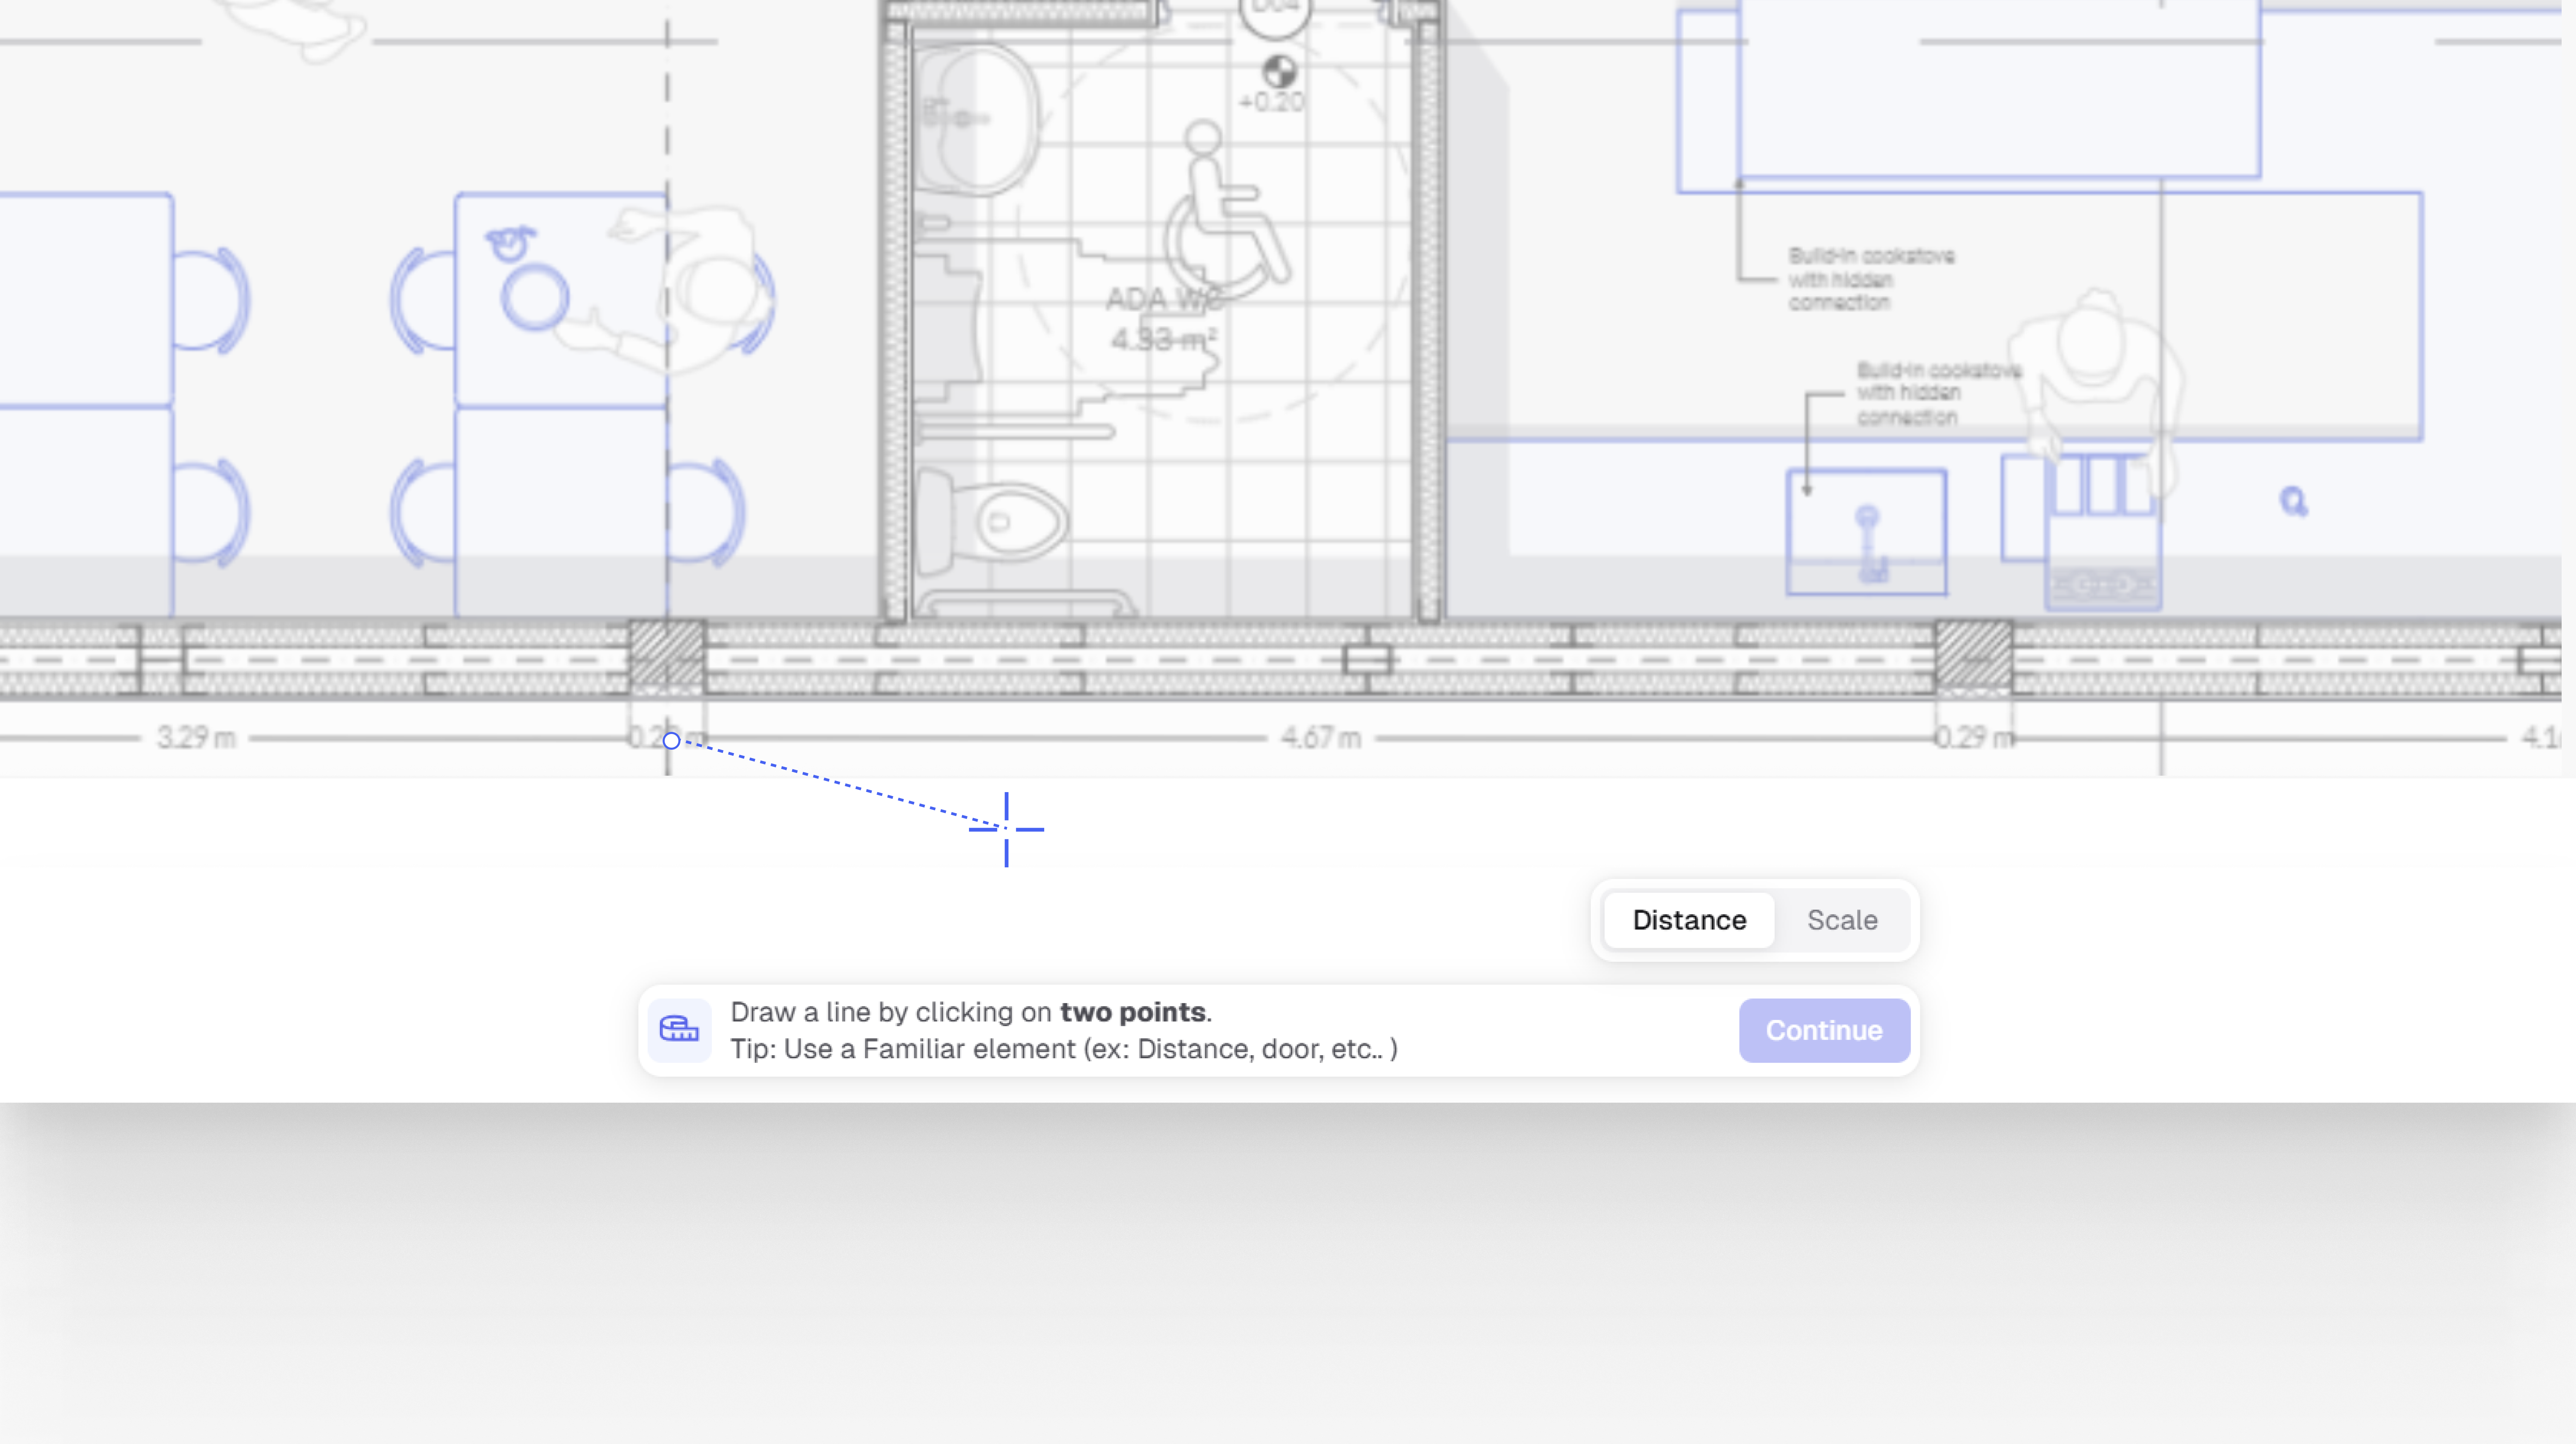
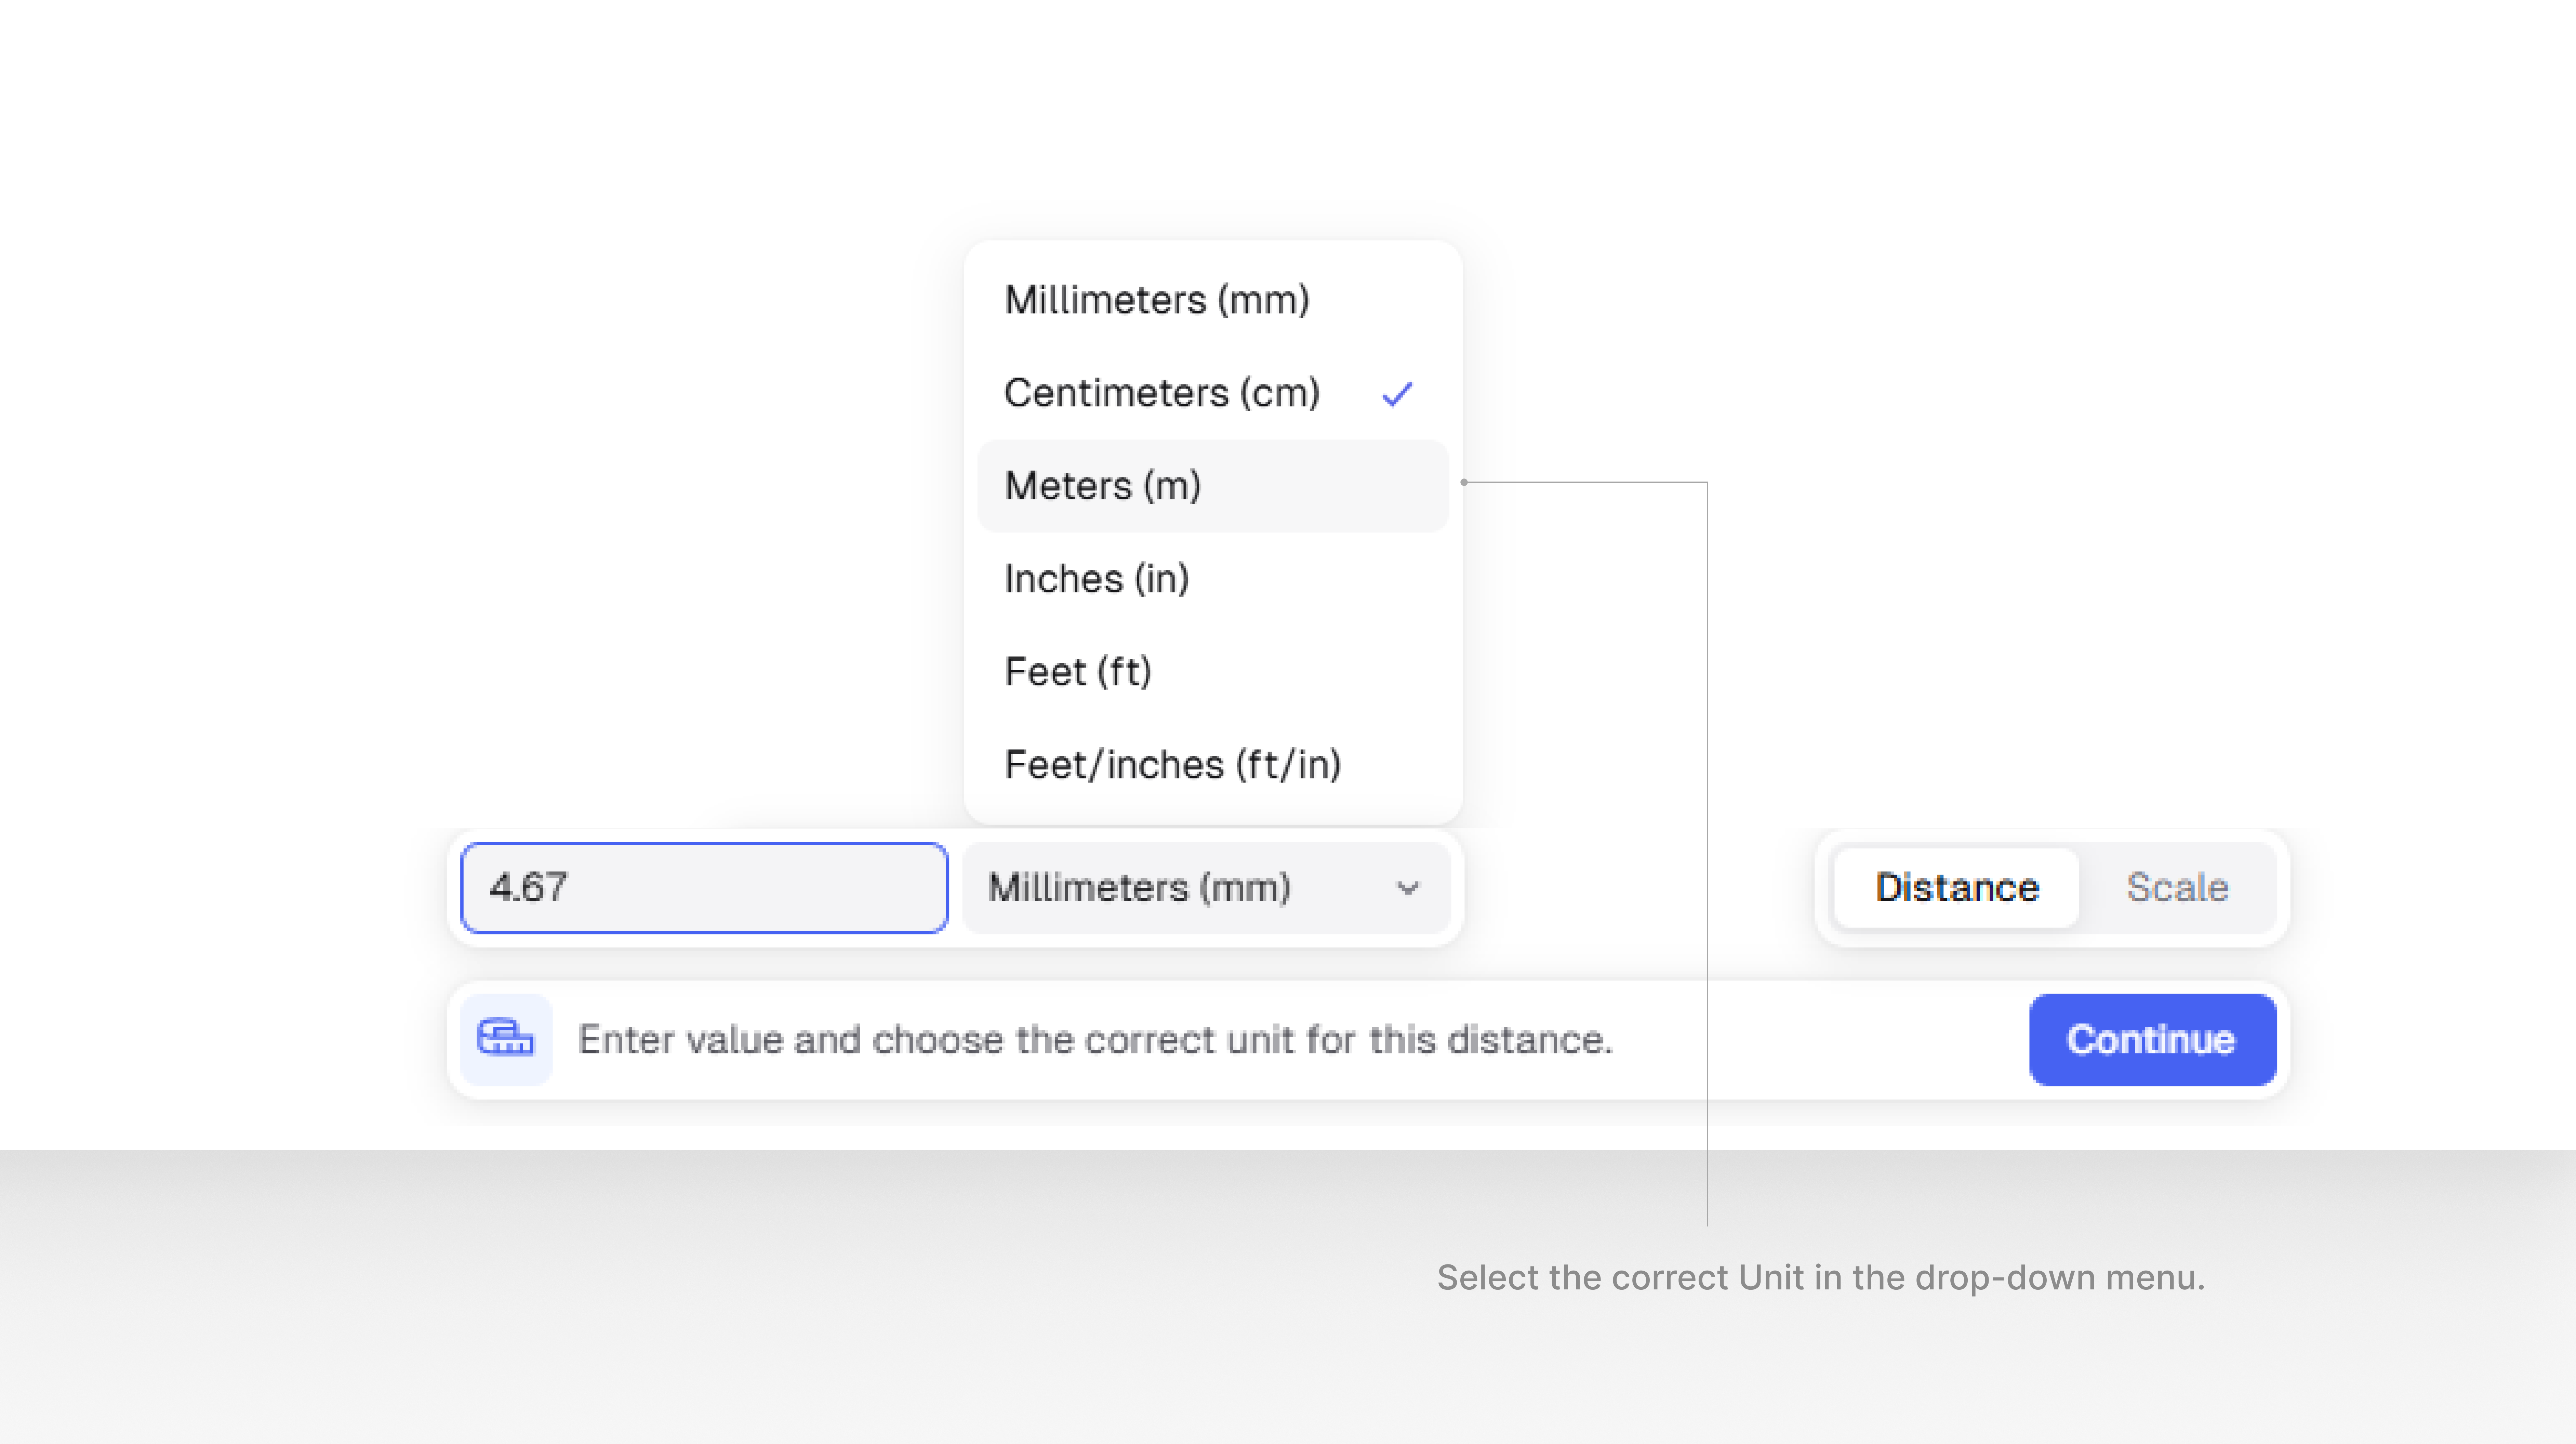


.png?alt=media&token=3b2d6f1f-0639-4fb4-8a79-7dd6680cc041)

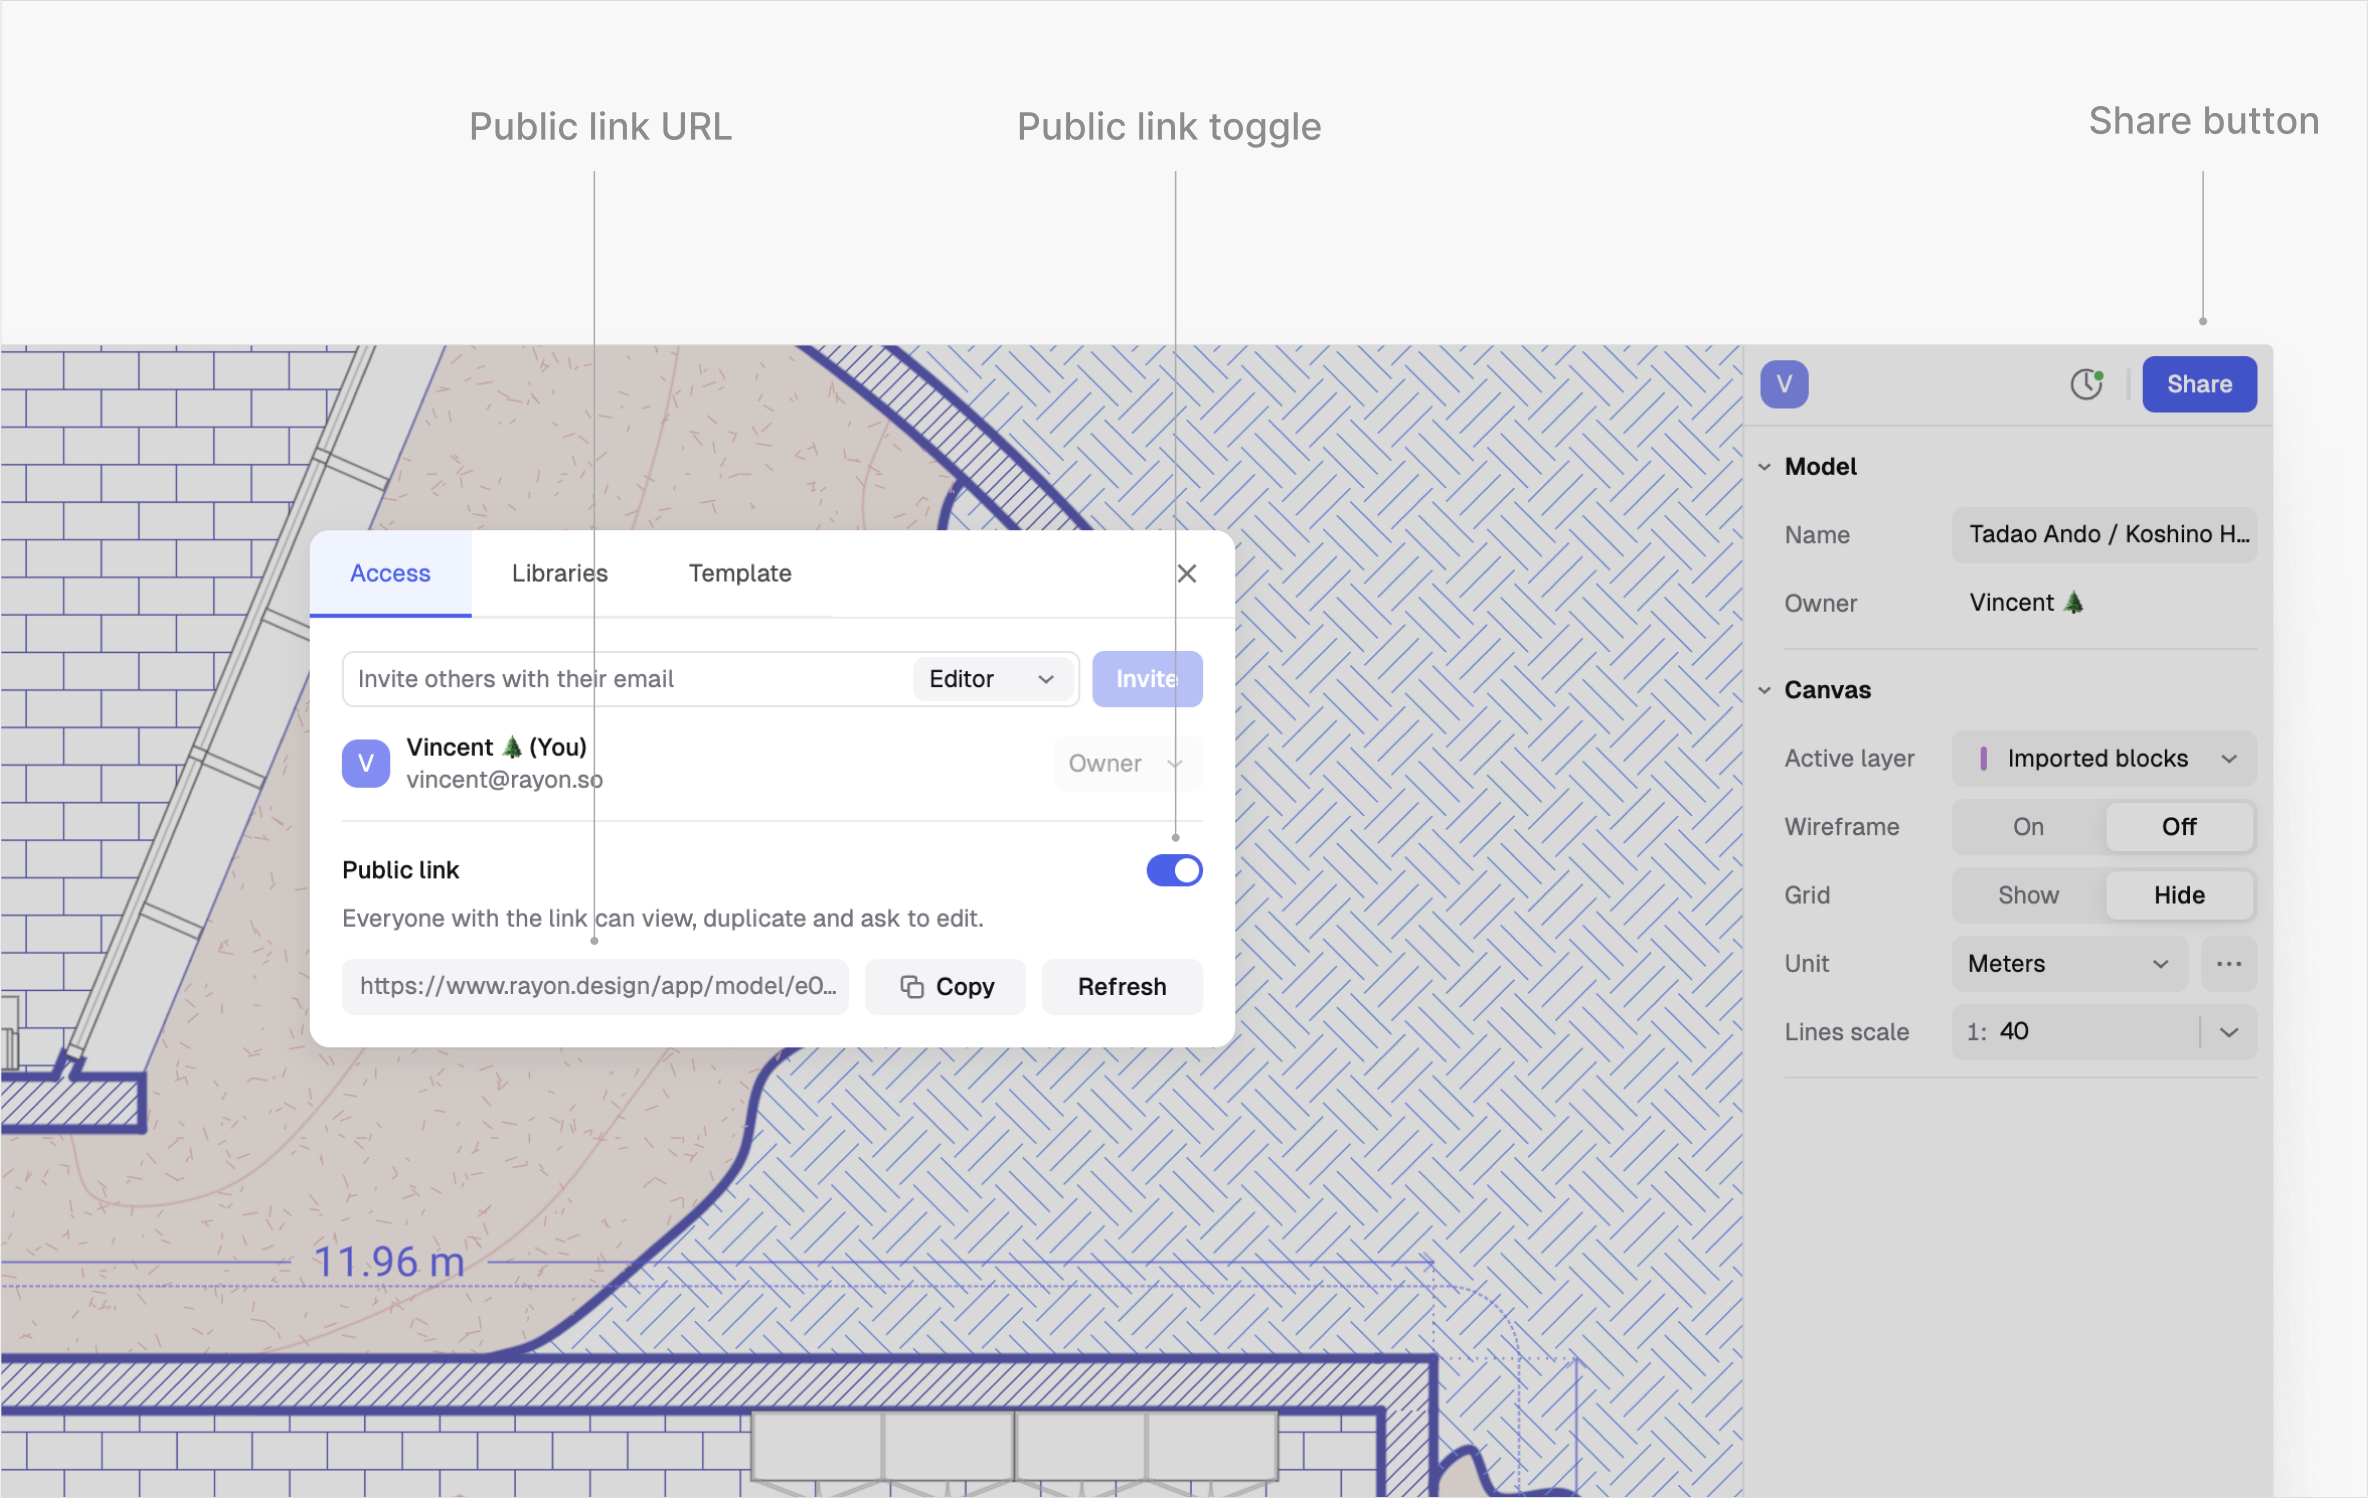
.png?alt=media&token=d85731c6-3e9e-4ac5-a64d-cafc5cde4379)
.png?alt=media&token=bc074059-05b5-4486-8927-bb080e420bc6)
.png?alt=media&token=37bb72b2-cef7-42a2-b6a8-4bd388448a82)
.png?alt=media&token=941e5766-2304-42c5-8e36-26c37339e661)

.png?alt=media&token=da30c81d-1c9c-464d-b310-9d26c9330c4a)
.png?alt=media&token=83e7d21f-fd6d-4eaa-9d4e-e8932d69bcae)

.png?alt=media&token=4f655cf7-2b16-4d62-82ea-f5477873f312)
.png?alt=media&token=d4e8545a-a36b-4bc1-8081-acf5d2577564)
.png?alt=media&token=49b7a939-3139-4acd-9f54-d26fc4b58062)

.png?alt=media&token=2d3989b3-e179-4b6f-b3f1-15c76fd088db)
.png?alt=media&token=c85299d6-4e56-429c-8d44-c8e680487293)

.png?alt=media&token=021ffdce-bb52-47bb-8f4d-649bea369159)


.png?alt=media&token=e10e3825-6462-434c-8317-dafd2c06c0ca)
.png?alt=media&token=9ef21dc0-dabb-4aac-b3fa-788c6f39976b)
.png?alt=media&token=7a99e648-200d-441c-af11-5fa52dba0ba1)
.png?alt=media&token=5ee0f882-55a2-4588-823c-9937815fffdd)
.png?alt=media&token=5d46704b-eb29-42ed-8945-eab1dcfb5b59)
.png?alt=media&token=19e67c39-745b-4675-a3a1-f28c7916bc01)
.png?alt=media&token=0bd79ae6-cf9f-4827-8a5c-2c653a5036ac)
.png?alt=media&token=5e9f38bc-e5a7-4543-80e2-2d538407168e)
.png?alt=media&token=7a0eaba6-0703-4abd-a606-a8127523c2e6)
.png?alt=media&token=a05acdc4-3d55-4d9c-92e6-37bfa7974593)
.png?alt=media&token=0ecd49c9-2639-4962-a2ca-cf17bc687c06)

.png?alt=media&token=1221991a-0b32-4c99-b03e-ed3bd49a4a16)

.png?alt=media&token=c5a35cc6-def4-43f1-809a-fee5ddb96d5a)
.png?alt=media&token=db7a3c7f-ff89-4720-b1c5-ab2797fe3dec)
.png?alt=media&token=f1631c47-6145-4e92-829a-e11c6a28eb92)
.png?alt=media&token=f8467cbf-e0b0-4cb4-92ae-21c5ed370d06)
.png?alt=media&token=78db3211-f1c0-44a3-9059-4c6a08bbf4d3)
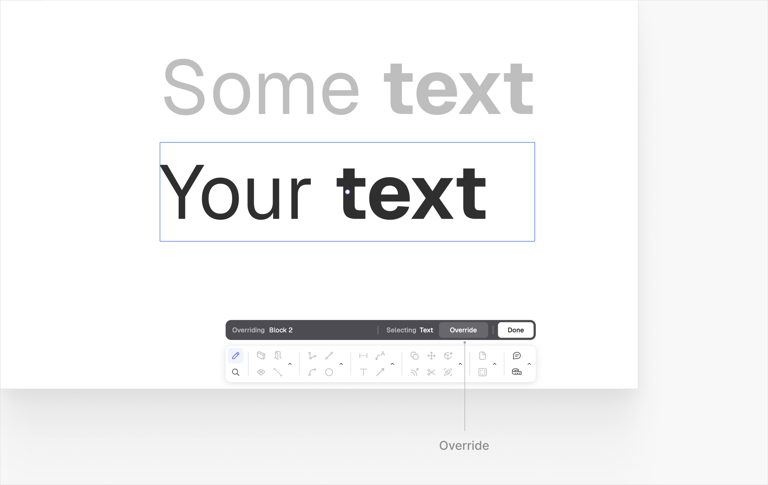
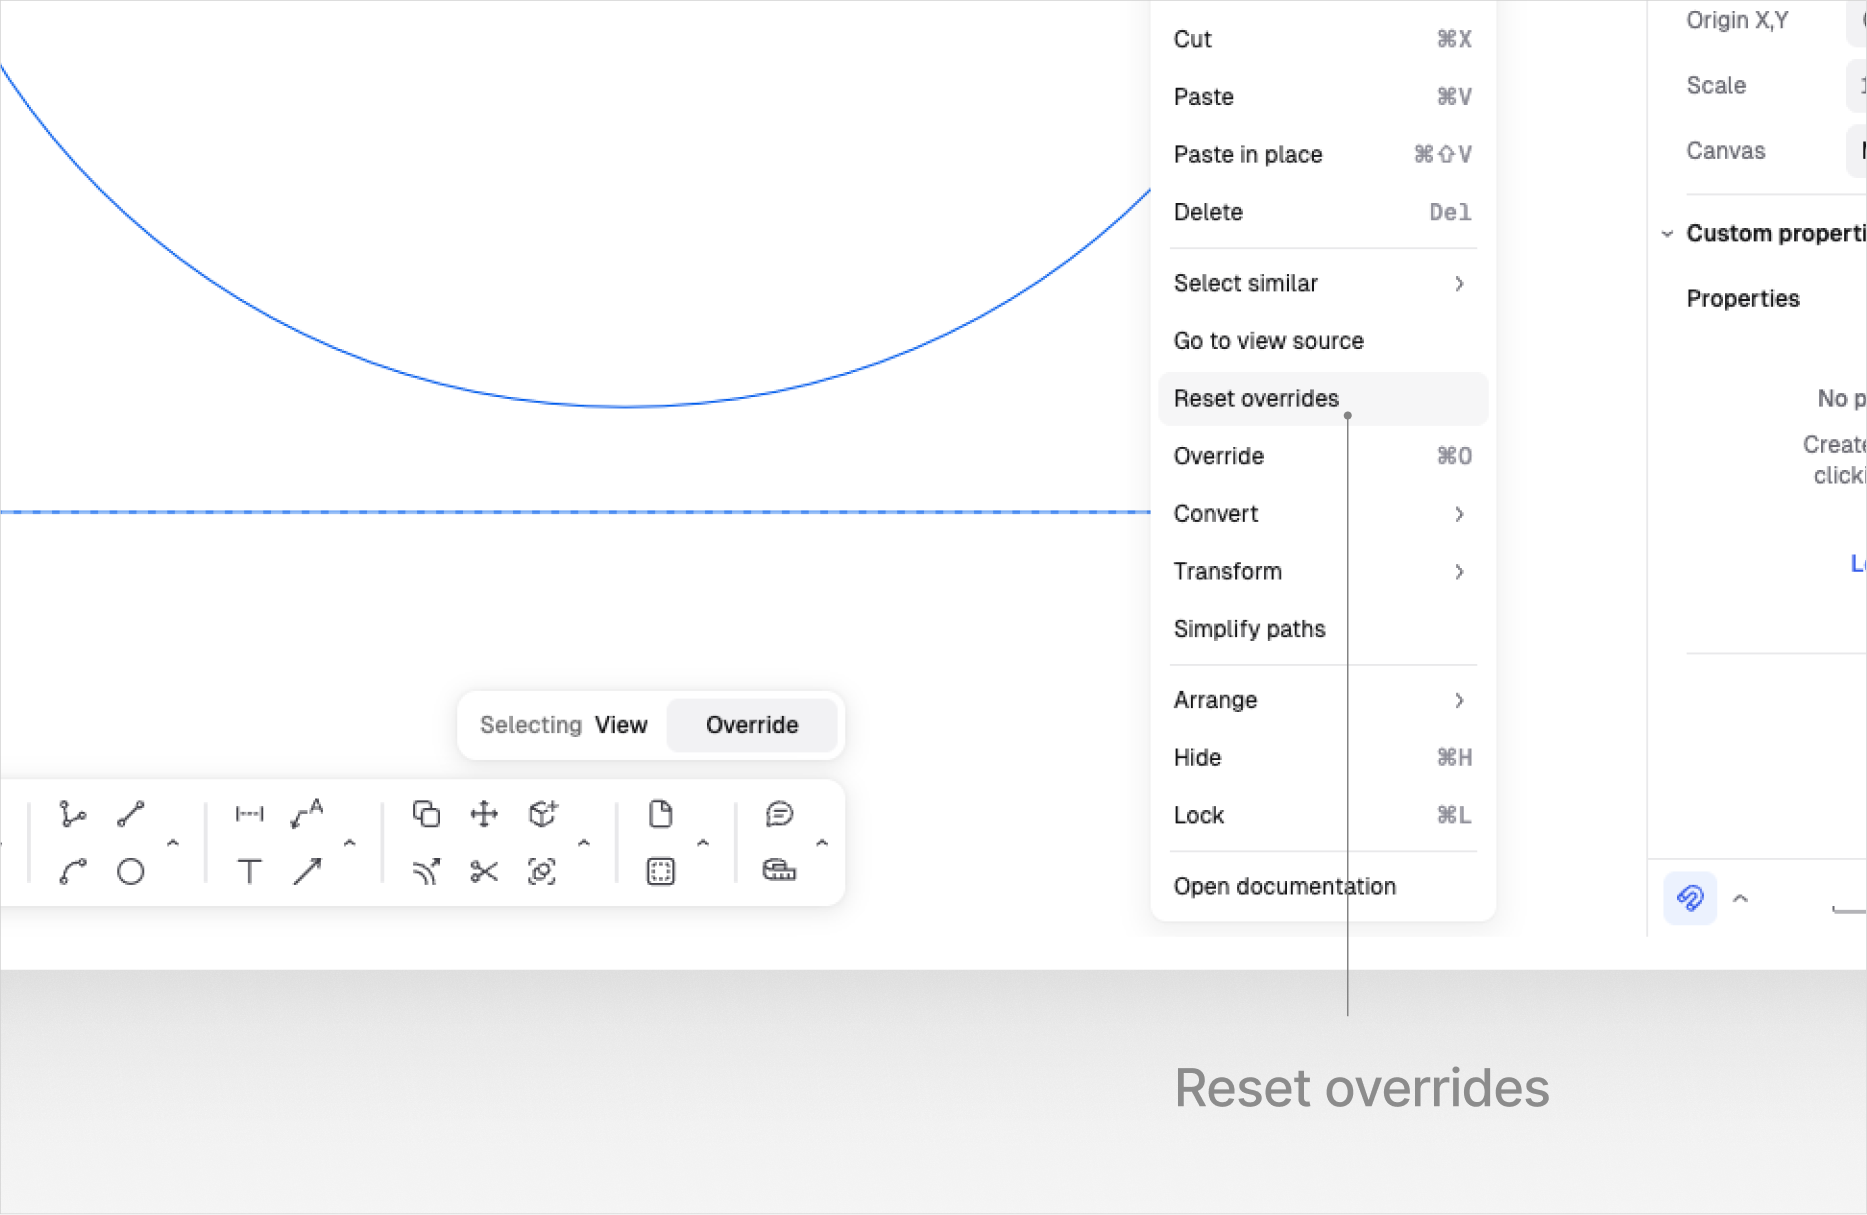
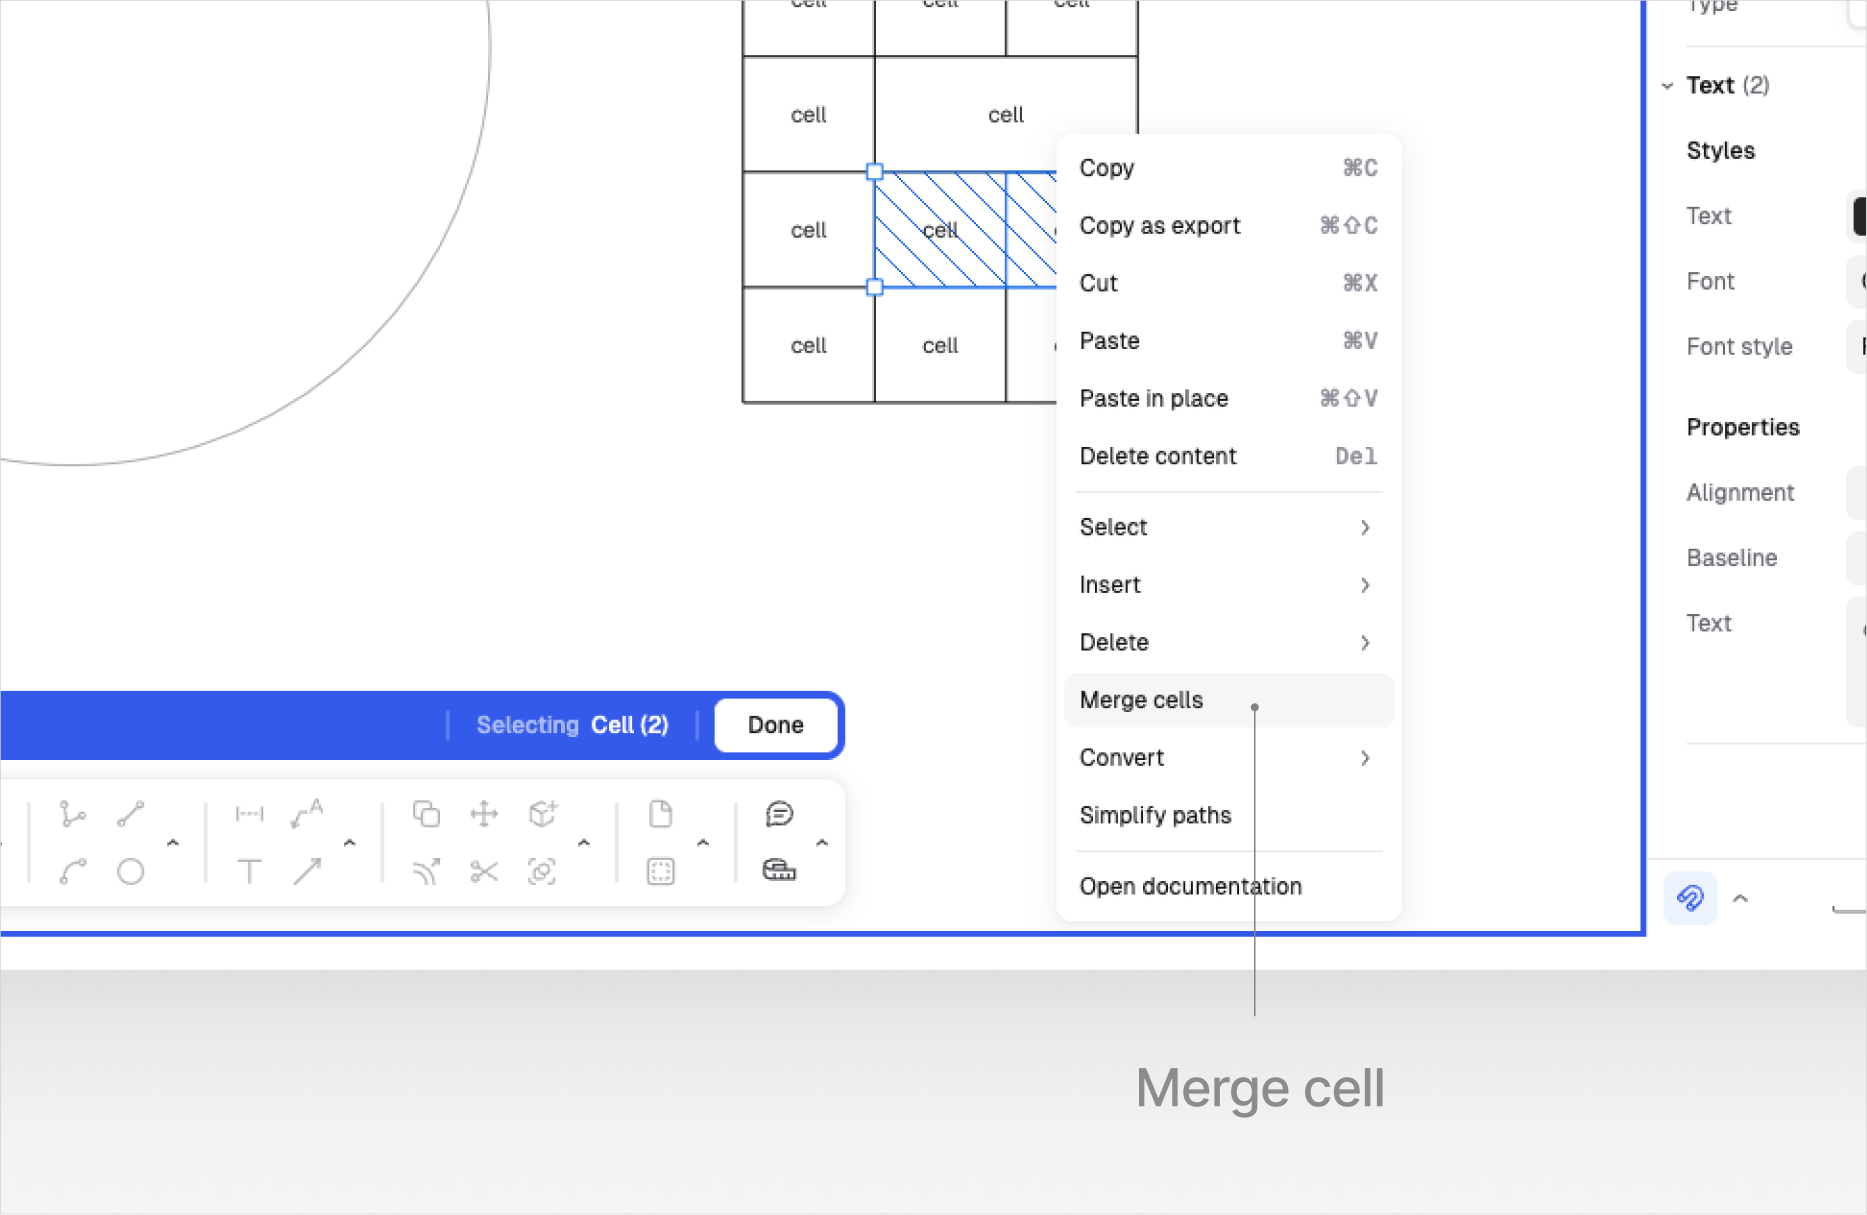
.png?alt=media&token=a978af8c-7c47-475c-83bf-2155e6484ece)
.avif?alt=media&token=25f5689f-05c0-438e-b7f3-c8c4b0e218d7)
.avif?alt=media&token=9d299dac-6e11-4645-80a9-e54b7ae49f51)


.png?alt=media&token=e33c2a0e-72b0-4cc7-8d64-3a372a9a20c1)
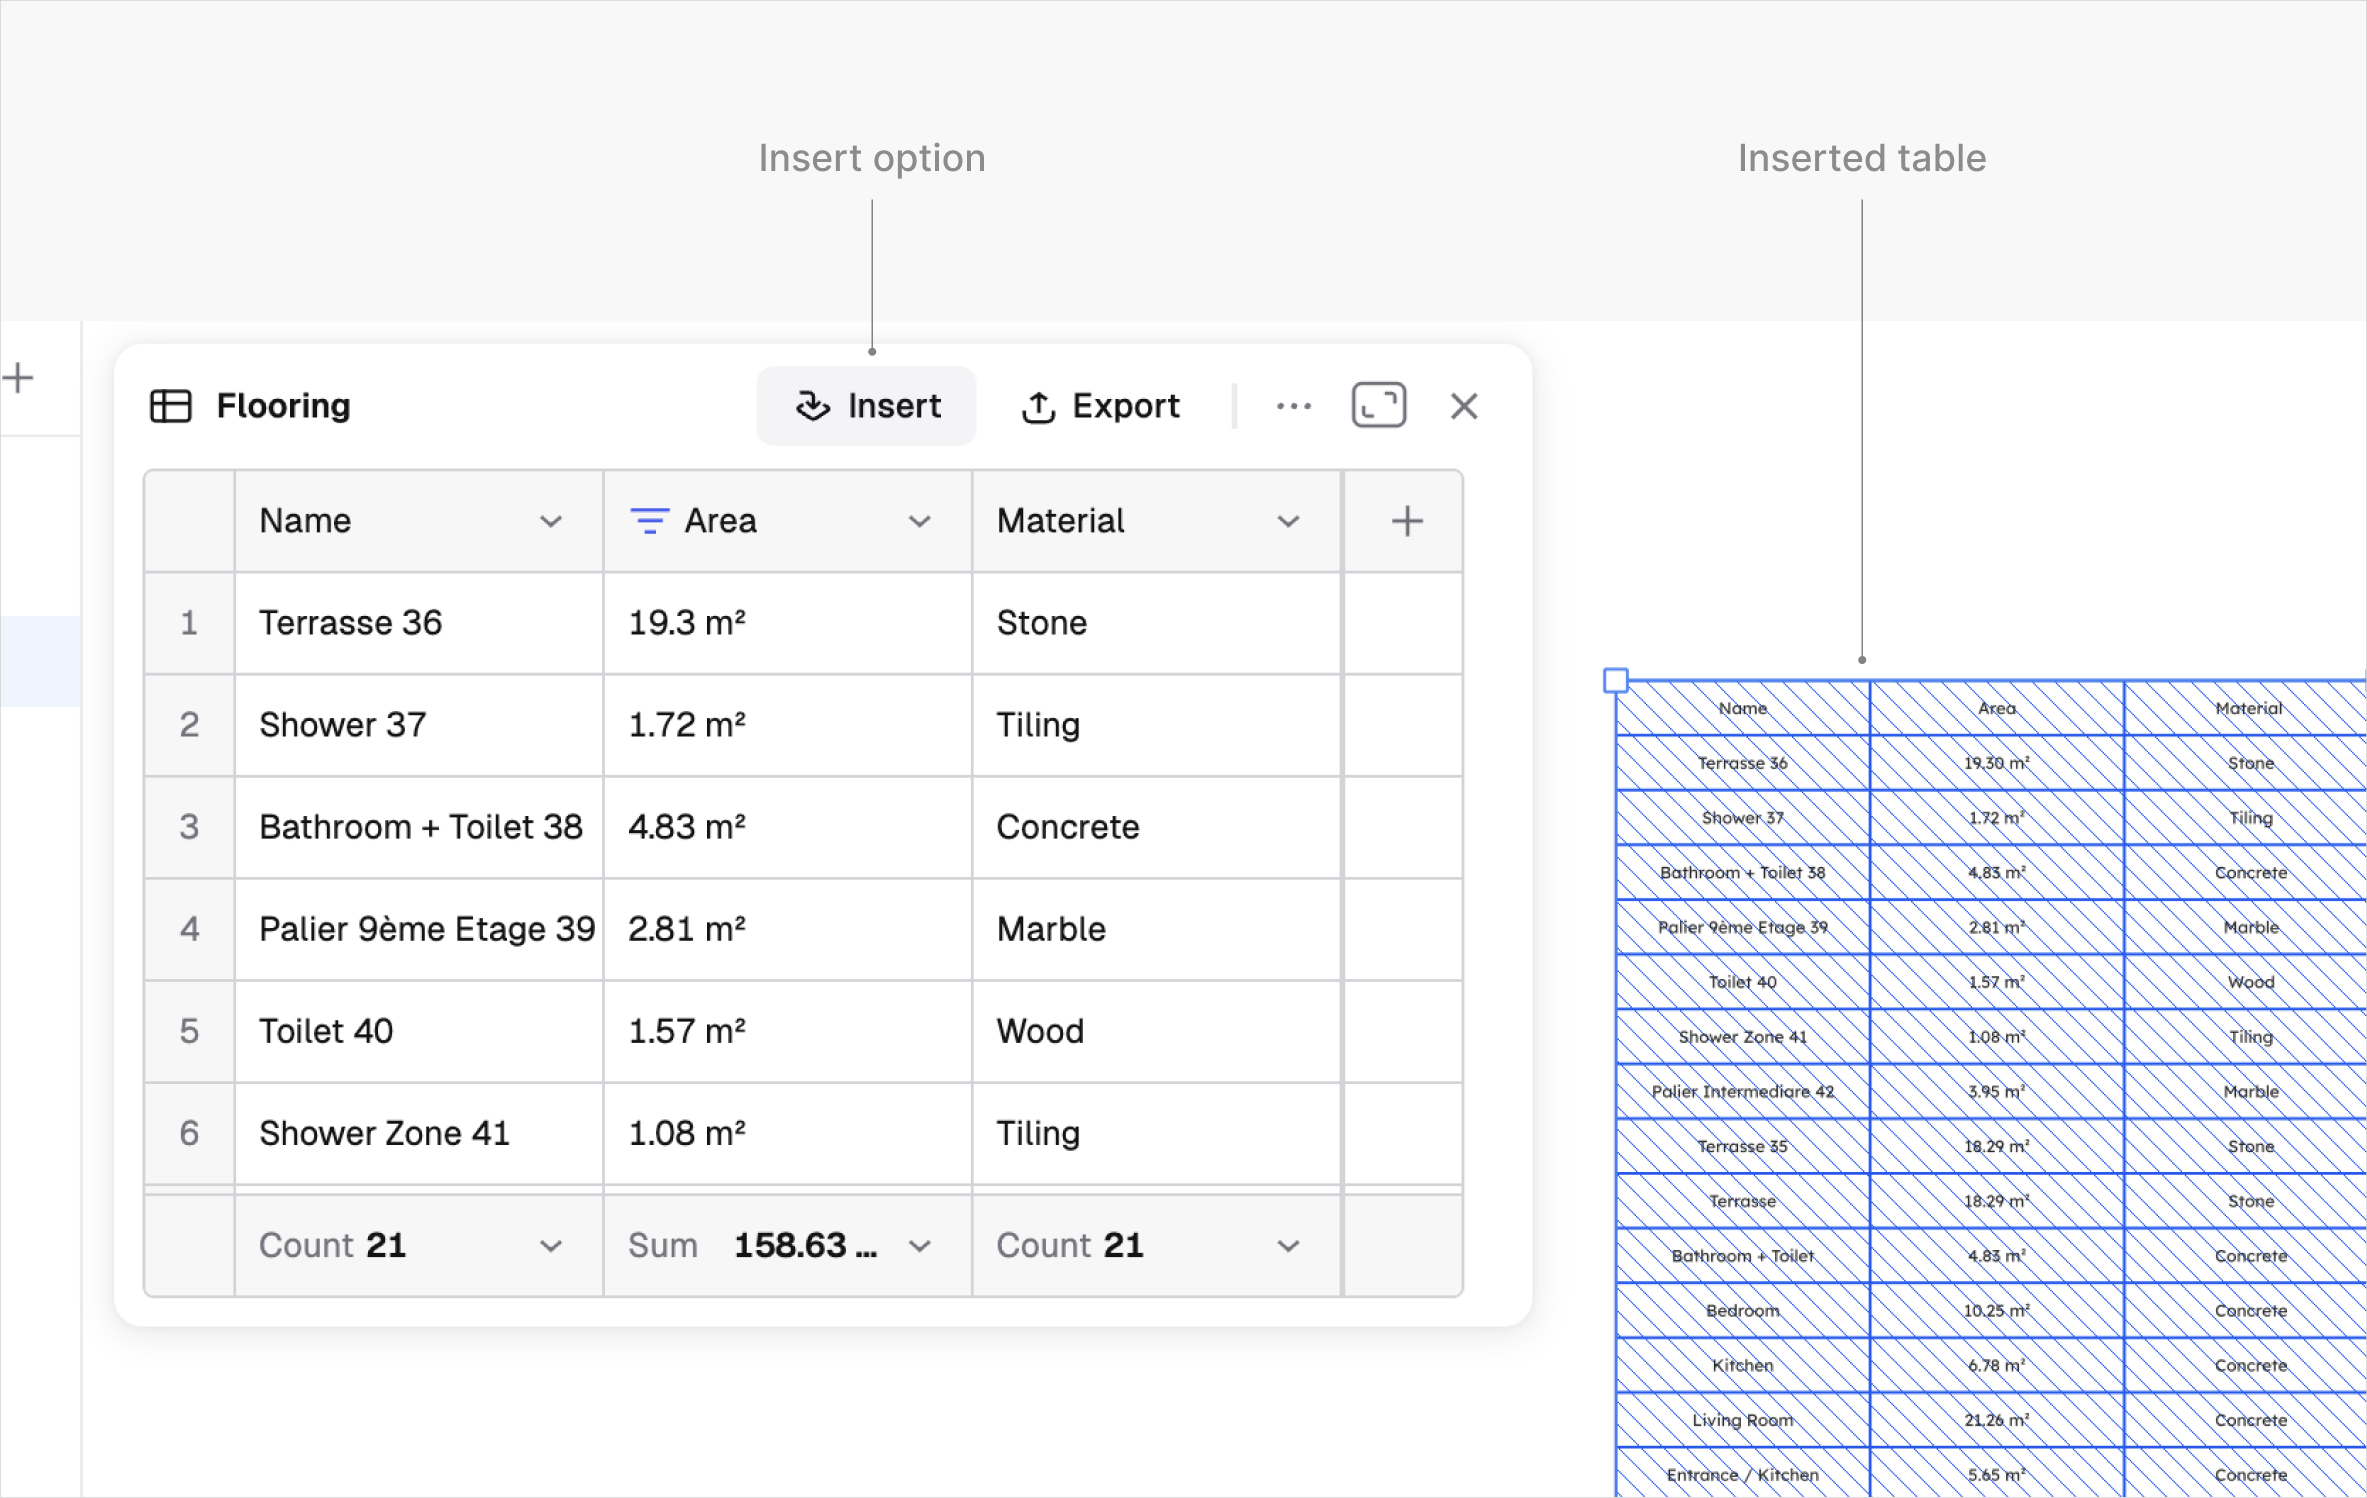

.png?alt=media&token=dc4476cb-15bb-4c47-810e-89cacd717e87)

.png?alt=media&token=f0e4deb3-9b01-44c4-beff-575ea5d3cf83)
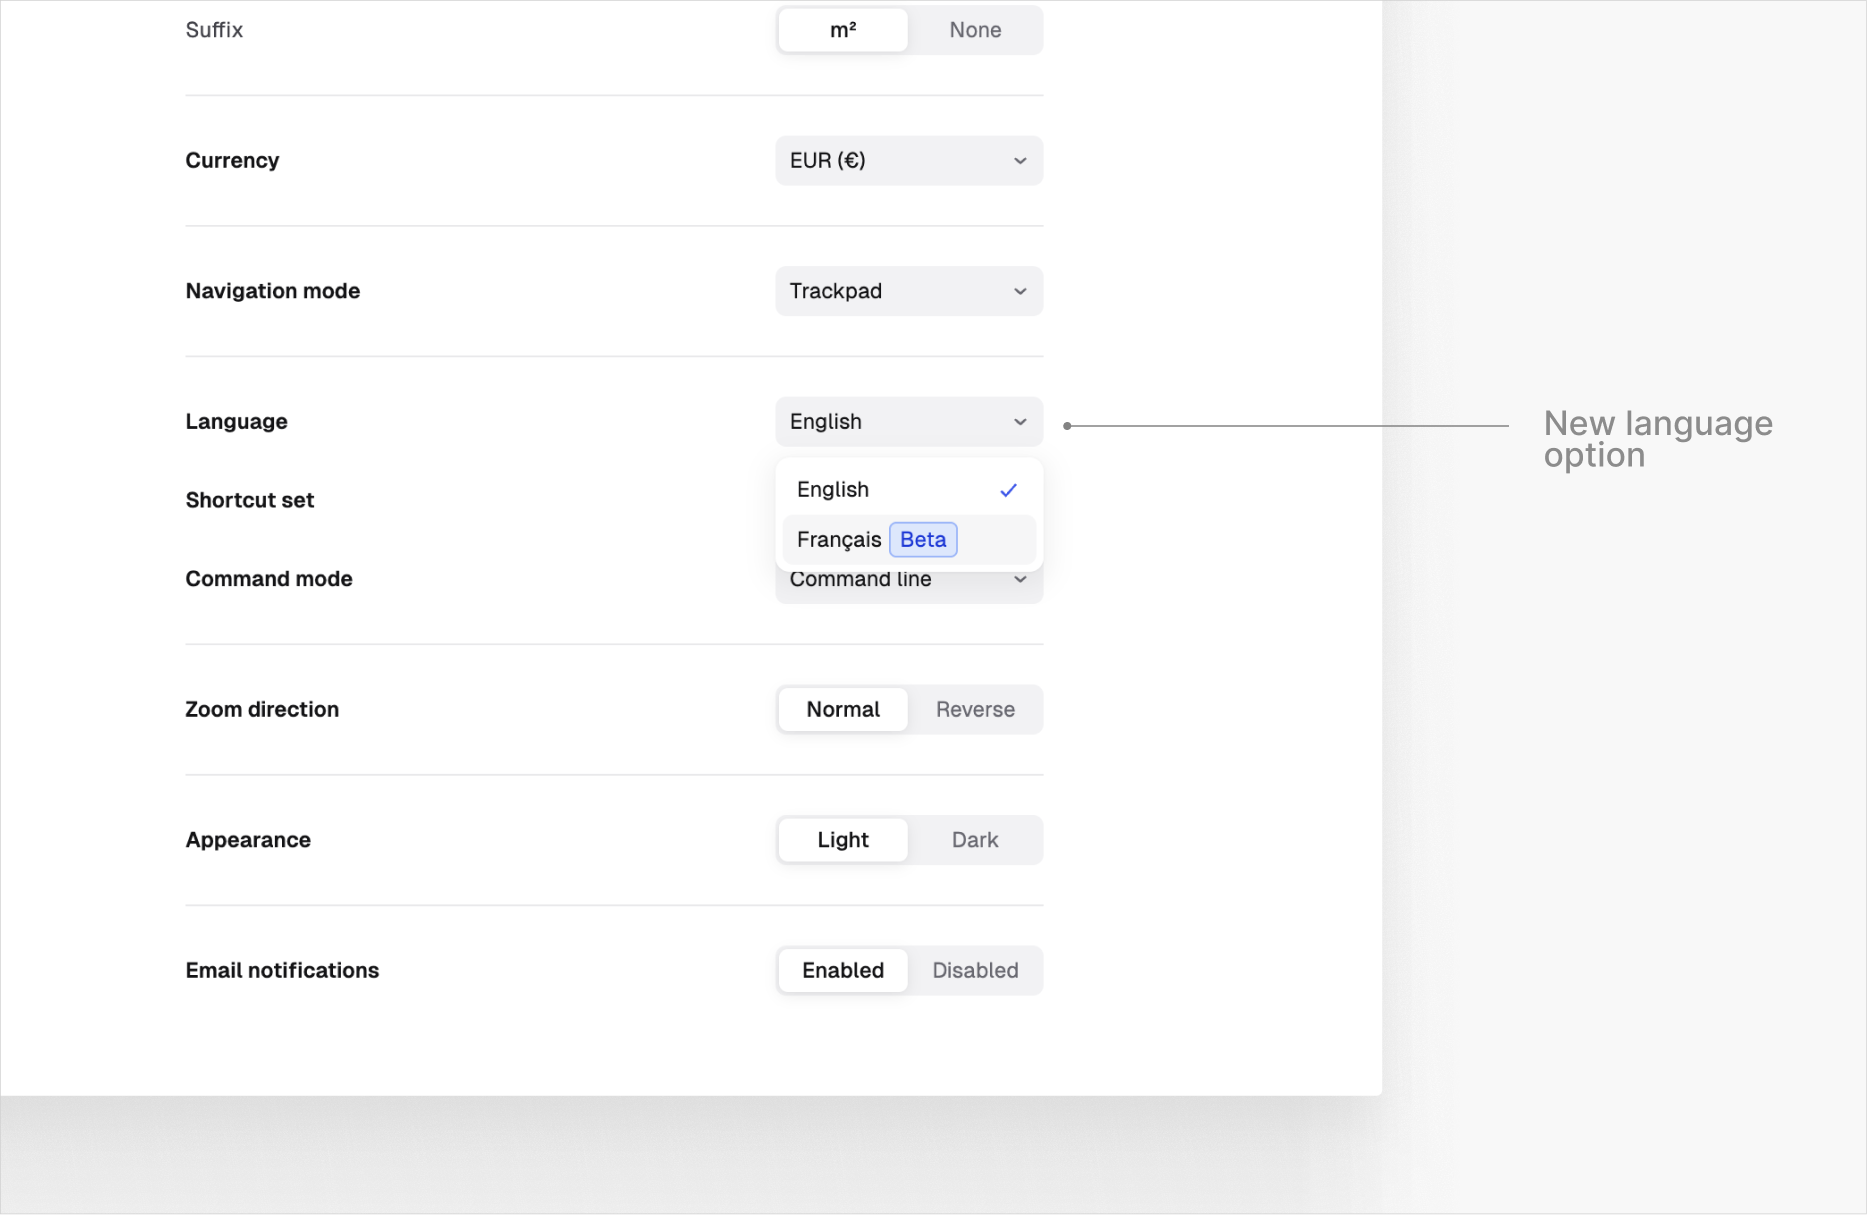
.png?alt=media&token=23208b33-62c9-4cb9-ad02-e02992639a66)
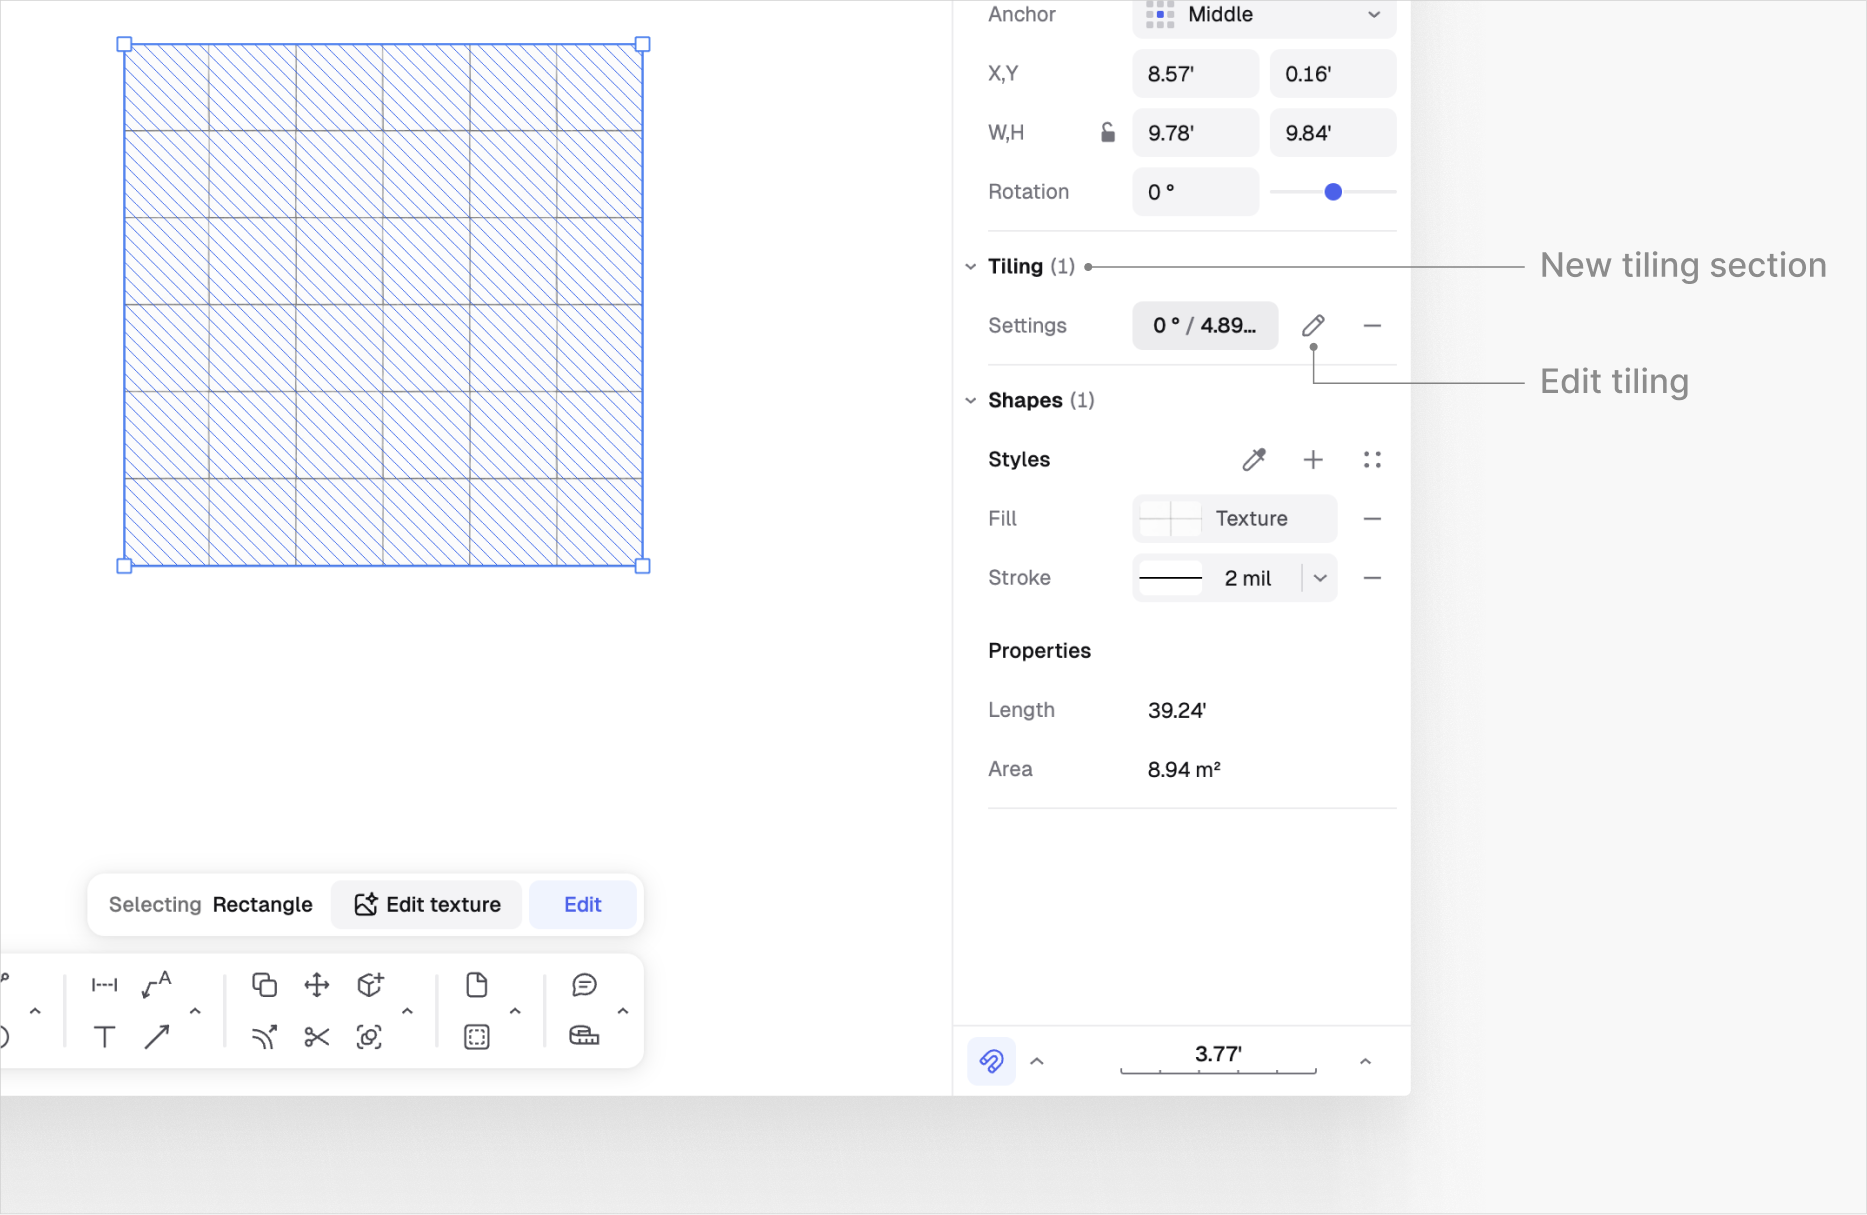


.png?alt=media&token=234d162c-8571-45dd-8897-5d9adbcaa77f)
.png?alt=media&token=0bc6fdb3-8543-4cf6-abfe-77519e8563b7)
.png?alt=media&token=81ee084d-c1d9-4483-82fa-cb68e1ae142d)
.png?alt=media&token=4f75d089-f0d7-4a4e-a2a9-c6eb5c482c7d)
.png?alt=media&token=e5e0a3aa-cf43-4b05-8a88-ecfb1c6fbe26)
.png?alt=media&token=3322e378-49a3-488f-9a01-61b641394b65)
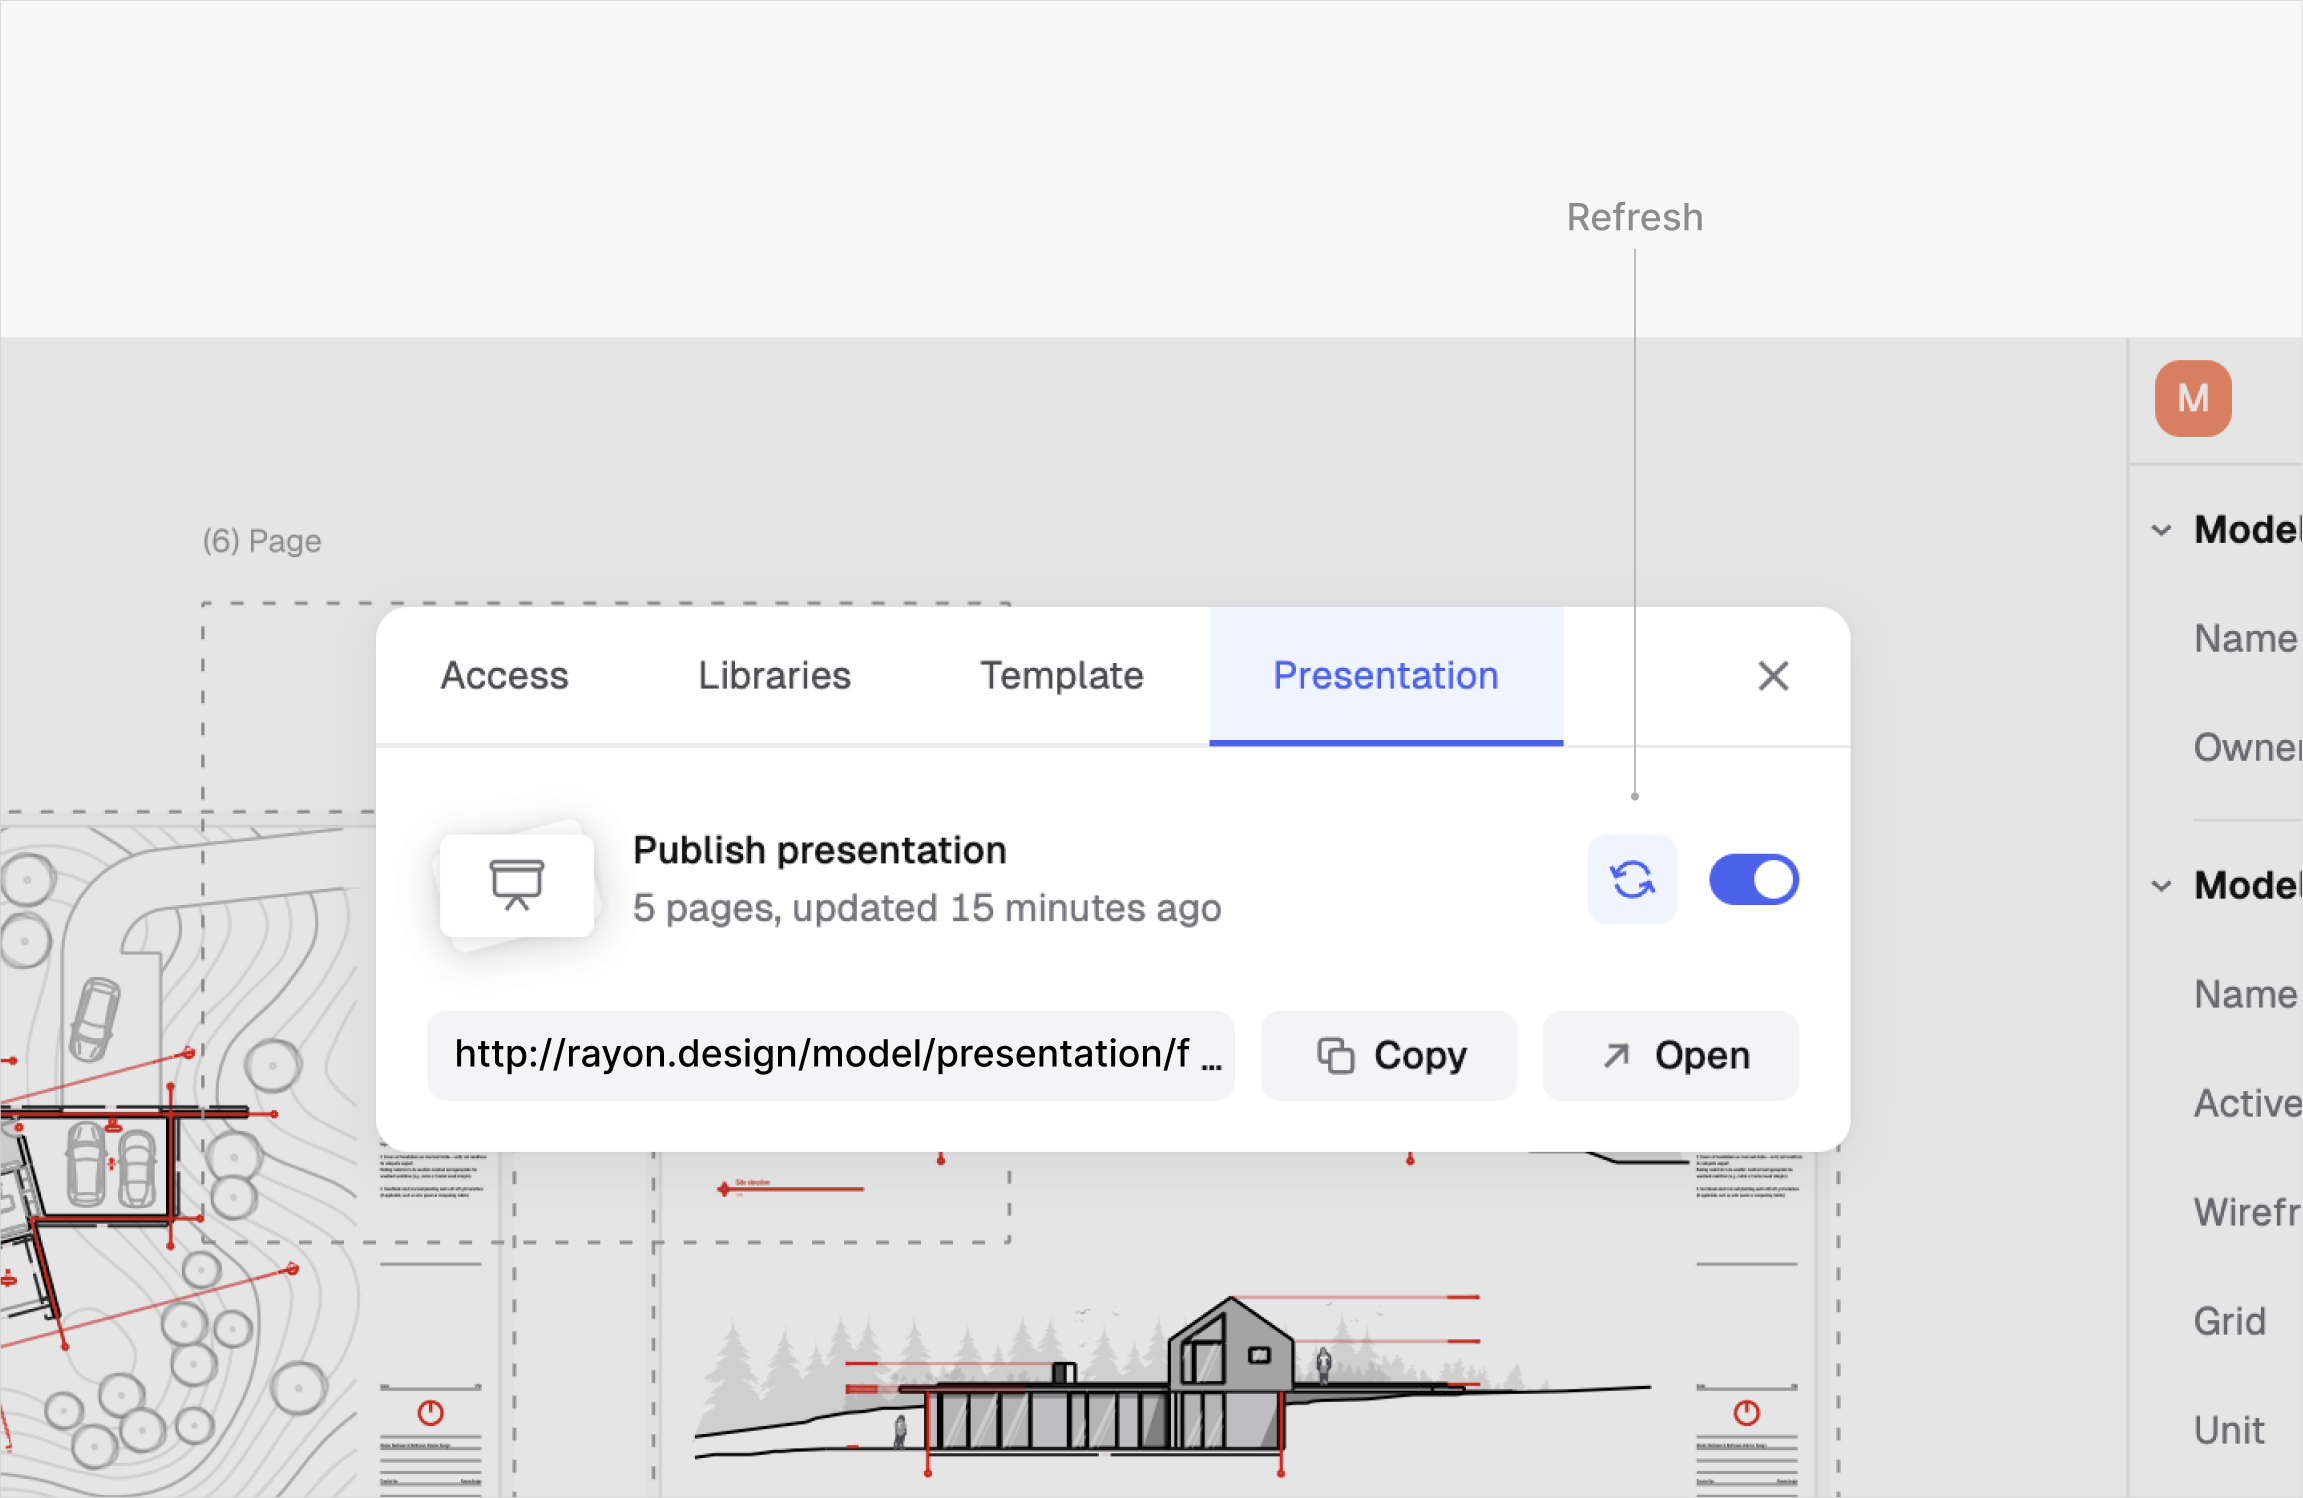
.avif?alt=media&token=c76b60d6-55cc-4695-9a67-bc68657782a5)
.webp?alt=media&token=20bc20b1-f8f1-4e12-9d65-5c3245a406cb)


.png?alt=media&token=2cefbfa5-1008-431b-9e48-9ca89b128925)
.png?alt=media&token=a12c2682-1de7-4857-b7da-6630f441909e)
.png?alt=media&token=9ca218db-4fb7-45c9-8b68-d62f28a7633a)
.png?alt=media&token=20cd475a-84a6-4699-a713-95b00e82437f)
.png?alt=media&token=594c6f2f-b4bb-435f-ab43-7f7bb0f6a552)
.png?alt=media&token=4ddb7de9-2cdf-4af0-9bdd-600bd9f8b9e9)
.png?alt=media&token=871ee846-c6e0-48d2-9ec0-6816456316cd)
.png?alt=media&token=e6dc477f-d735-4e82-a2bf-1802855528f0)
.png?alt=media&token=5952614b-7909-470f-9ab4-29ca6c409c87)
.png?alt=media&token=509647d8-9b98-4c4a-9b53-a5c3a9285d7b)


.webp?alt=media&token=0a003b9a-433f-4b32-9fc7-1e99368e8512)
.avif?alt=media&token=79948d1f-f0f4-40c2-8ba8-7b3c0e046571)

.avif?alt=media&token=c0758265-d437-4d30-ba2a-af84dfed4b32)
.avif?alt=media&token=8e438d7d-a7fd-46a7-991a-74dd296ad789)


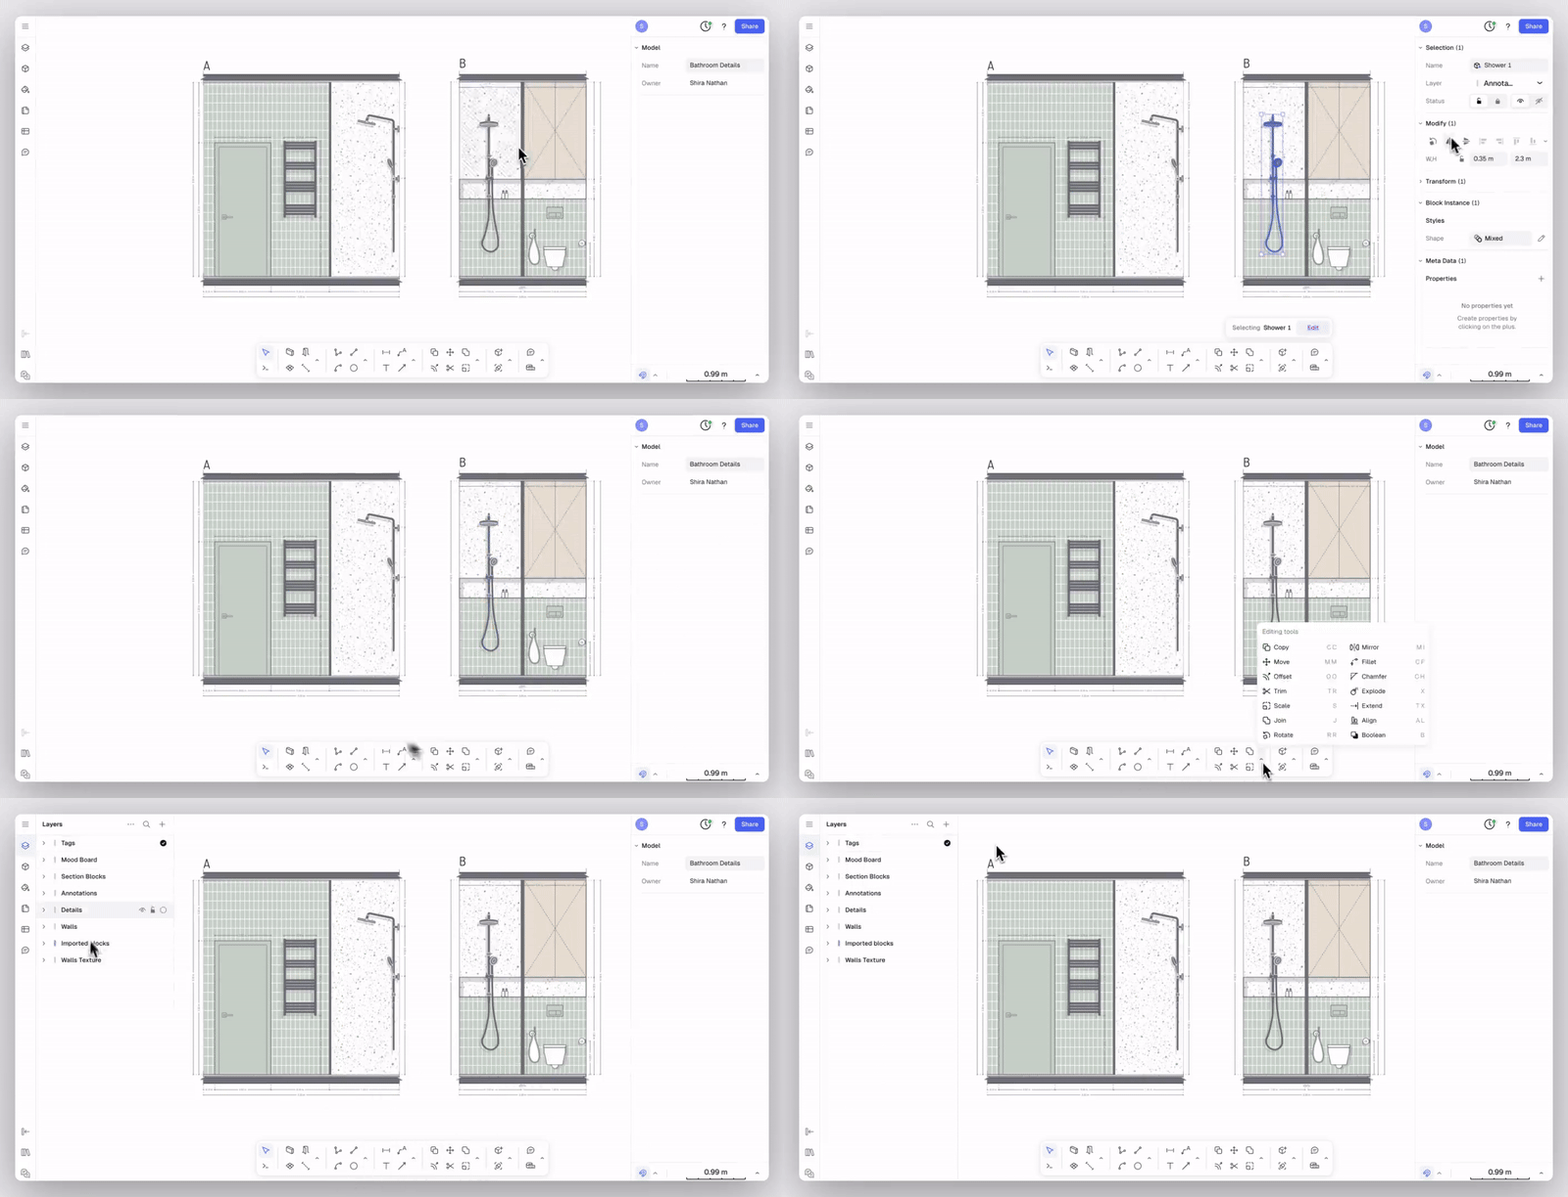
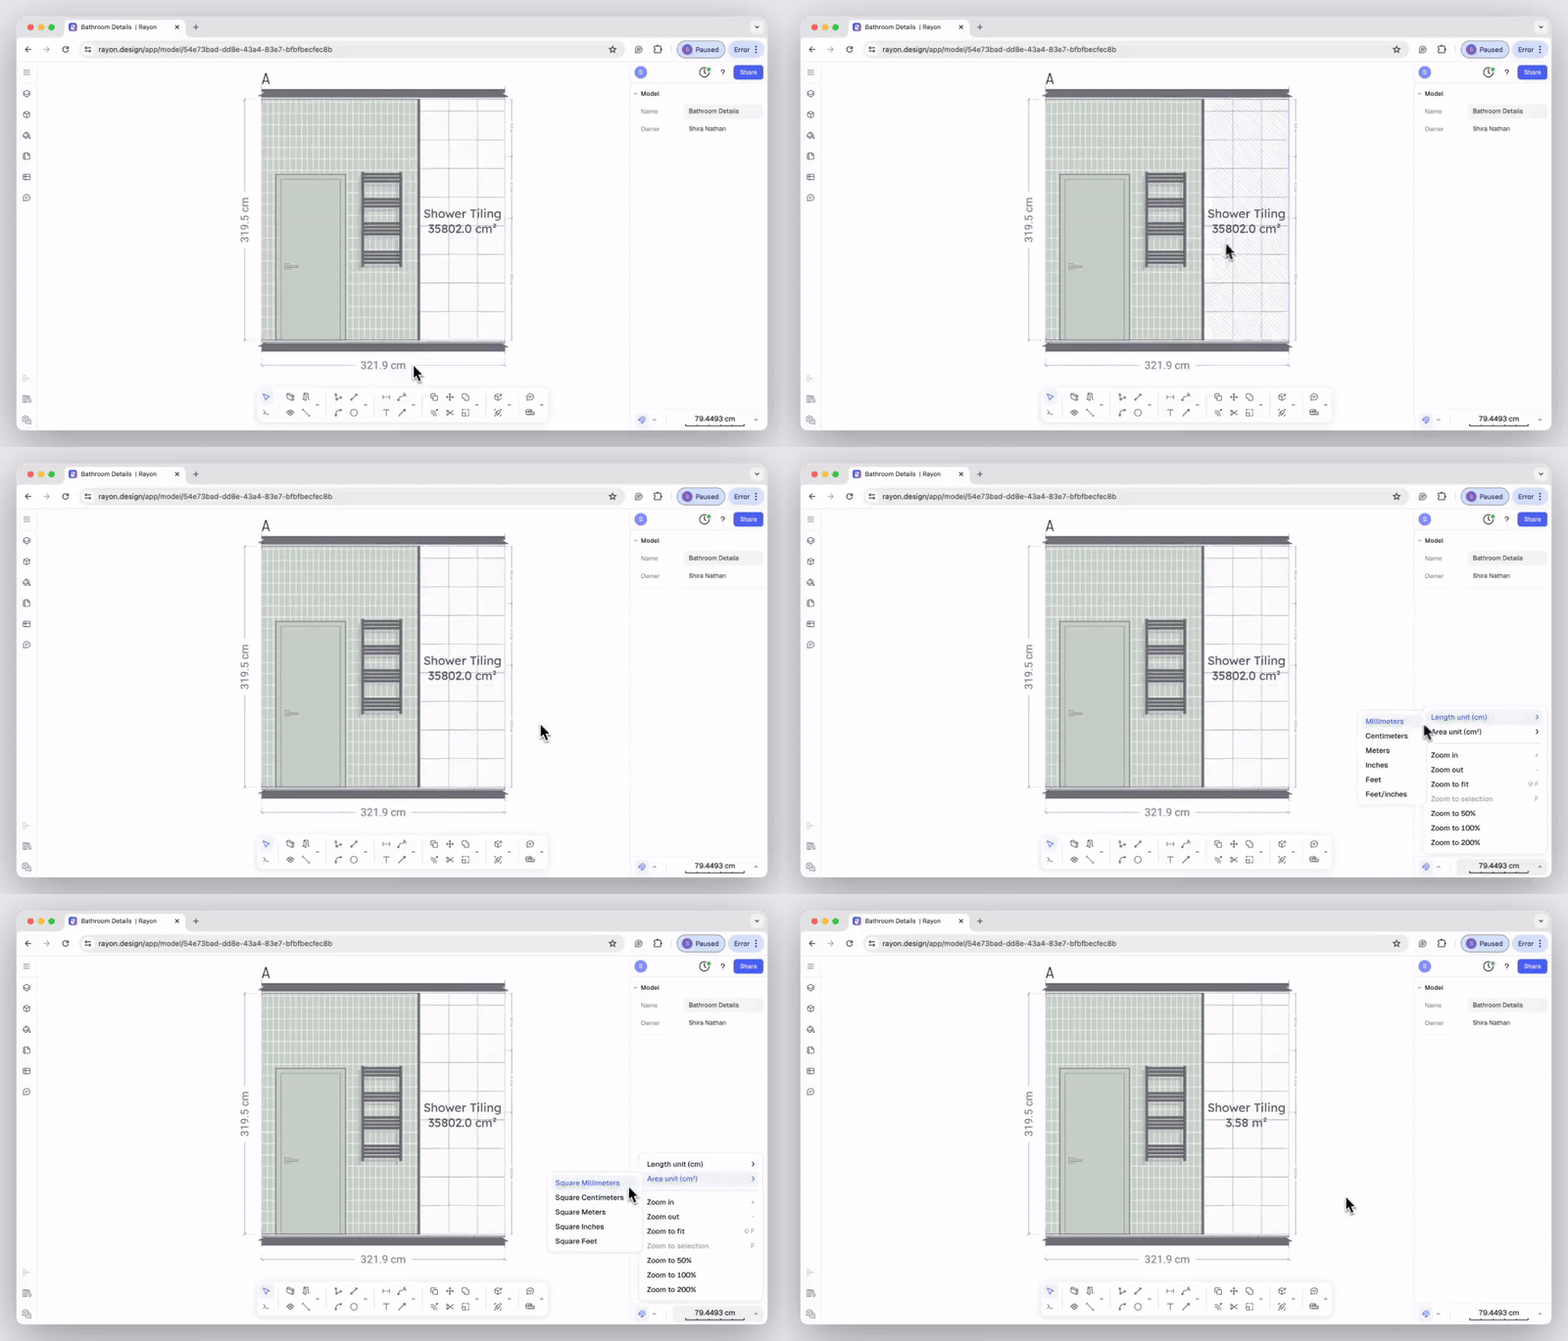

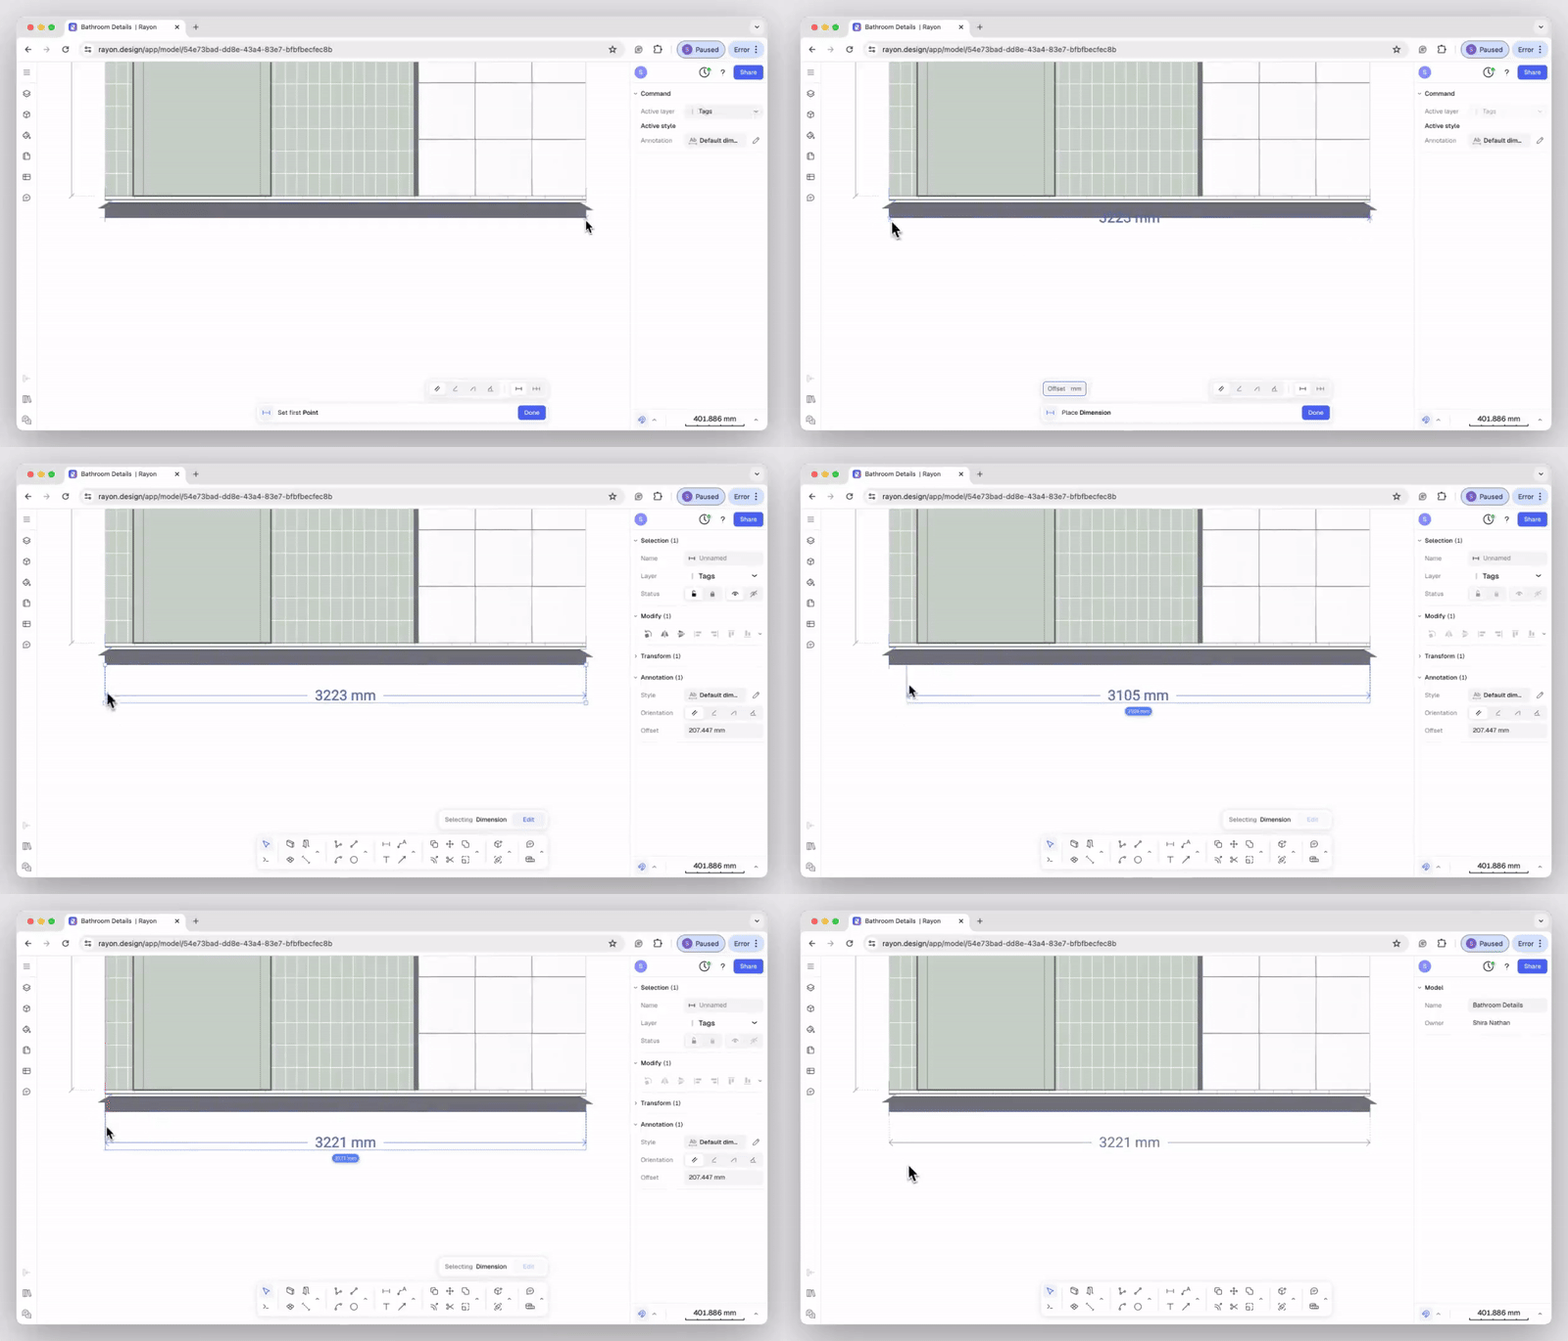
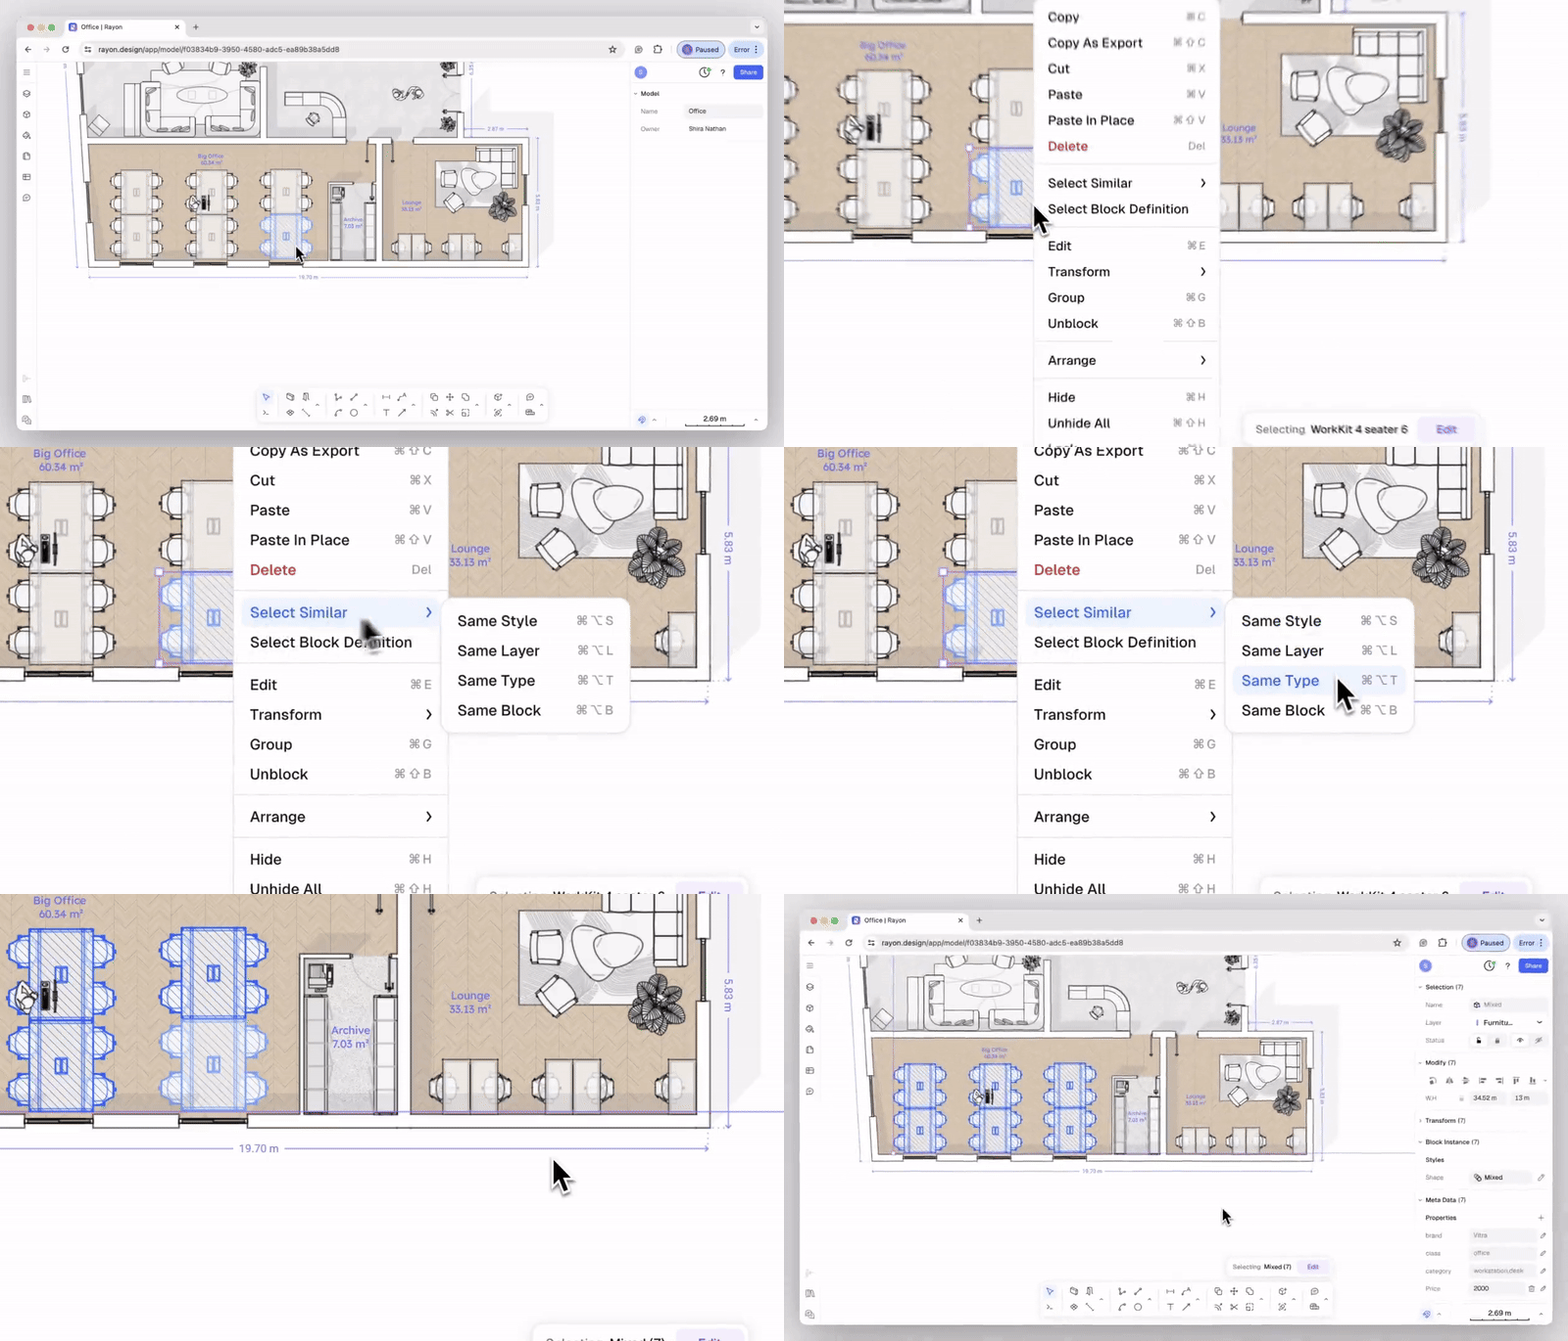
.gif?alt=media&token=5f0f8442-1a25-4bf4-8a4d-b054f04c9462)


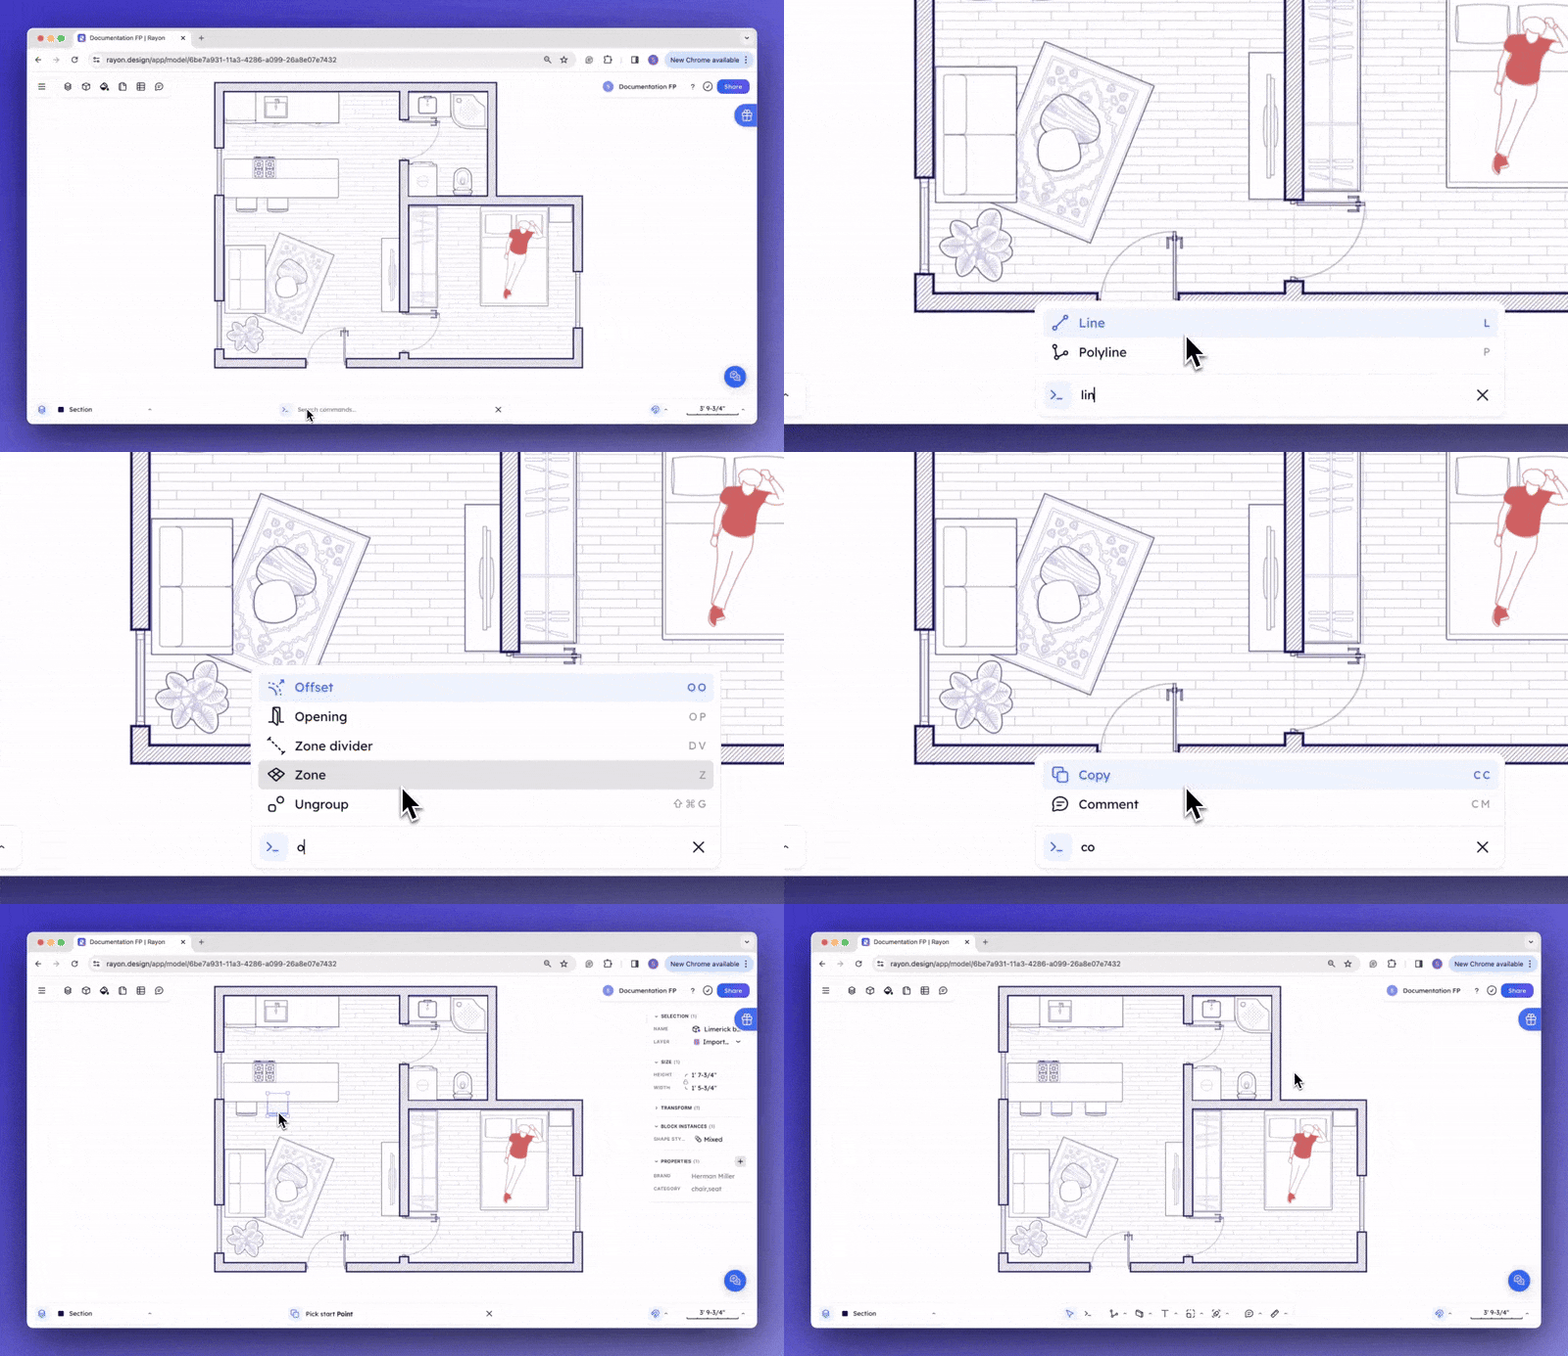


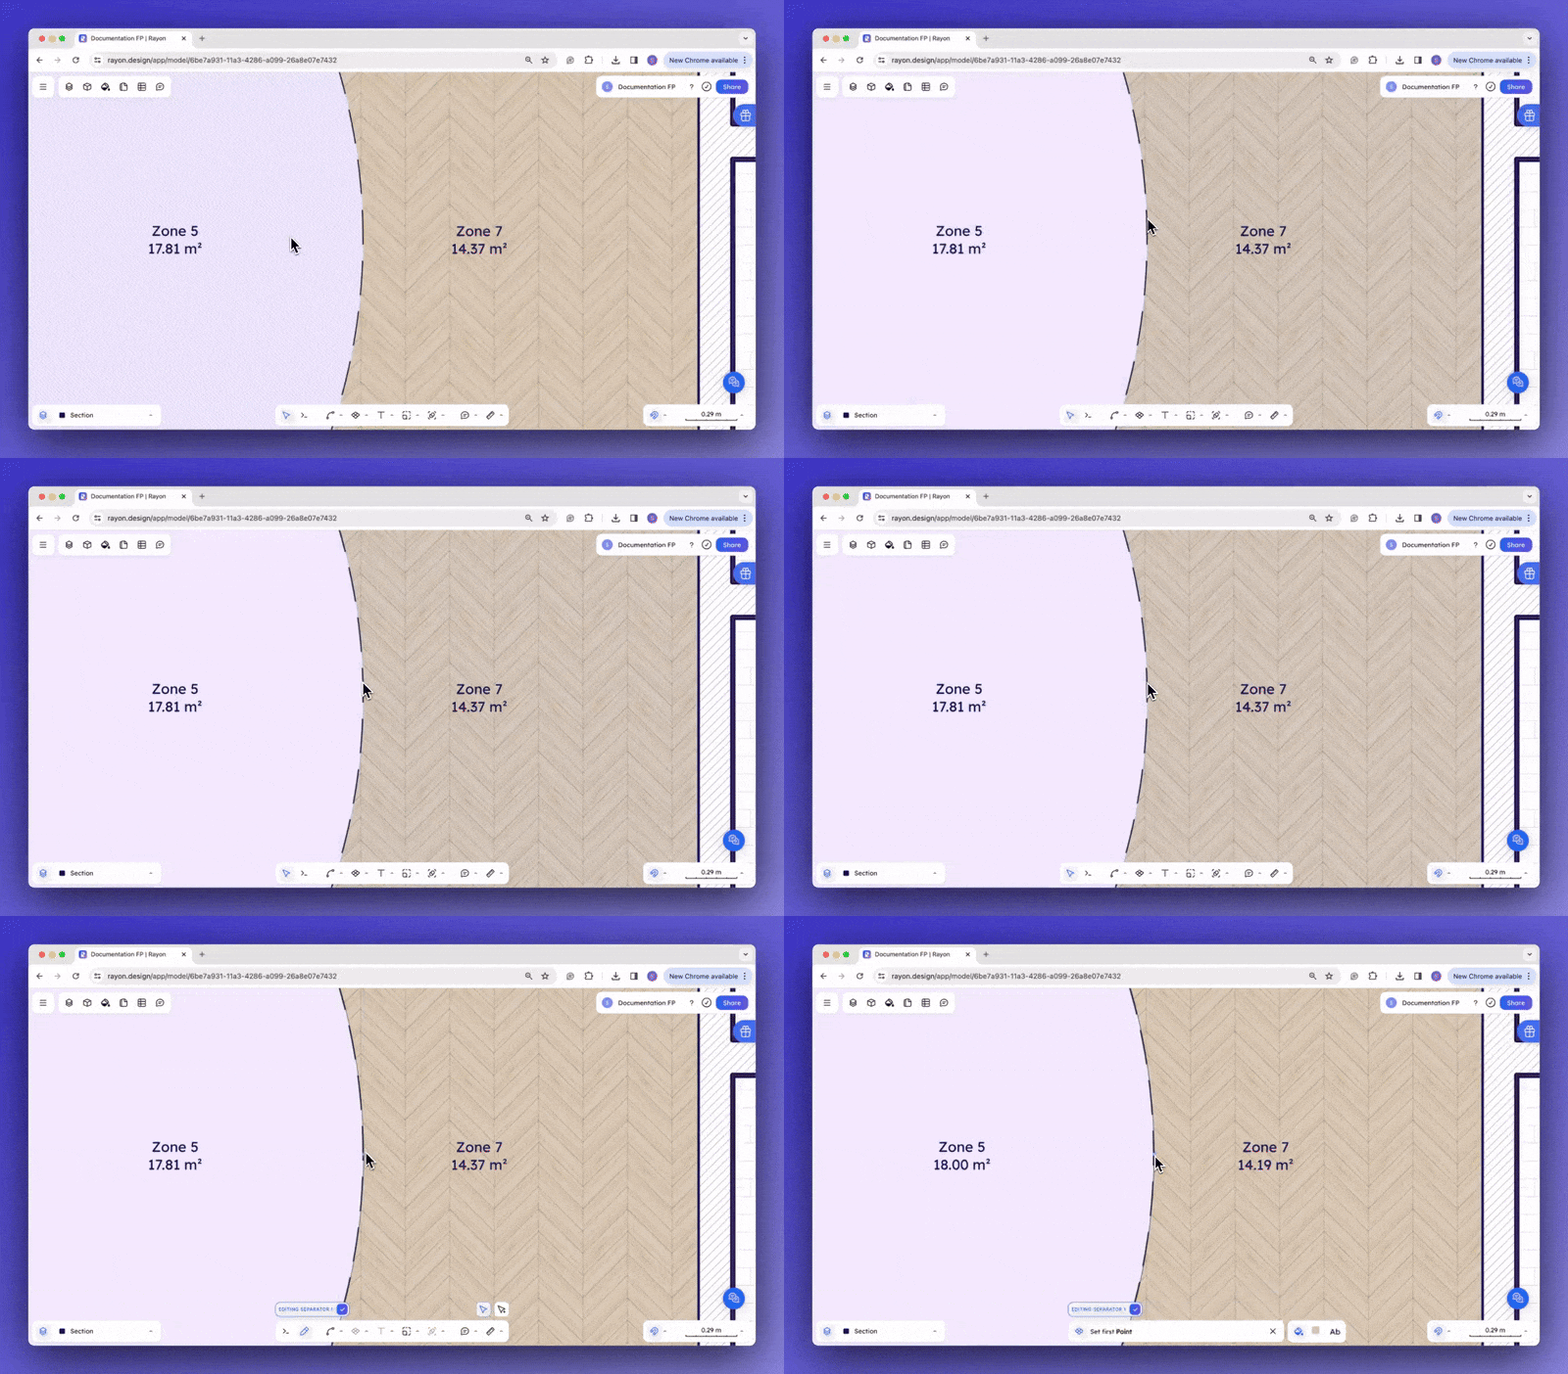
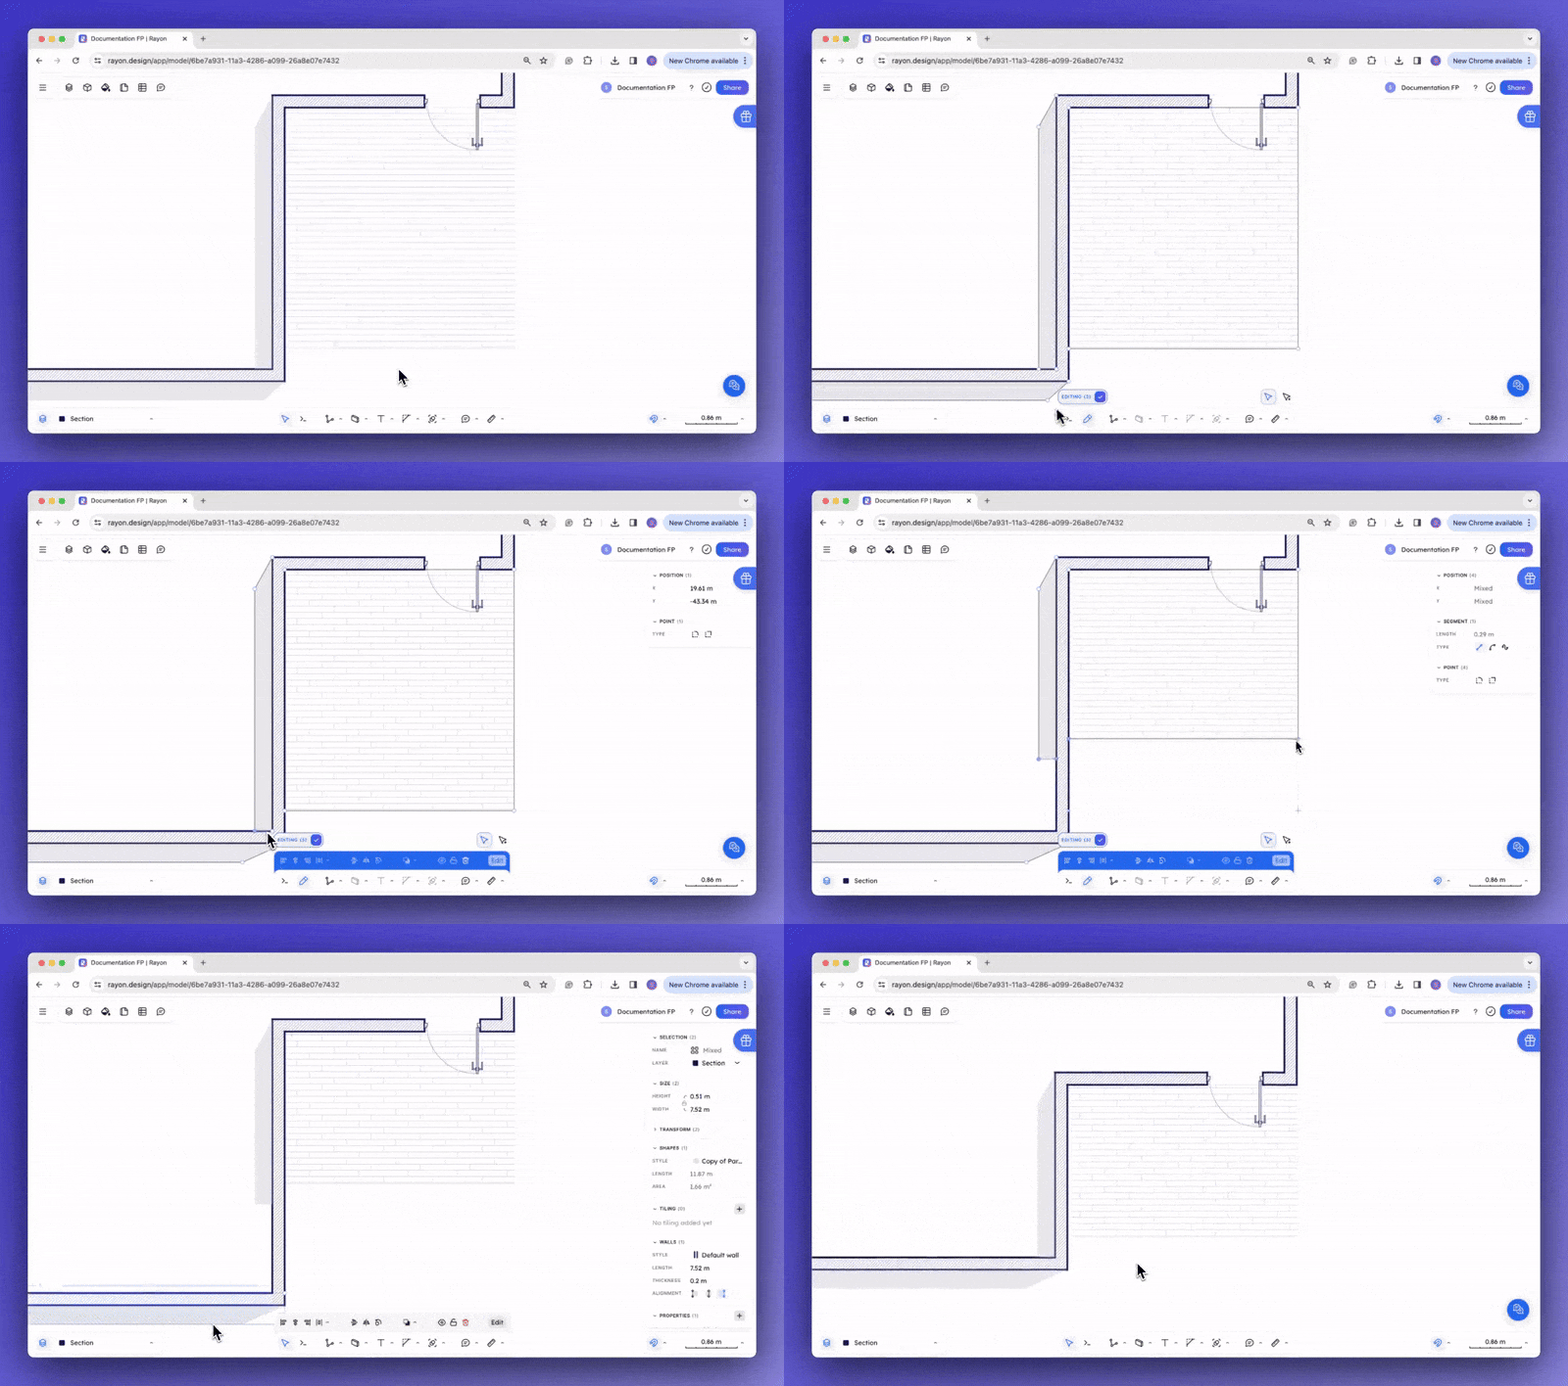
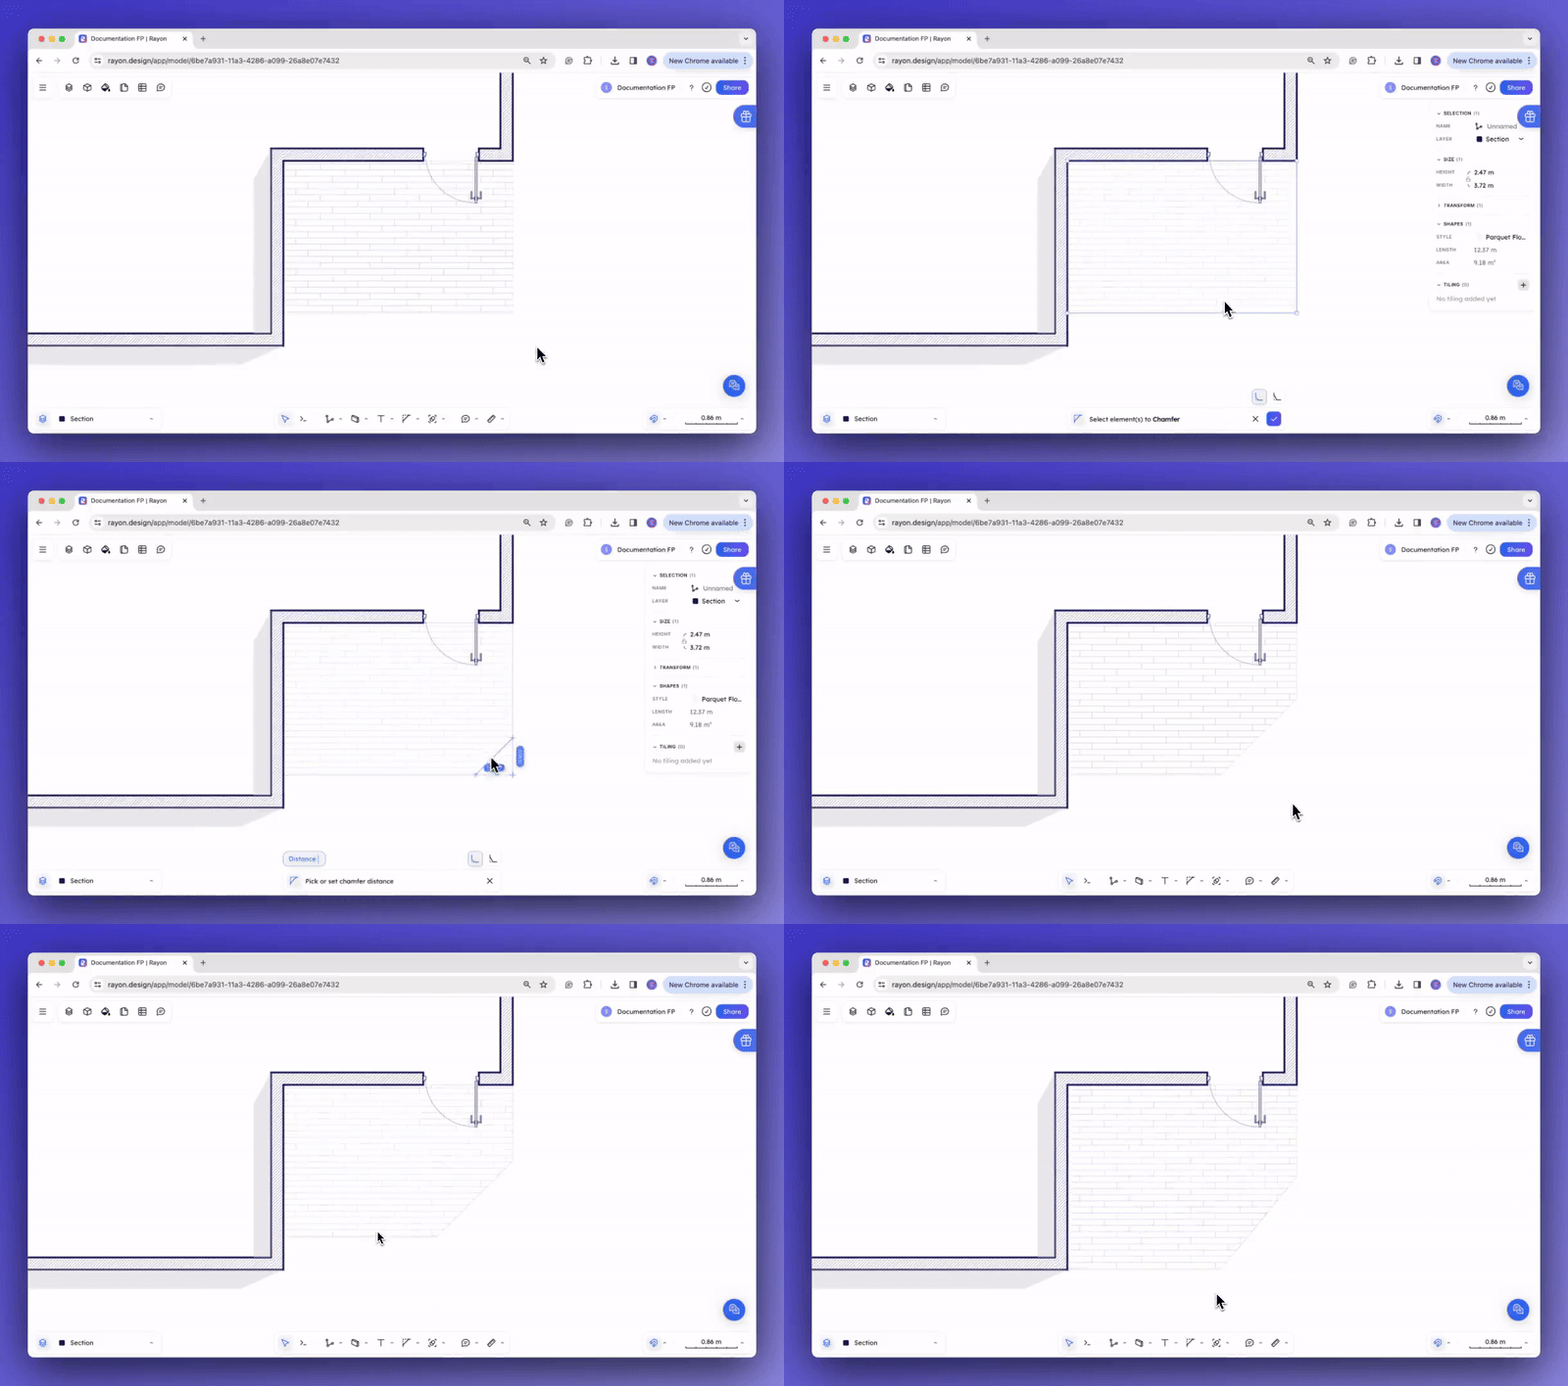
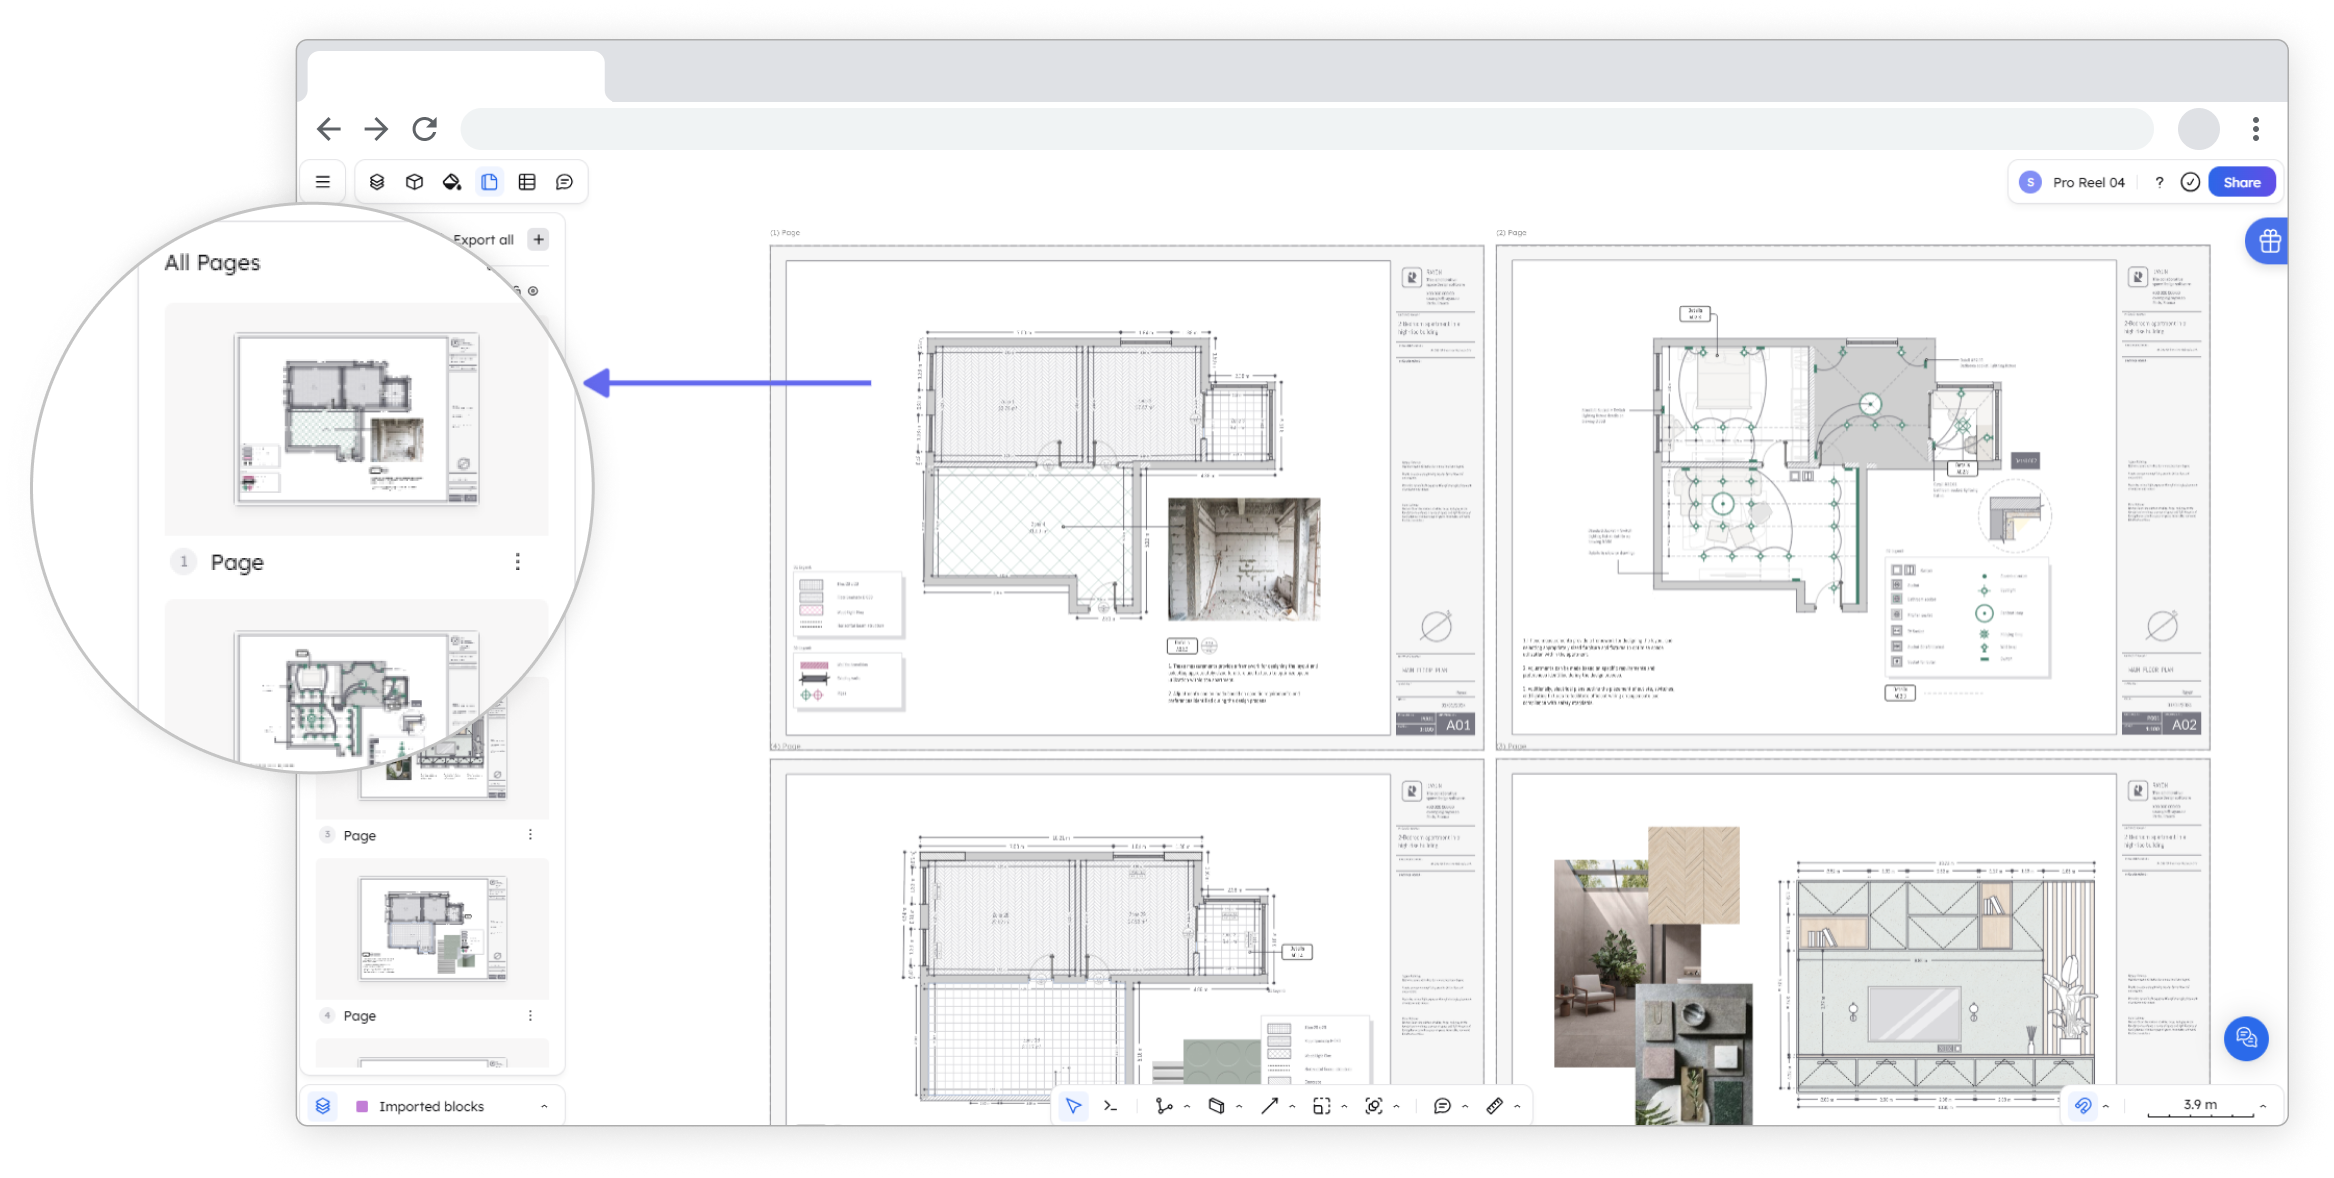


.gif?alt=media&token=1ef8f600-7d4e-4dda-8005-2bbfbf526739)
.gif?alt=media&token=0dd913f9-2727-4e14-aafc-ce82e51b3384)
.gif?alt=media&token=b99b5aab-0912-4193-85f8-091af6ead16b)
.gif?alt=media&token=28a3d069-b083-41ce-8e76-b7ae7e996477)
.gif?alt=media&token=0a6b9b96-eaa7-4a52-a761-f8d0aa0cb6ad)
.gif?alt=media&token=4dc77c93-7e46-4d15-afb4-0d3cab9d4be3)
.gif?alt=media&token=541388a8-4dc1-4ba3-88a0-0c8ad44033a3)
.gif?alt=media&token=67382f3e-4163-41f2-ae16-647f74570a85)
.gif?alt=media&token=4a6f65c0-7e22-43d5-bb16-83923508b3e3)
.gif?alt=media&token=22a52987-0e01-43b0-b2ad-9c89abd55221)
.gif?alt=media&token=1521c41a-a6ad-4697-ab89-429e08627e1b)
.gif?alt=media&token=d9050aa2-7e9e-473d-9d19-22bbccfcfece)
.gif?alt=media&token=047e2ba5-e50d-4f22-9df3-bdbc782d5763)
.gif?alt=media&token=ddb9ef29-4260-4a39-89ae-738b18292144)

.gif?alt=media&token=696d752d-c441-4aee-9072-cb558a65442f)
.gif?alt=media&token=9a388e09-58ba-4069-a59b-6e94daf161f0)
.gif?alt=media&token=c0937001-00c1-47a9-9e7e-8fe344769475)
.gif?alt=media&token=240cb678-a744-4ed3-acbf-9ff5ba15d409)


.png?alt=media&token=234052a5-a0ea-4190-933c-3edb5079686e)
.png?alt=media&token=248ff33d-6c64-4180-a906-1edc0f6d8547)

.png?alt=media&token=2494e4e1-4d05-4227-a548-fcf684ae9a23)
.png?alt=media&token=16b0c979-7556-4575-8d83-3103faae906c)


